15 Crochet Tips That Will Set You Up For Success | Getting Started For Absolute Beginners
Getting started with crochet is the hardest part of the process. Everything is new, there are many different things to learn, and it can be a struggle to know where to begin. Today I’m going to share 15 crochet tips that will set you up for success from the start. We’ll start by briefly covering how to get started with crochet and then we’ll lead into these 15 crochet tips that will help you if you’re an absolute beginner or you’ve already started dabbling. It sounds like a lot, but if you plan ahead now you won’t have as much trouble in the future!
How To Get Started With Crochet
The first thing you need to do when getting started with crochet is to learn about the materials needed. In short, you will need: yarn, a crochet hook, and a tapestry needle. For more details, you can read more about the basic crochet supplies and why they’re important here.
After that you will need to learn the basic stitches. Start by learning how to create a slip knot, the chain stitch, and at least two of the four basic stitches. If you’re brand new to crochet, the best way to learn is by taking things step by step. If you’re not sure where to start, sign up for my free 7-day training and you will learn everything you need to know about the basics of crochet by the end of that 7th day.
Below I’m going to share some crochet tips (in no particular order) that will set you up for success whether you’ve already started or haven’t even picked up a hook yet. I know that 16 tips sounds like a lot, but I promise that these tips will help you become more successful and confident in your crochet. Each of these tips are meant to push you to believe in yourself and not give up. Learning a new hobby is all about trial and error. You got this!
15 Crochet Tips That Will Set You Up For Success
1. Knitting is not Crochet
This has to be number one on the crochet tips list because this gets confused very often. Knitting is not crochet. Yes, they both use yarn but everything from the tools used to the fabric created is completely different. With knitting, you have two needles and with crochet, you have one hook. The fabric created by each of these tools winds up looking completely different in the end as well.
2. Have Patience
Having patience is one of the most important things to remember when you’re learning to crochet and that’s why it’s crochet tip number two.
I won’t lie. In the beginning, crochet can feel a bit overwhelming. There are a lot of things to learn, you don’t know where to get started, and you just want to start making. I get it. But also remember that you’re teaching your hands a brand new craft. Even if you’ve always been a crafty person, you have to give yourself time to learn. I’ve known so many people who started and gave up without giving it a real chance. I don’t want that to be you!
3. Stitch markers will be your best friend
There are a few essential tools you’ll need to get started with crochet. For beginners I recommend aluminum hooks, light-colored medium or bulky weight yarn, tapestry needles, and stitch markers. If you’re already ready to commit to learning, then I suggest Clover Amour hooks. They are pricey, but they are the only hooks I use.
These are the only tools you really need to get started. Stitch markers are optional because you don’t NEED them to complete every project, however, they will save you a lot of time a frustration.
Stitch markers can be used to save your work from unravelling, help to count stitches, keep your edges straight, and a whole lot more. As you progress into more advanced patterns, you will need to get stitch markers at some point anyway. I suggest getting them from the very start.
4. Start with beginner friendly supplies
There are a few essential tools you’ll need to get started with crochet. I mentioned that stitch markers are going to be your best friends, but you don’t technically NEED them to complete every project. What you do need are: Crochet hooks, yarn, and tapestry needles. That’s it!
To make things easier for you when you’re starting off, start with beginner friendly supplies. For beginners I recommend ergonomic crochet hooks, light-colored yarn, and bent-tip tapestry needles. But before you head off to the yarn store, here are some more tips on choosing the right supplies.
- If you are ready to commit to learning and you know you’re going to love crochet, then I suggest getting some Clover Amour hooks. They are pricey, but they are AMAZING and the only hooks I use – And if you’re having a hard time justifying the price, test out your most-used hook size and you will see what I mean.
- Light colored yarn is going to be your best bet. With lighter colors, it’s easier to see your stitches and any potential mistakes.
- It’s also best to start with a medium or bulky weight yarn (you’ll see the weight on the yarn label – medium is #4 and bulky is #5).
- Acrylic yarn is great to use, but you get what you pay for. If you use a cheaper acrylic yarn, the fibers tend to get fuzzy and it’s hard to see what you’re working with.
- Cotton yarn is great at showing beautiful stitch definition so that is a good place to start. However, don’t get the tougher cotton yarn like Lily Sugar ‘n Cream. That brand tends to be hard on the hands so it’s not the best choice for beginners.
You can find all of these tools are your local craft store or you can purchase them on Amazon, which is where I do most of my shopping. Here’s a link to my Amazon storefront where I’ve listed all of my favorite tools for beginners.
5. It’s normal to feel abnormal
This goes hand in hand with having patience. Because you’re teaching your hands something new, it’s going to feel super weird when you’re starting out. The more you practice, the less awkward you’ll feel. There are a few different ways to hold your hook and yarn. Regardless of what anyone else says, there is no “right” way to hold either one of them. All that matters is that it feels comfortable for you. If you feel like something isn’t right or you start to feel a lot of pain, try switching up the way you hold your hook and/or yarn. Eventually you will find the way that suits you best.
6. Learn at least 2 basic stitches before you start working on actual projects
I know you want to jump right in to making, but it would be so beneficial for you if you took the time to practice and get to know these stitches. But before you jump into learning these basic stitches, there are a few techniques you need to learn first. If you don’t already know how to create a slip knot and chain, that’s where you need to start.
After that, the four basic stitches are: single crochet, double crochet, half double crochet, and treble. It would be best to learn them all, but if you’re getting impatient then at least learn the single and double crochet stitches. Once you learn these stitches, you will be able to make hundreds of different kinds patterns. Isn’t that amazing?
7. There’s a difference between US and UK terminology
Speaking of crochet stitches, did you know that these stitches are named differently in the US versus the UK? I didn’t know this when I first started, but I quickly realized something wasn’t right when I was working on a pattern written in UK terms. The stitches are the same, it’s just the name that’s different.
Below you’ll find a chart with all of the differences. Write this down on a post-it note so you can always refer to it down the line until you’re able to memorize them.
| US TERMS | UK TERMS |
| Single Crochet (sc) | Double Crochet (dc) |
| Half Double Crochet (hdc) | Half Treble Crochet (hdc) |
| Double Crochet (dc) | Treble Crochet (tr) |
| Treble Crochet (tr) | Double Treble (dtr) |
8. Pay close attention to dye lots
What is a dye lot exactly?
A dye lot is the number assigned to a particular skein based on what group of yarn it was dyed with. This number can be found on the yarn label. You can read a lot more about yarn and their labels in this article, but here are a few things you need to know about dye lots.
Just because two skeins are the same color and same brand, doesn’t mean they’ll look exactly the same when worked up into a fabric.
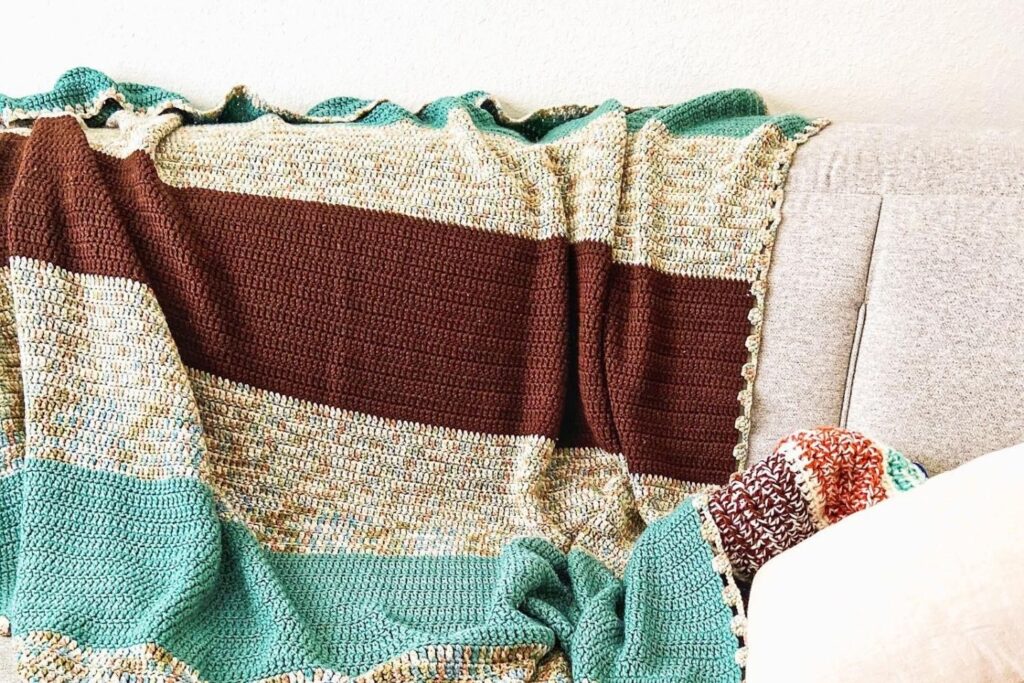
Example: You’re in a rush. You grab a few skeins of the same brand and color, head home, and start working on your project. A few skeins later and halfway through your project, you notice that one half of your blanket is a lighter green than the other half of your blanket… that’s because you grabbed a skein in a different dye lot.
This can really affect the look of your finished project if you’re not careful… she says from experience 🤦🏻♀️
9. There are 4 ways to read a crochet pattern
One of the great things about crochet is that is really appeals to any learning style. There are a few different ways to read patterns depending on what stage you’re at and how you prefer to learn. You can follow a pattern by watching a video, reading a written crochet pattern, reading a chart/diagram, or a graph.
YouTube has tons of crochet pattern tutorials to choose from and if you’re more of a hands on learner, then that would be the best option for you. Following a video tutorial helps you to see how you’re supposed to do a stitch and what your project should look like when it’s finished. Subscribe to my YouTube channel where I have tons of free patterns and beginner crochet tips!
When you’re first starting out, written crochet patterns can look like gibberish. It’s just like learning another language, but I promise it’s a whole lot easier (says the girl who has taken Spanish 3 times and still only knows ‘uno, dos, tres’…). In the future I’m planning on releasing a mini course, teaching you how to master reading crochet patterns, but for now I have a two-part article that covers the basics. Read over that post and you should start to understand a little better.
There are a few different types of crochet charts and diagrams out there. The first is laid out with crochet symbols with each stitch labeled by a symbol. If you’re interested in learning more, watch the video below on how to read crochet diagrams.
Graphs are a bit different. You’re still following a picture, rather than words, but in a different way. Graphs are usually used when working C2C projects, filet crochet, color work, and things of that nature. I’m not going to go into detail about these but if you’d like to learn more about these techniques, let me know in the comments!
10. Must-know left handed tips
I’m not a lefty, but my mom is so I’ve seen first hand how difficult it can be. Learning how to crochet when you’re left handed can be tough because most of the internet covers right handed crochet. But you just have to know the right places to look.
One thing you need to know is that when you watch a righty crochet, you will be doing the opposite of what they’re showing you. Try sitting across from someone if you’re able to or look up left handed specific videos.
Another thing you need to know is if you’re following a graph, you will need to adapt that pattern so that it doesn’t end up backwards when you’re finished.
If you need some more left handed tips, I talked about some more over on the Limitless Crochet Everyday project for January this year.
11. Accept the frogging
Ribbit ribbit… ribbit ribbit 🐸
What is frogging? Frogging is what you do when you make a mistake and you have to rip back your work and start over.
Rip it rip it… get it? It’s pretty clever and probably one of the best phrases within the crochet community.
But listen, frogging is normal. You WILL make mistakes. You WILL most likely work for an hour or so and then realize you made a mistake a few rows back that you have to fix. Soon I’ll be writing a full post on why frogging is actually a good thing, but for now I’ll keep it short.
Frogging means you made a mistake right? But making mistakes helps you to learn what not to do next time. Yes, time is precious and unravelling a bunch of work is extremely frustrating. Trust me, I’ve been there… plenty of times. But if you look at it as a waste of time, you’re just hurting yourself.
It’s not wasting time if you come away learning something. Whether it’s to take the time to count your stitches or check your gauge. Either way there’s always a lesson in frogging so focus more on what you can learn from it rather than being upset about the time you “wasted.”
12. Start Slowly
Crochet is so fun and exciting because you can make anything you put your mind to. If you couldn’t already tell, I’m very obsessed passionate. But it took me years to get things figured out.
When I started learning, I had no one to talk to about it. No one to ask questions. The internet didn’t have the answers to half of my struggles and it was pretty annoying at the time. But I ended up figuring things out along the way by reading countless books, making and frogging lots of projects, watching loads of videos, and lots of trial and error. That brings me to where I am today.
Now my point in saying that is when you’re starting out, start slow. Learn about the tools you’re using. Learn about the yarn and the different types of fibers. Learn to master the basic stitches. Learn to have patience.
I’ve created a free 7 day challenge where you will learn all of this and more. It’s step by step and you can work at your own pace. That way you know where to start and how to improve. And although I highly recommend enrolling in my Masterclass for more tutorials and step by step instruction, this challenge is free and it will get you started in the right direction.
13. Working in the round vs. working in rows
There are two ways to work a crochet project. In rows and in the round. Most blankets and flat objects are worked by rows. Working in rows means that you’re crocheting side to side, turning your work at the end of each row. When you’re working in the round, you crochet in circles and don’t turn your work unless the pattern tells you to. Hats, amigurumi, bags, and granny squares are some examples of projects worked in the round.
If you dive more into crocheting in the round, you’ll learn that you can crochet in continuous rounds or joined rounds, but that’s getting a bit too specific. Click over to this article to read more about crocheting in the round.
14. How to work into the foundation chain
This is a very common question because you’ve probably seen different crocheters do different things. There are actually three different places you can insert your hook into the foundation chain:
- The very top loop
- underneath the top and middle loops
- into the back bump
Any of these ways is perfectly fine. What matters is how you feel when you’re working the stitches. Try each of them, see which one you like best, and stick with that. Here’s a quick video tutorial explaining the three different ways to work into the foundation chain. This video also shows you the finished result of each placement and you can use this to further help you choose which technique you like best.
15. Tension is a b!#@$
We already talked about practicing and having patience, but I feel like we need to touch on tension a little bit more. Tension is how tight or loose you crochet. It is one of the biggest frustrations when it comes to crochet. Almost everyone complains about it whether they’re first starting out or they’ve crocheted for years.
The thing about tension is it can be affected by something as little as your mood. And because tension fluctuates so much, it can get annoying. But just remember that you’re not alone. Everyone (including myself) struggles with this at one point or another. If you’ve found that you struggle with this a lot, read some of my top 7 tips on learning to control your tension.
How To Get Started With Crochet (Recap)
After going over these 16 crochet tips to set yourself up for success, I hope you learned more than a thing or two. I hope you enjoyed these crochet tips and that they help get you off on the right foot! If you’re looking for more step by step instruction, I highly recommend taking my 7-Day Crochet Challenge. It walks you through all of the basics step by step.
In case you skimmed through, here are all 16 crochet tips again.
- Knitting is not crochet
- Have patience
- It’s normal to feel abnormal
- Stitch markers will be your best friend
- Start with beginner friendly supplies
- Learn at least 2 basic stitches before starting crochet projects
- There’s a difference between US and UK terminology
- Pay close attention to dye lots
- There are 4 ways to read a crochet pattern
- Must-know left handed tips
- Accept the frogging
- Start slowly
- Working in the round vs. working in rows
- How to work into the foundation chain
- Tension is a b!@$#