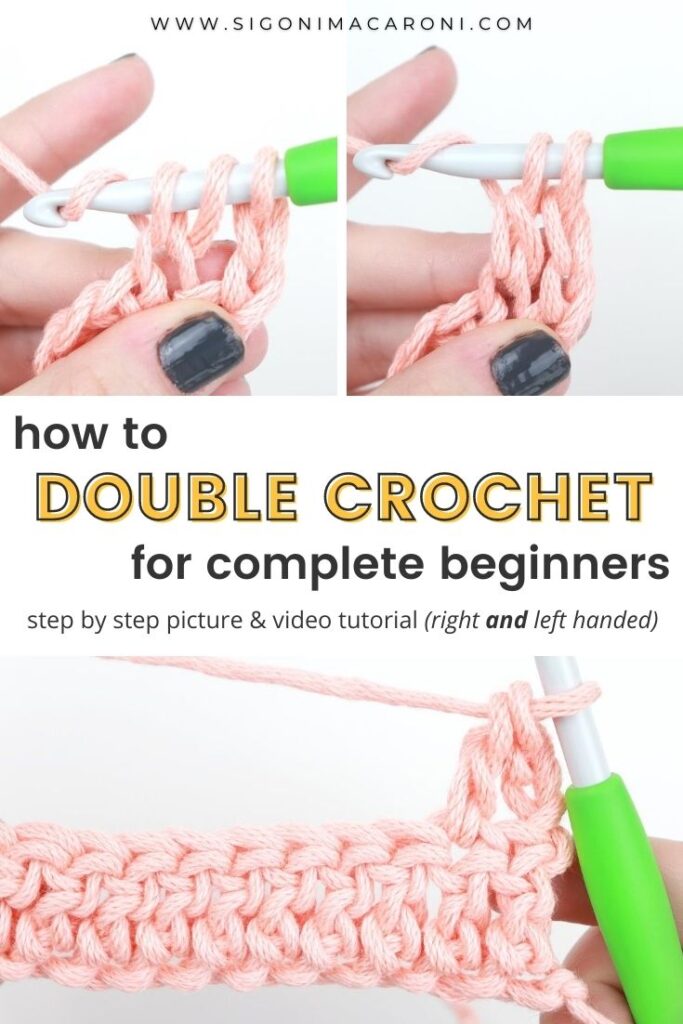
How To Do A Double Crochet For Beginners (DC)
The double crochet is the third of the four basic crochet stitches. It’s taller than both the single and half double crochet stitches and the double crochet stitch can be used in a variety of techniques. Today we’ll cover how to do a double crochet for beginners with step by step picture and video tutorials. After you learn how to double crochet, try making something with one of these free patterns!
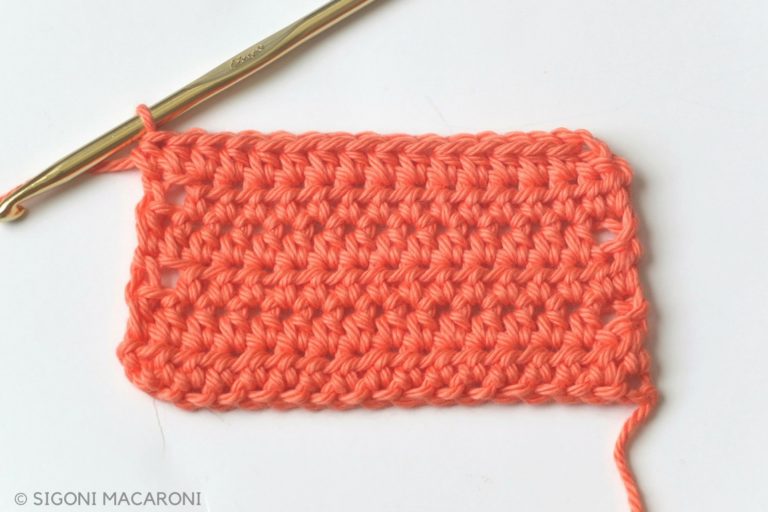
In today’s beginner crochet tutorial, we will learn how to double crochet in rows. The picture tutorial below will show you step by step how to double crochet right handed. If you need a video to follow along with or you’re left handed, you can find my double crochet Youtube video here.
The double crochet stitch is one of my favorite stitches to work! The motion of working up this stitch is so relaxing. I could crochet an entire blanket with this one stitch and not get bored. I also love that with the double crochet, you can create beautiful ribbing and cable work by working around the front and back posts. But that’ll be for another tutorial! You can also try out filet crochet! There are endless possibilities.
But First, What Is Double Crochet?
The double crochet stitch is one of the four basic crochet stitches. These basic stitches can be used individually to create many patterns on their own. But they’re also frequently used together to create different types of stitches.
Learn to Crochet the Easy Way
Within the Learn to Crochet the Easy Way series, you will find a list of tutorials for beginner crocheters. This series was created just for you, to make learning to crochet as easy as possible. If you’re interested in turning crochet into a hobby you love (with the least amount of frustration as possible), I highly suggest you check it out!
Not sure where to start? My 7-Day Learn To Crochet Challenge will give you step by step guidance on where to start, what to learn next, & how to get started on your first project!
Click Here to Join the FREE 7-day Challenge!How To Do A Double Crochet For Beginners: Picture Tutorial
When you’re first starting out, I suggest learning with a medium weight yarn (#4) and a 5mm crochet hook. I also recommend using a lighter color, that way you can really see and count your stitches.
Getting Started
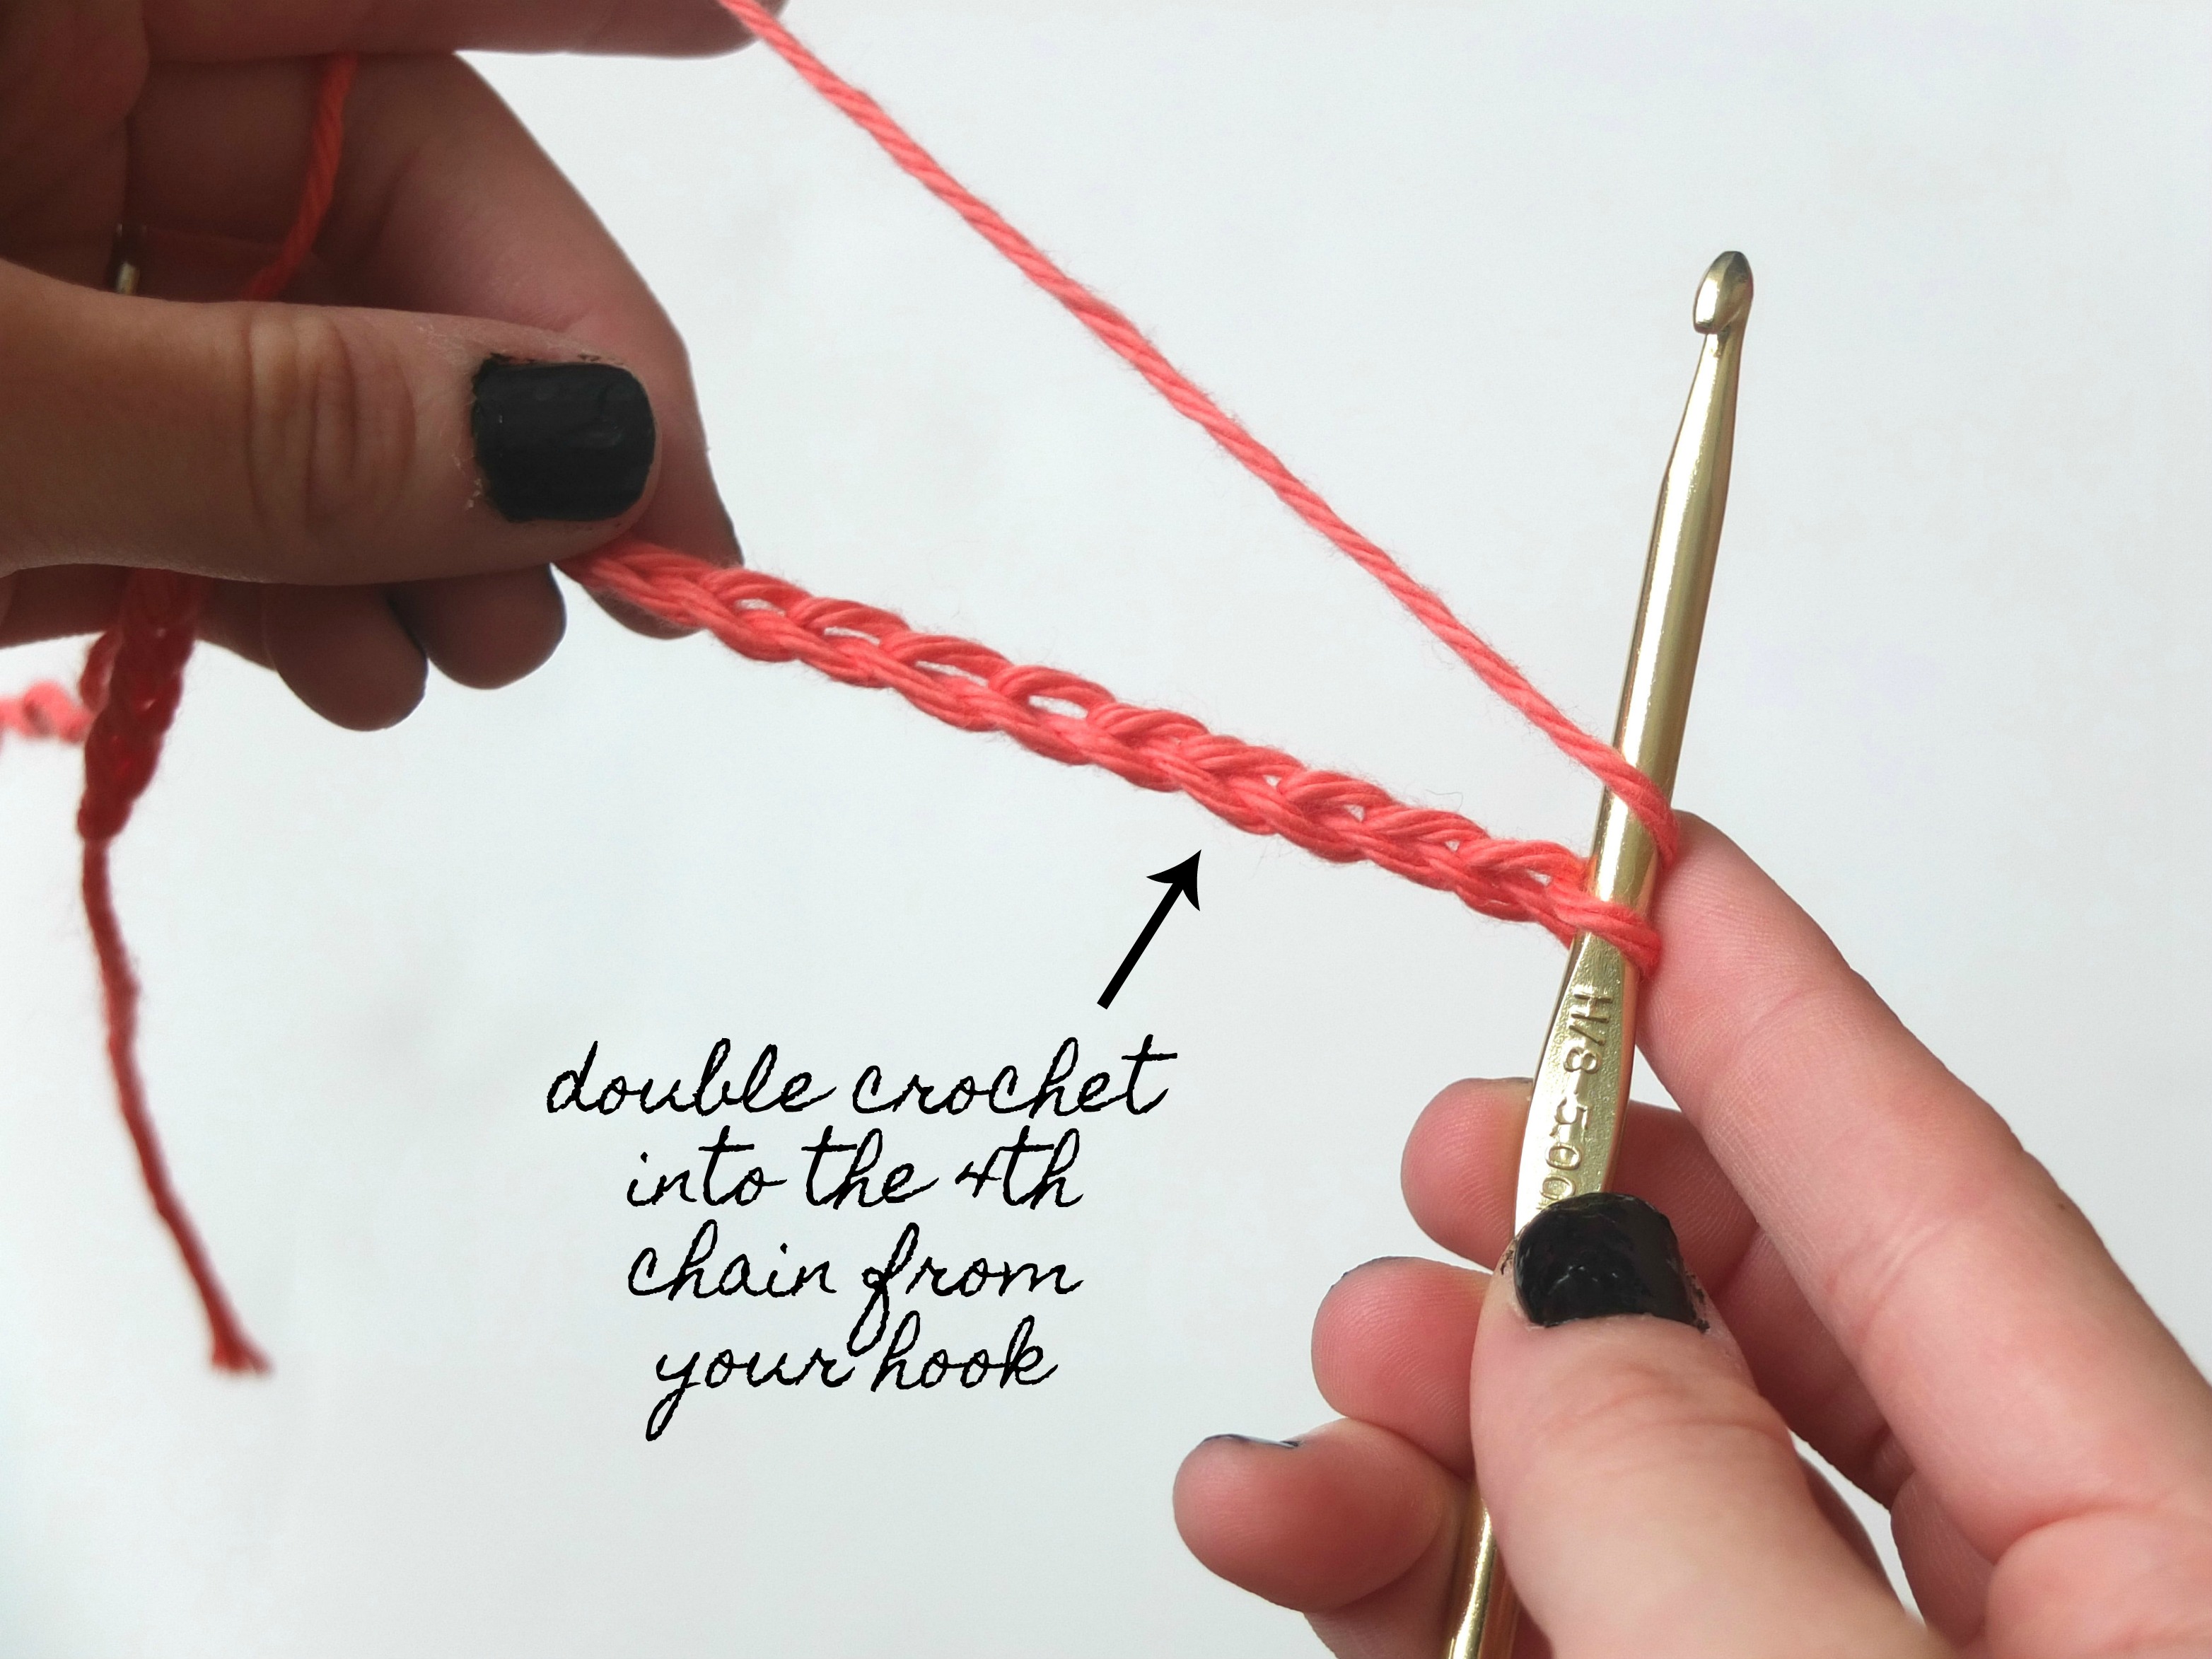
Step 1: Create a slip knot and chain 20
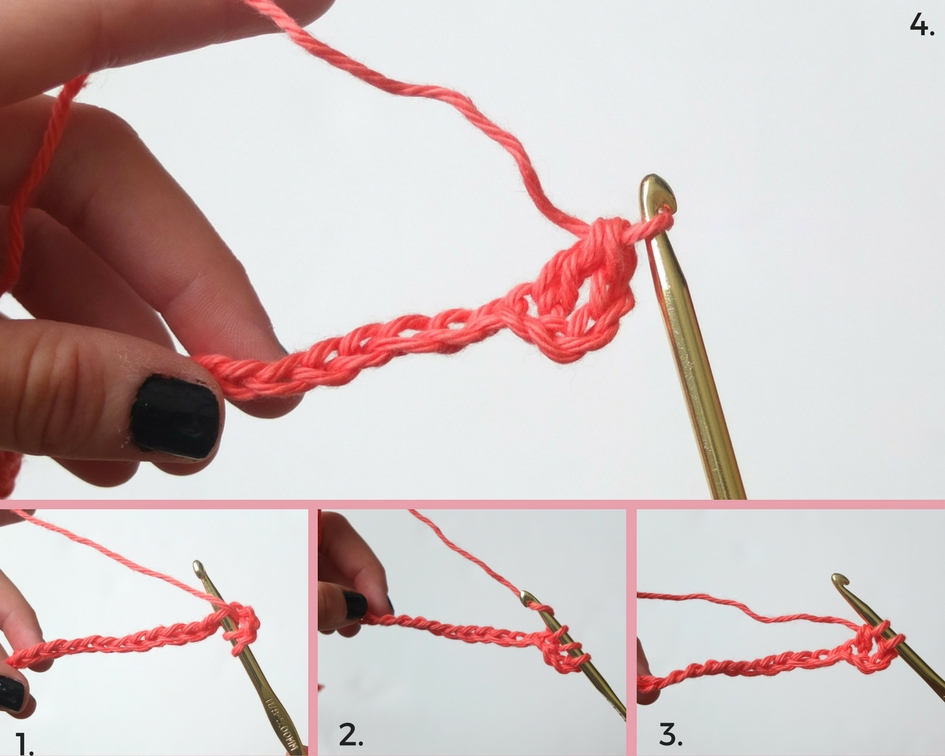
Step 2: Yarn over and insert your hook into the 4th chain from your hook. Yarn over, pull up a loop. You will have 3 loops on your hook.
Step 3: Yarn over, pull through 2 loops.
Step 4: Yarn over again and pull through the remaining 2 loops.
That is the double crochet stitch!
Let’s try it together one more time.
Yarn over and insert your hook into the next chain, yarn over and pull through.
You will have 3 loops on your hook.
Yarn over, pull through two loops, yarn over pull through remaining two loops.
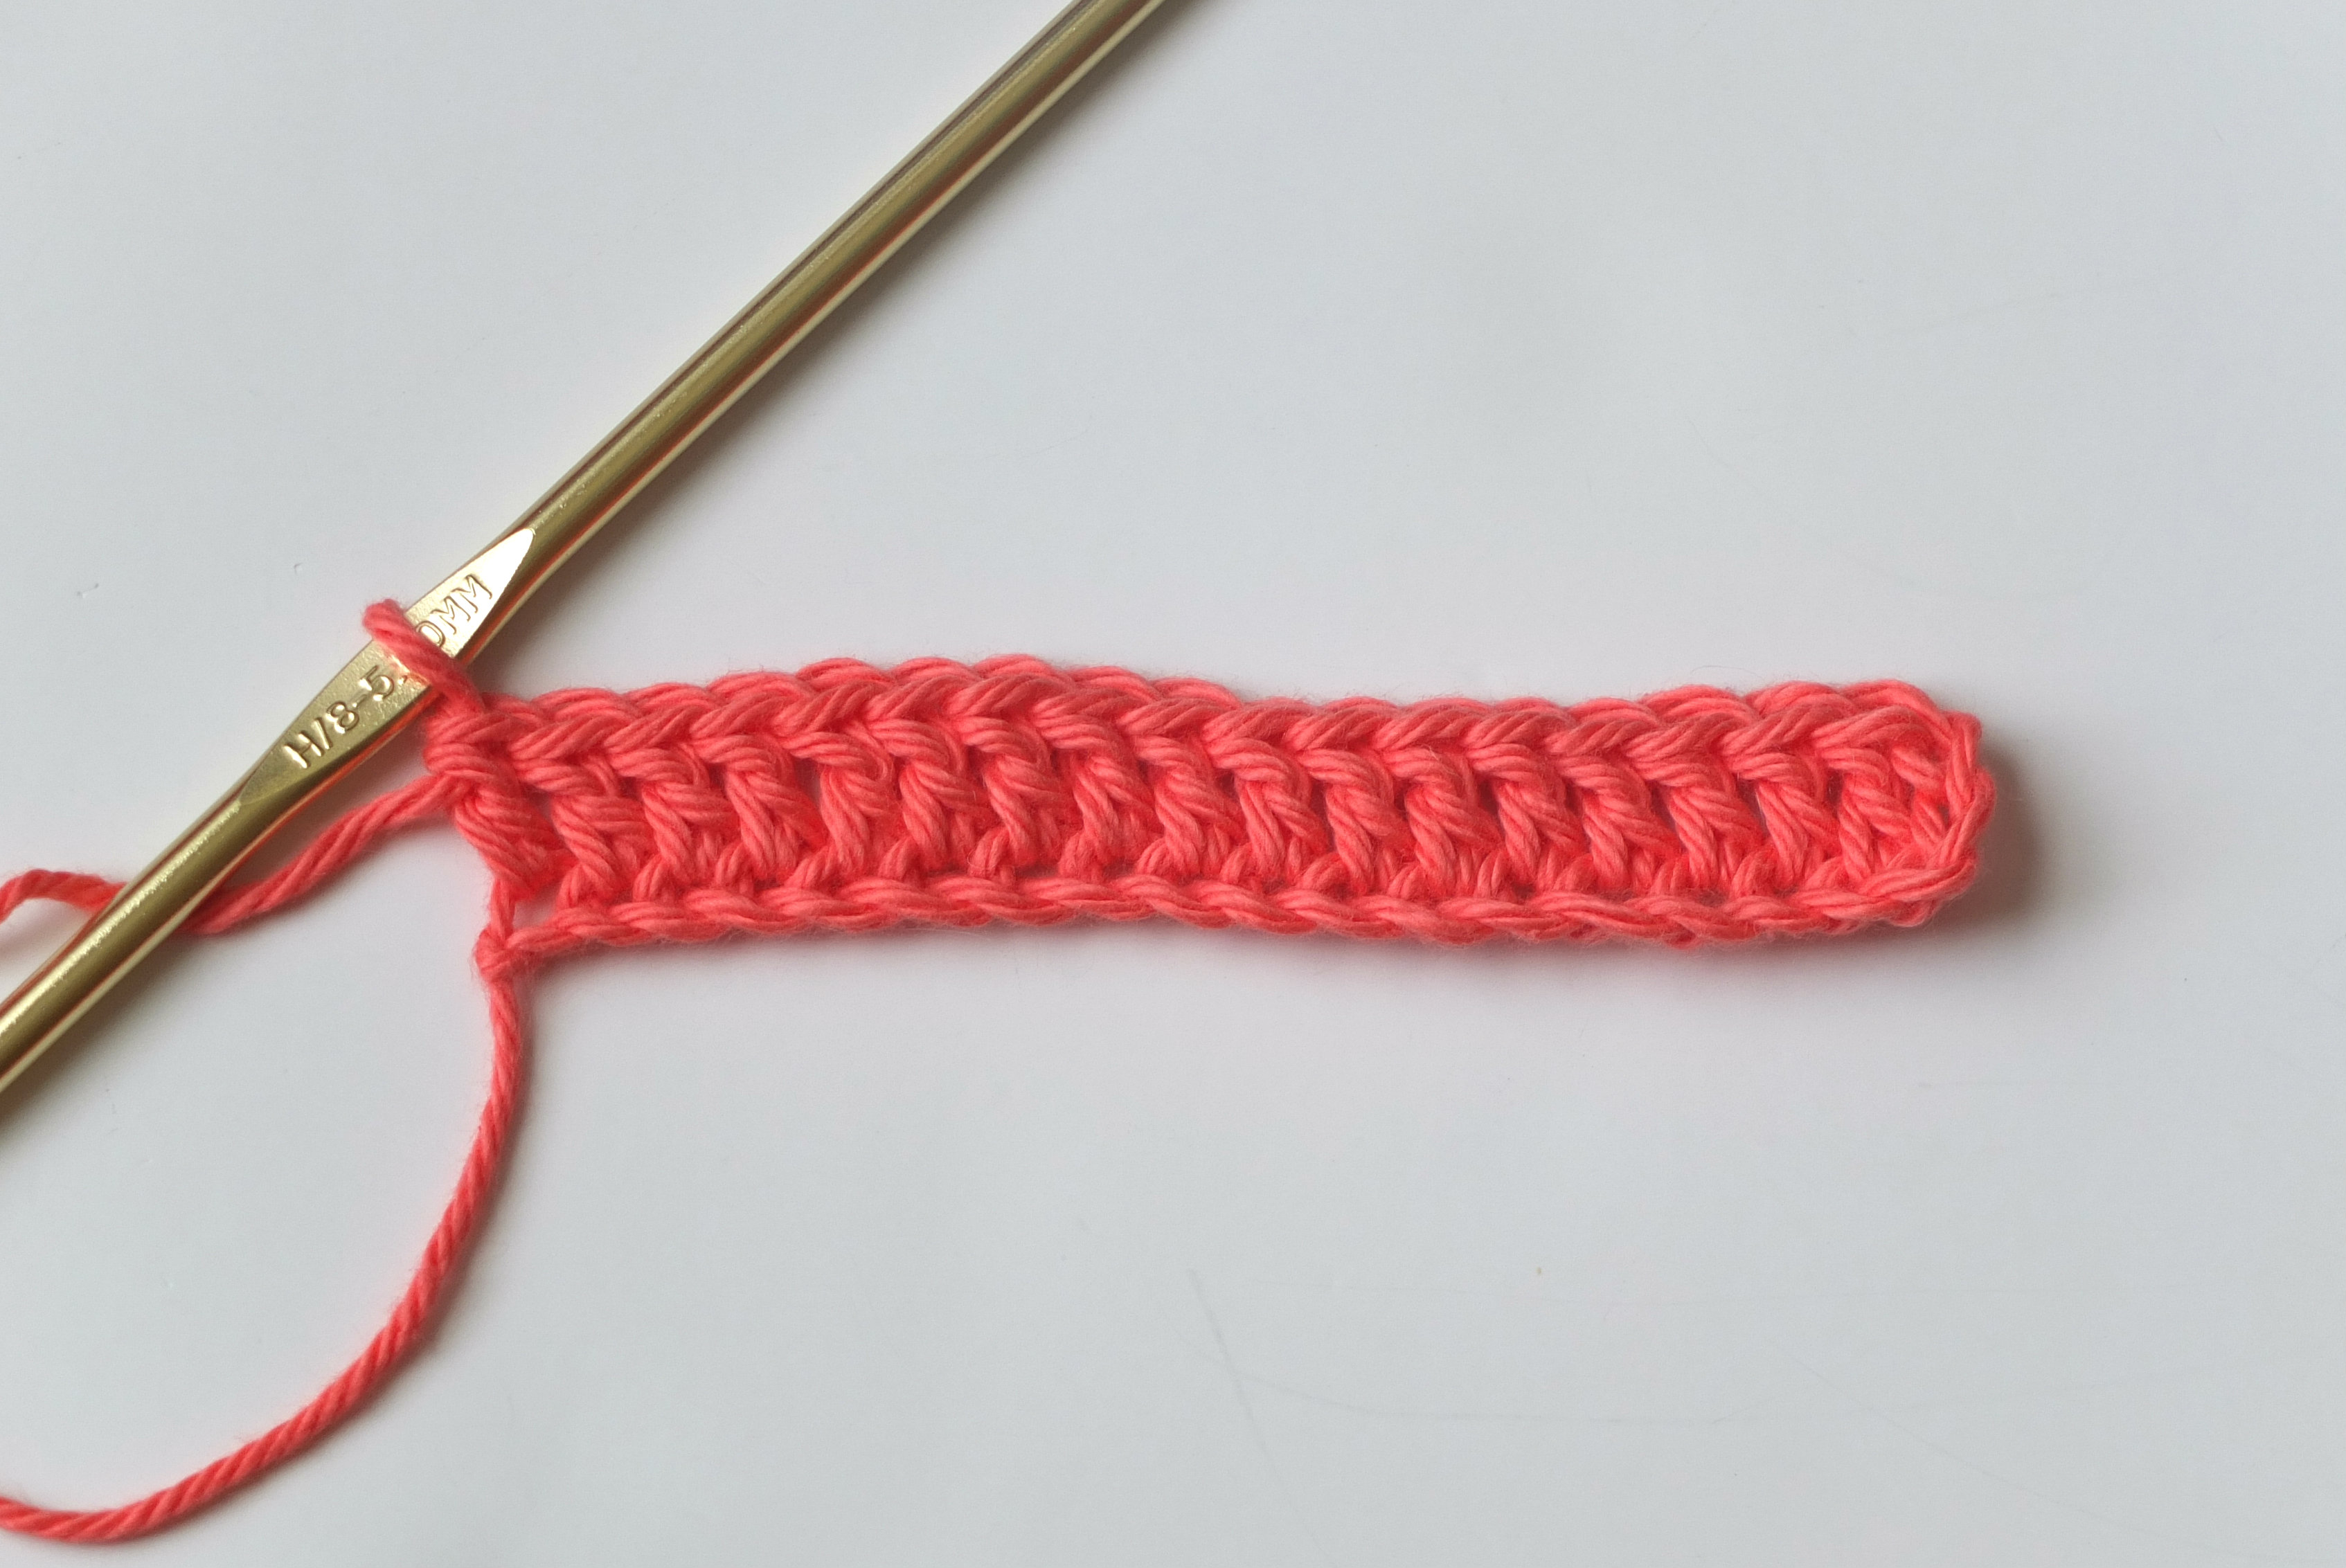
Continue double crocheting in each chain down the row.
Crocheting into the foundation chain is the toughest part as a beginner. Once you get a couple rows down it will become easier to grip your yarn.
Once you’ve reached the end of the row, you should have 17 double crochet stitches total (the 3 chains that you skipped at the beginning of the foundation chain counts as a double crochet).
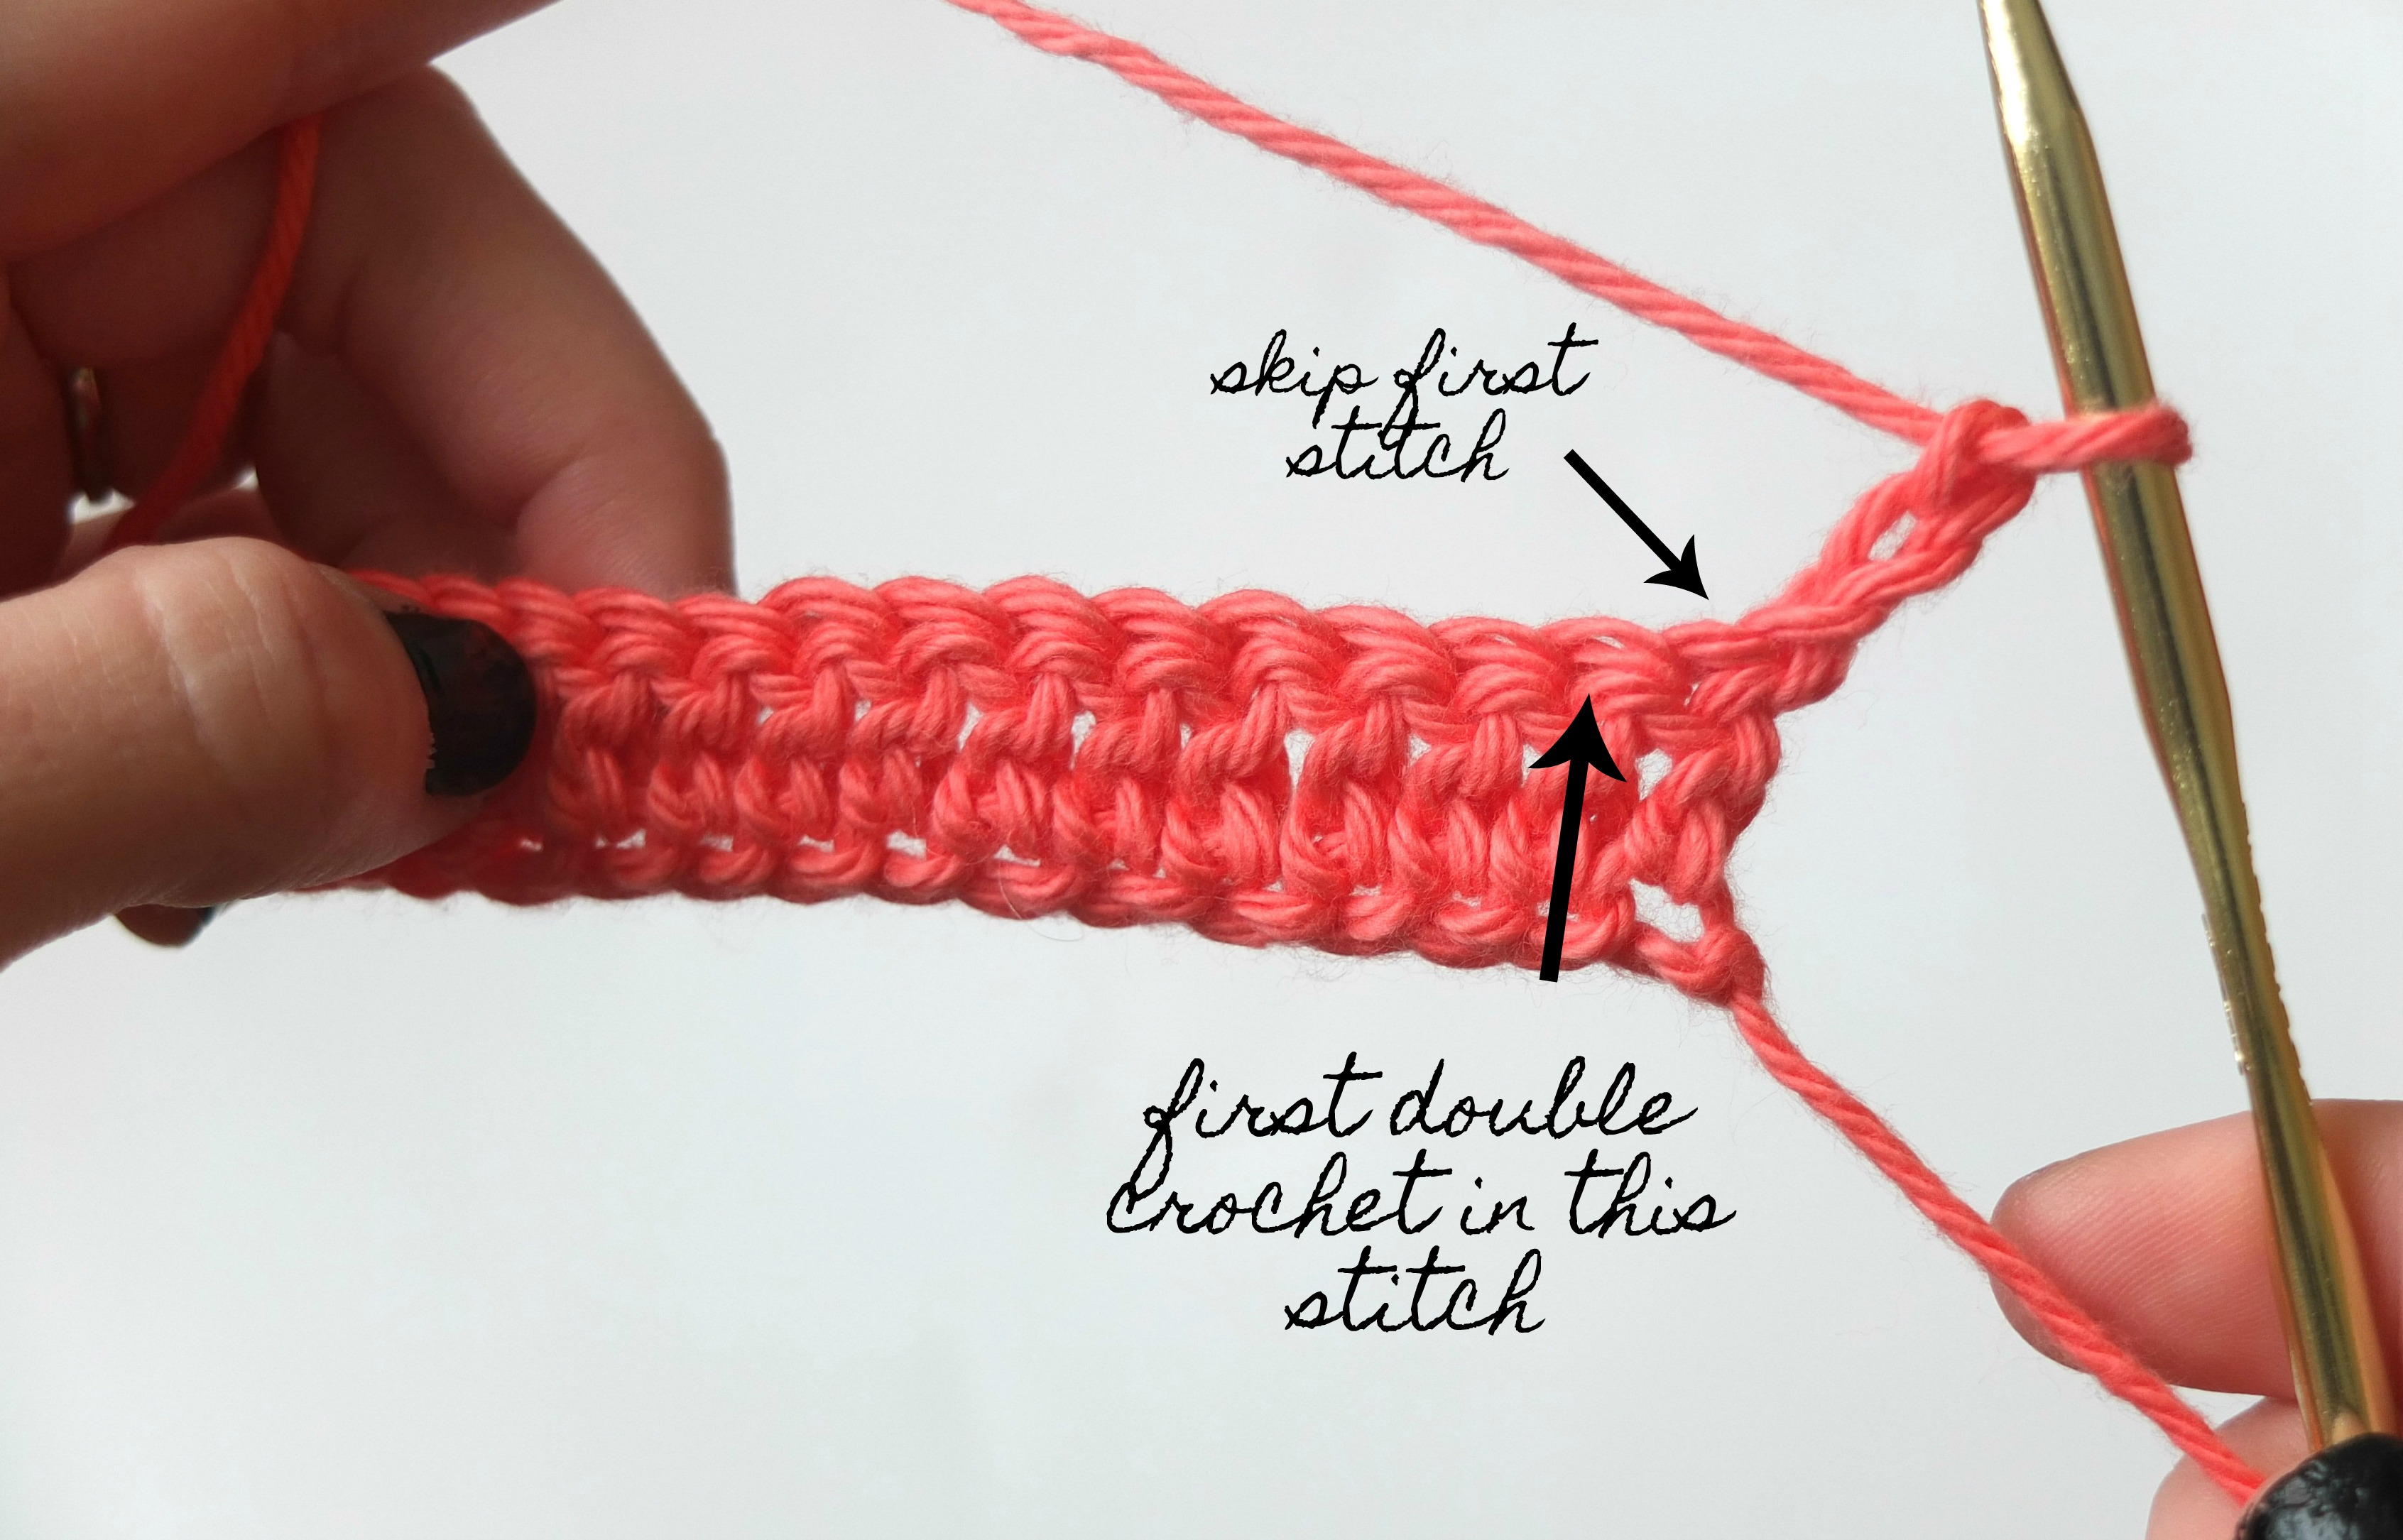
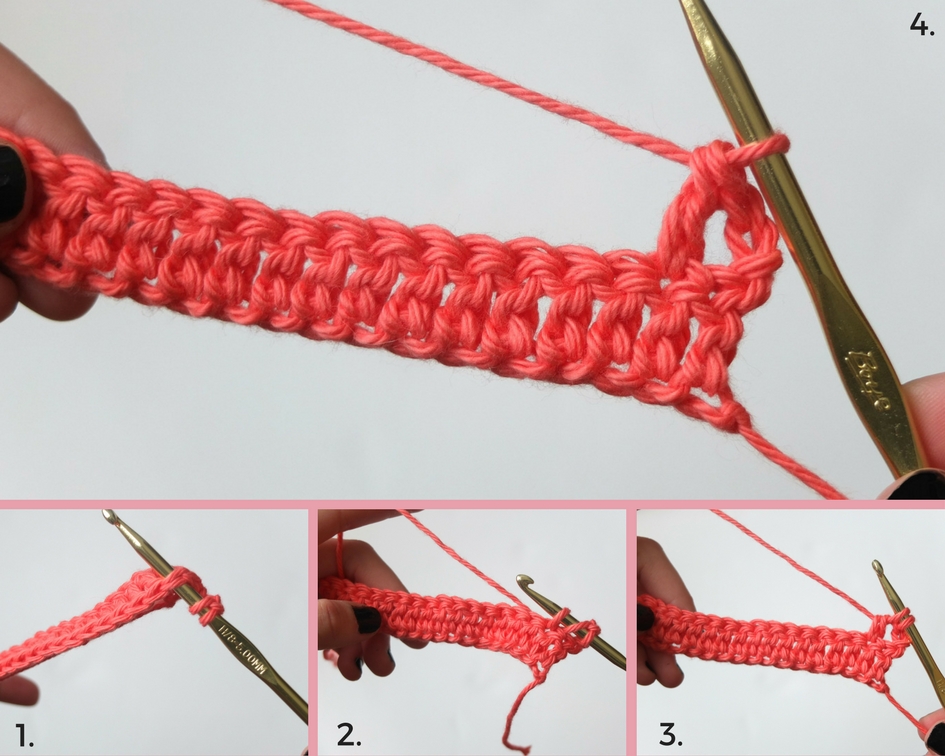
When you reach the end, chain 3 and turn your work to face the back side of your first row.
*IMPORTANT: The very first stitch in a row is known as a “false” stitch. The chain 3 at the beginning of each row counts as a double crochet stitch. This means it’s as if the chain was worked from that stitch. You will make your first double crochet into the next stitch. (read more about turning chains here)
Yarn over, insert your hook under both loops of the next stitch (not the base of the chain 3 – see photo above).
Yarn over, pull up a loop. You’ll have 3 loops on your hook. Yarn over, pull through 2 loops. Yarn over, pull through the last 2 loops.
Continue double crocheting in each stitch down the row.
Don’t forget about the last stitch! Because the chain 3 at the beginning of each row counts as a stitch, you’ll be crocheting into the top chain of the chain 3. Sometimes it can be a little tricky to find.
Count your stitches at the end of each row to make sure you’re on track.

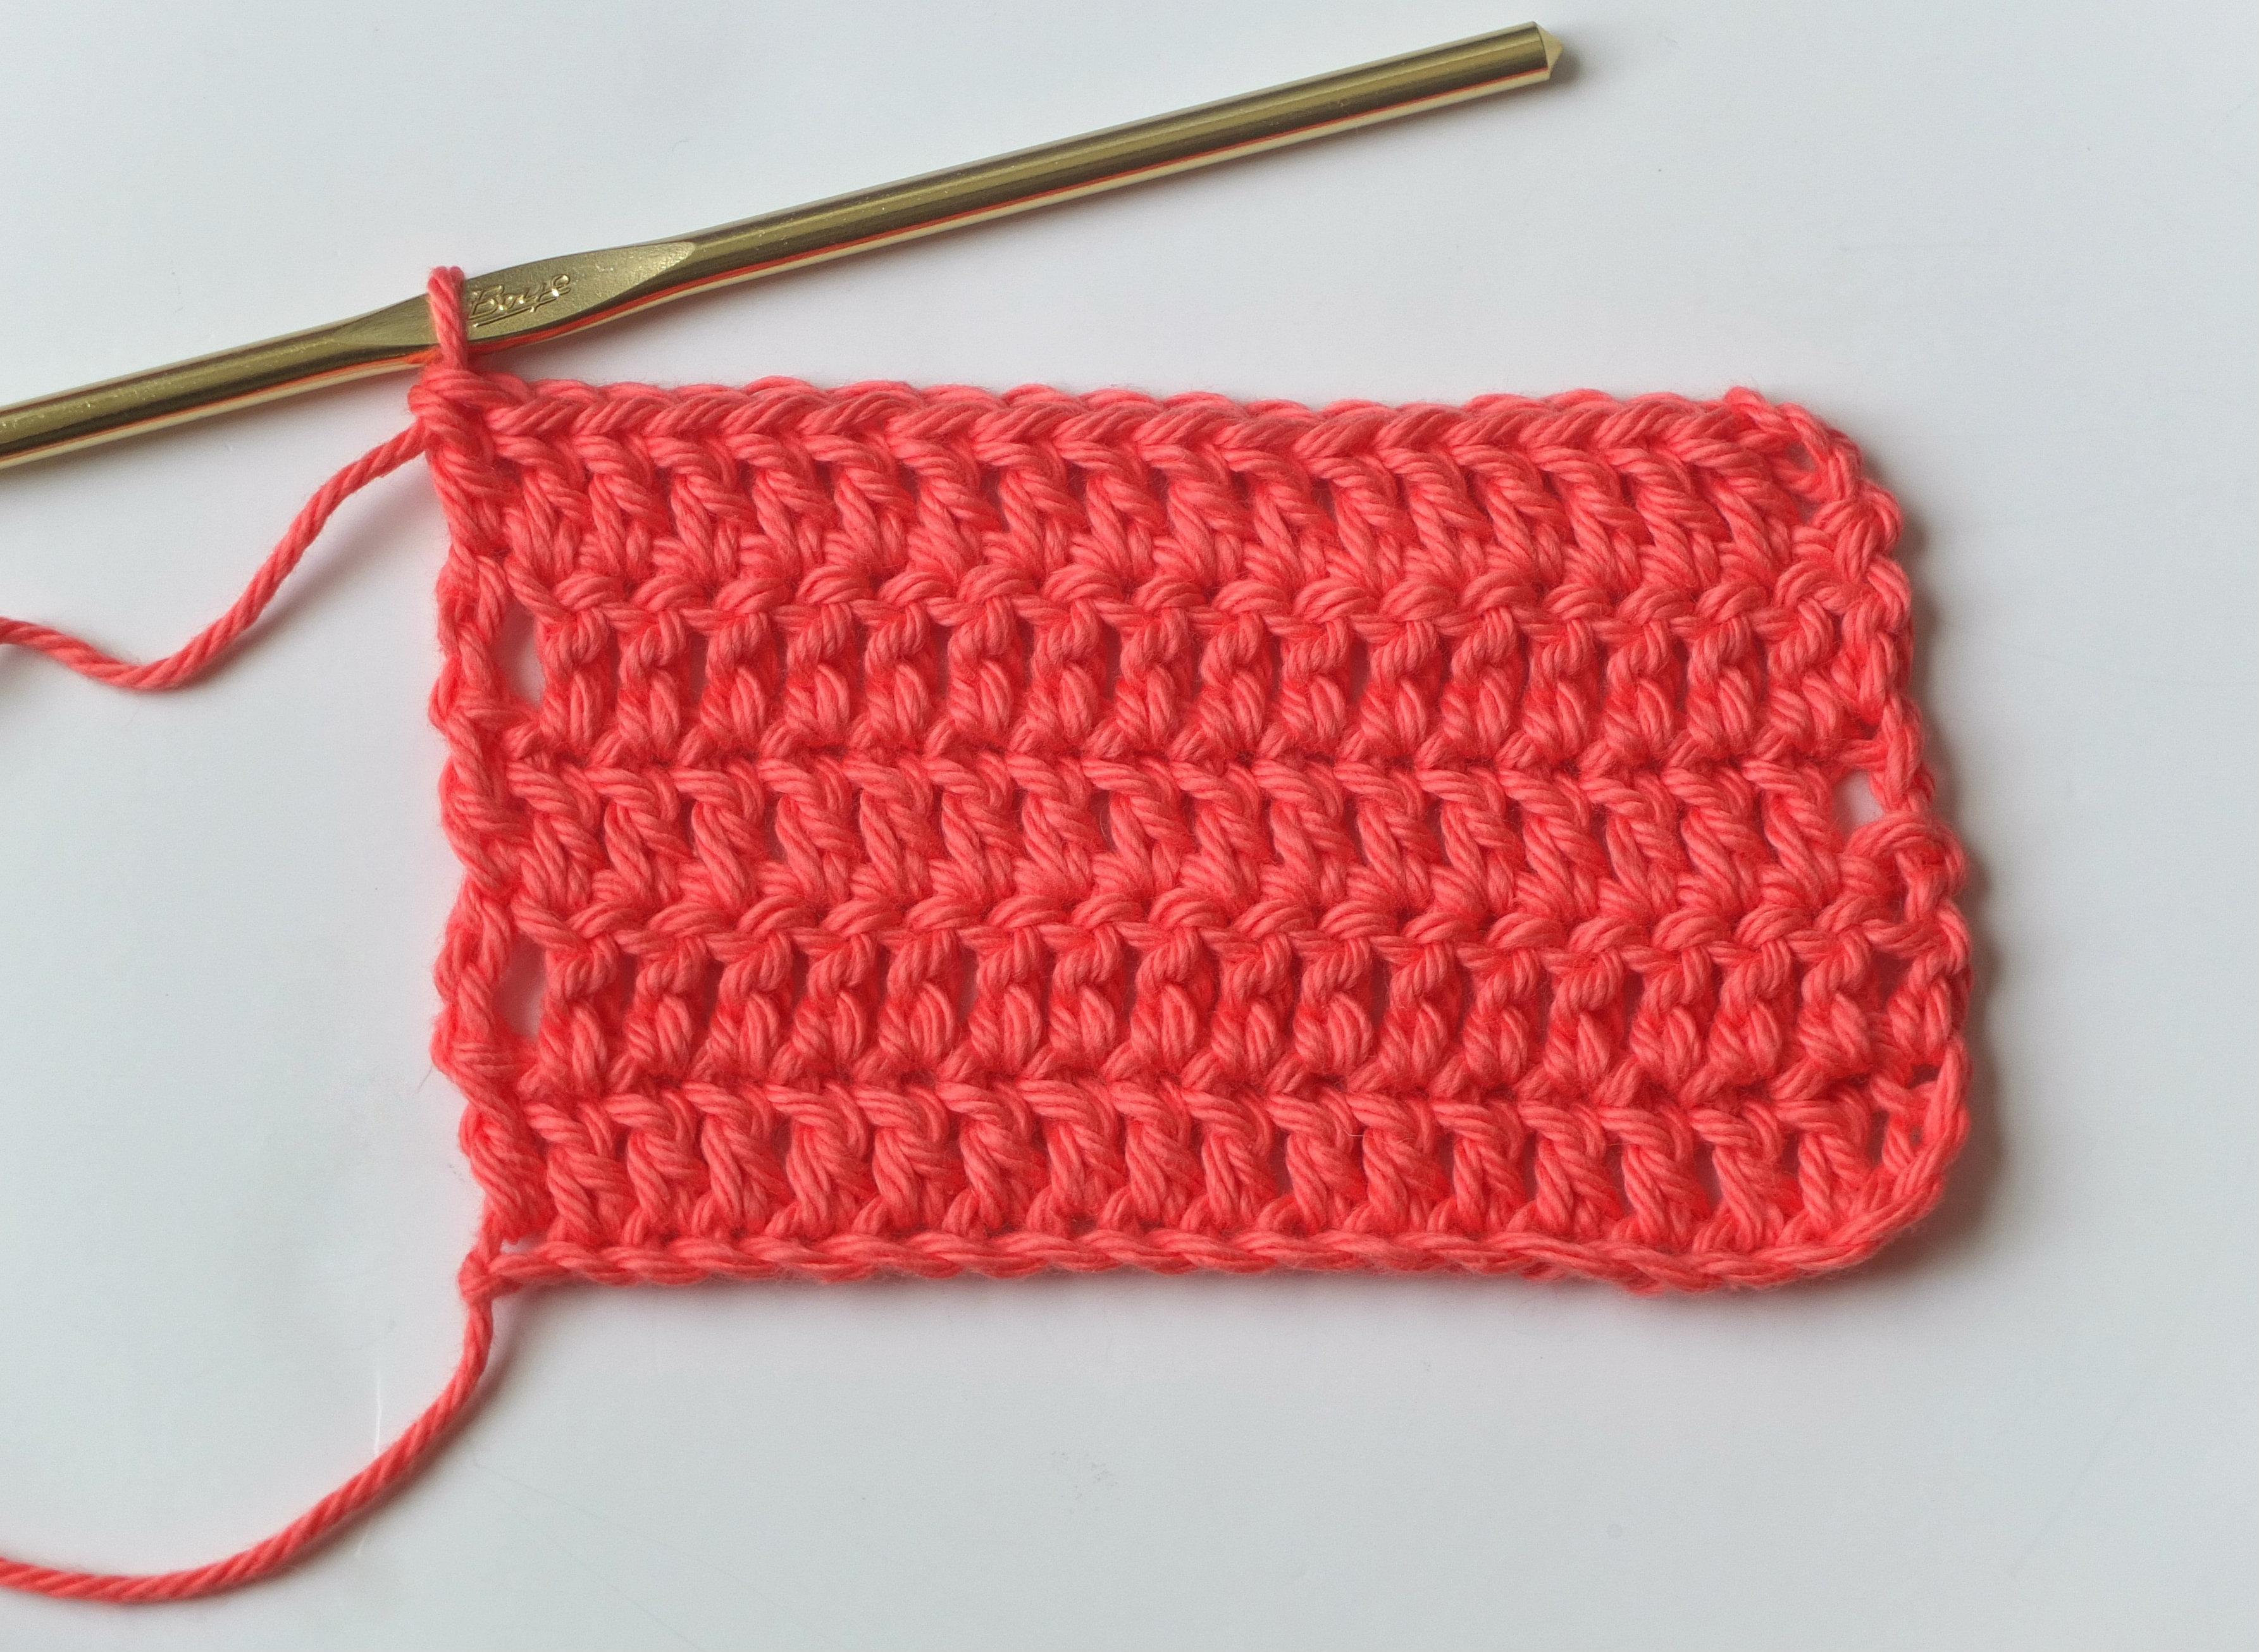
Repeat Row 2 until you’re really confident in your double crochet skills!
How To Do A Double Crochet For Beginners: Video Tutorial
Watch the right handed tutorial on YouTube here
Watch the left handed tutorial on YouTube here
Want to make practicing more fun?
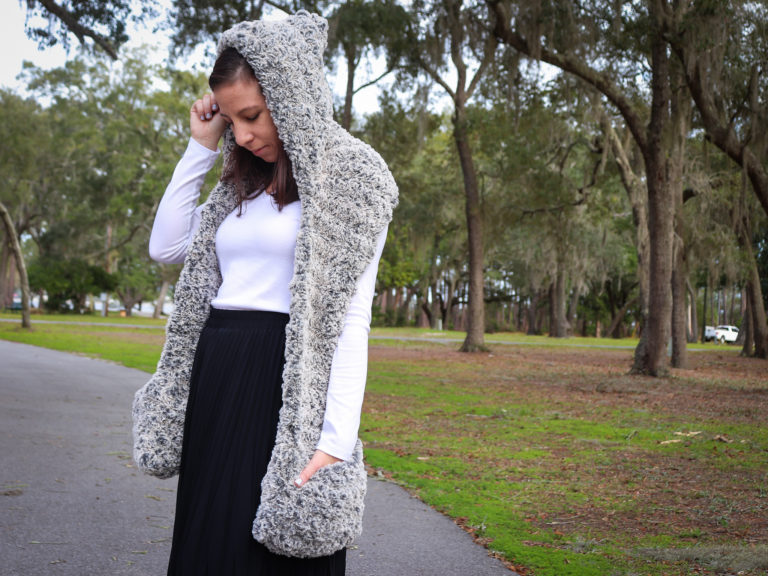
With the single crochet stitch, I told you how to use your practice stitches to make a set of coasters. With the half double crochet stitch, we turned it into a washcloth. Today, how about we turn your double crochet stitches into a super simple scarf?
Rip back all of the rows you just did and start over.
You’ll need about three skeins of worsted weight yarn to turn this into a full-size scarf.
Chain 28 and follow the steps above. Continue double crocheting row after row until your project measures about 54 inches (or as long as you want!) Guess what you just made? Your very own super simple double crochet scarf!
Here are a few other crochet projects you can make with the double crochet stitch:
- Crochet Pumpkin Drawstring Backpack
- Checkered Colorblock Washcloth
- Suzette Baby Blanket
- Slouchy Crochet Leg Warmers
- Striped Rainbow Baby Blanket
Not sure what to learn next? Sign up for my 7-Day Learn To Crochet Challenge for further step by step guidance on where to start, what to learn next, & how to get started on your first project!
Click Here to Join the FREE 7-day Challenge!In conclusion
Today we learned the double crochet stitch for complete beginners with step by step photos. I hope this tutorial on how to work the double crochet stitch for beginners was easy for you to understand. Congratulations on learning the third basic stitch! If you have any questions at all, don’t hesitate to ask!
If you’re having trouble learning how to keep track of your stitches, I highly suggest checking out one of my other posts, Counting Crochet Stitches and Rows. It is jam-packed with a ton of great tips and tricks to make counting your stitches a whole lot easier! Plus, it will help immensely with keeping the edges of your work straight!
Did you make yourself a scarf? Show me a picture in the comments below or send me an email at [email protected]. I would love to celebrate your progress with you.
Next in the Learn to Crochet the Easy Way Series:
The Crochet’dy Bunch Facebook Group
I created a Facebook Group just for you! We call ourselves the Crochet’dy Bunch and I would love for you to join. We have daily threads that include:
- Motivational Mondays
- Tip Tuesday
- WIP Wednesday
- Tutorial Thursday
- Chit Chat Friday!
In this group, we talk about all things crochet, dive deeper into tutorials and share tons of laughs! Plus, there’s a video tutorial for every picture tutorial. If you join the group and have any questions about this post or would like me to go over something I didn’t cover, feel free to leave a question on the wall or send me a message!
Click here to join The Crochet’dy Bunch!