Tie a Slip Knot the Easy Way: Crochet Tutorial with Pictures for Beginners
Learning how to tie a slip knot in crochet is one of the most important things to master. Why? Because a slip knot is used to begin nearly every project. There are several different ways that you can make a slip knot and I’ve chosen two of the easiest ways I could find and explain. Today we’re going to learn to tie a slip knot the easy way with step by step pictures for beginners. Try both of these methods and choose the one that comes naturally or at least the most comfortable to you.
If you are a left-handed crocheter, I have a left handed video tutorial linked below the picture tutorial!

Learn to Crochet the Easy Way
Within the Learn to Crochet the Easy Way series, you will find a list of tutorials for beginner crocheters. If you are new to crochet and are interested in turning this into a hobby you love (with the least amount of frustration as possible), I highly suggest you check it out.
Not sure where to start? My 7-Day Learn To Crochet Challenge will give you step by step guidance on where to start, what to learn next, & how to get started on your first project!
Click Here to Join the FREE 7-day Challenge!Tie a Slip Knot the Easy Way: Crochet Tutorial with Pictures for Beginners
Before we get started, I wanted to go over where to pull the strand of yarn on your skein (or ball). On every skein of yarn, there are two ends. You can find one end on the outside and the other is found in the center of your ball.
I almost always pull from the center because it flows easier when crocheting, but be careful of the yarn vomit! Sometimes it’s hard to find the single strand in the center of your ball and you’ll have to pull out a clump of yarn and sort it out from there. Don’t worry though, it’s not half as bad as it sounds in most cases.
Whether you choose to pull from the outside or the inside of the skein (it’s completely up to you), pull out a good 8-10 inches so you have enough to work with.
The video below will show you how to create a slip knot and the crochet chain stitch! Plus there’s a left handed tutorial linked in the description.
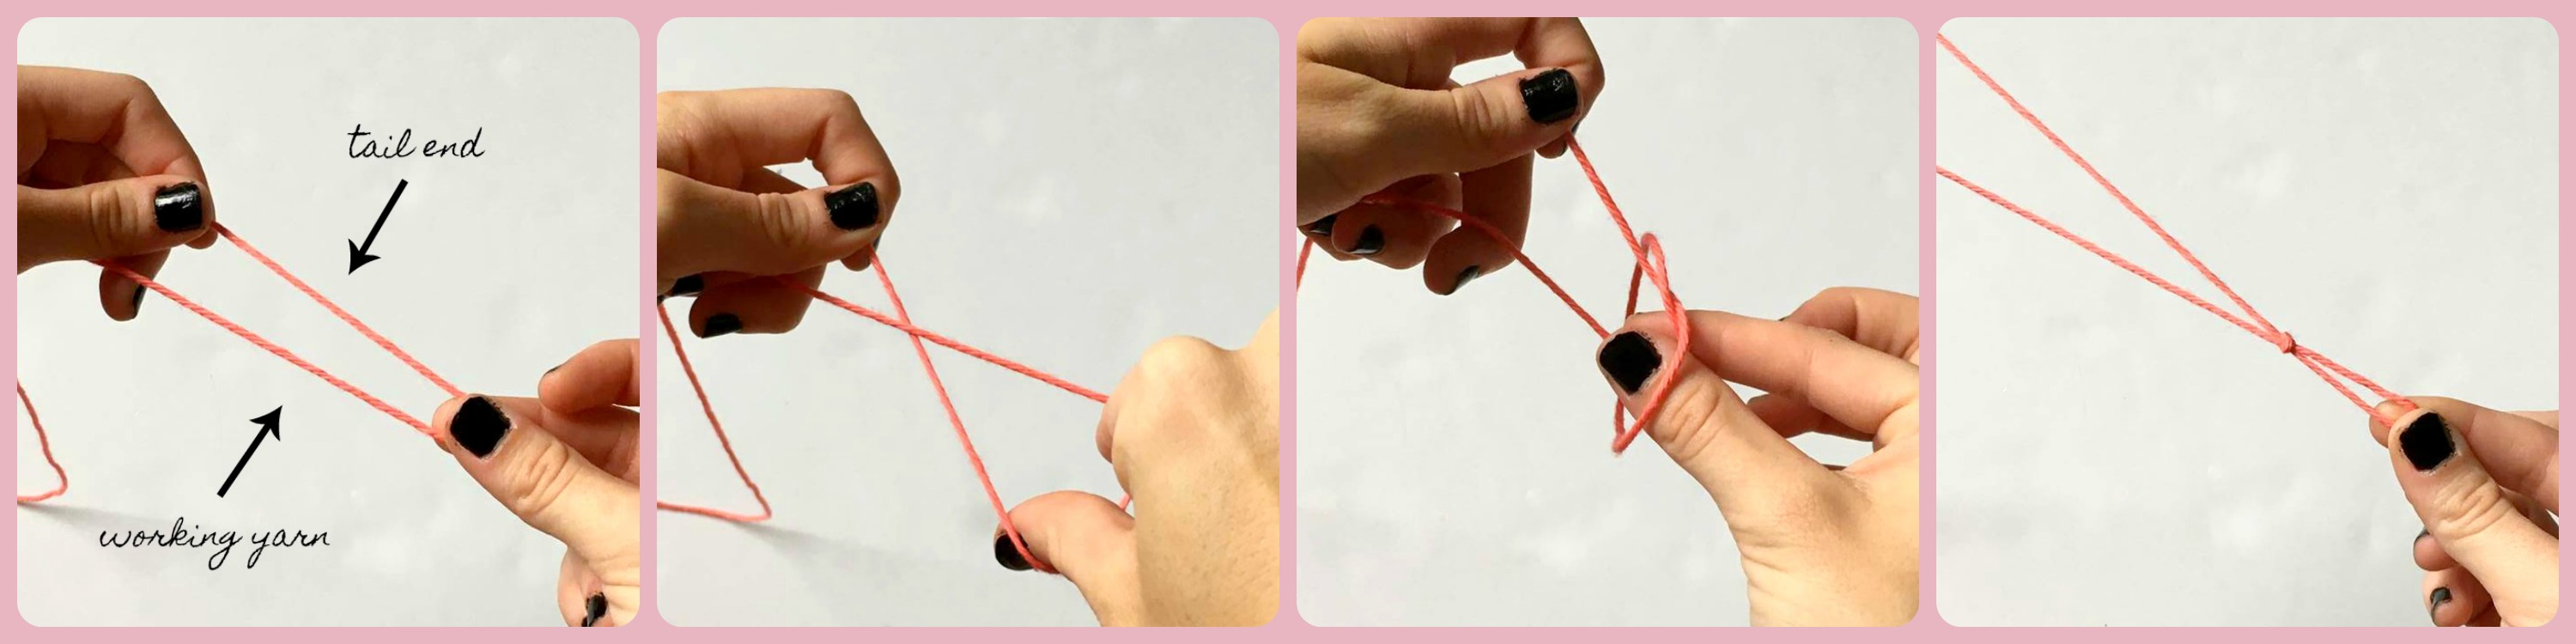
Slip Knot Method #1:
- First, use your thumb and pointer fingers of your left hand (if you’re right-handed) to hold the tail end of the yarn while your pinky and ring finger are holding the working yarn.
- Twist the yarn with your right hand so that the working yarn lays on top of the tail.
- Insert your thumb and pointer finger of your right hand into the hole you just created and pull the working yarn through.
- Pull the loop tight with your right hand while holding both the working yarn and the tail in your left.
- Insert your hook into the slip knot and pull tight on the working end to tighten onto your hook.
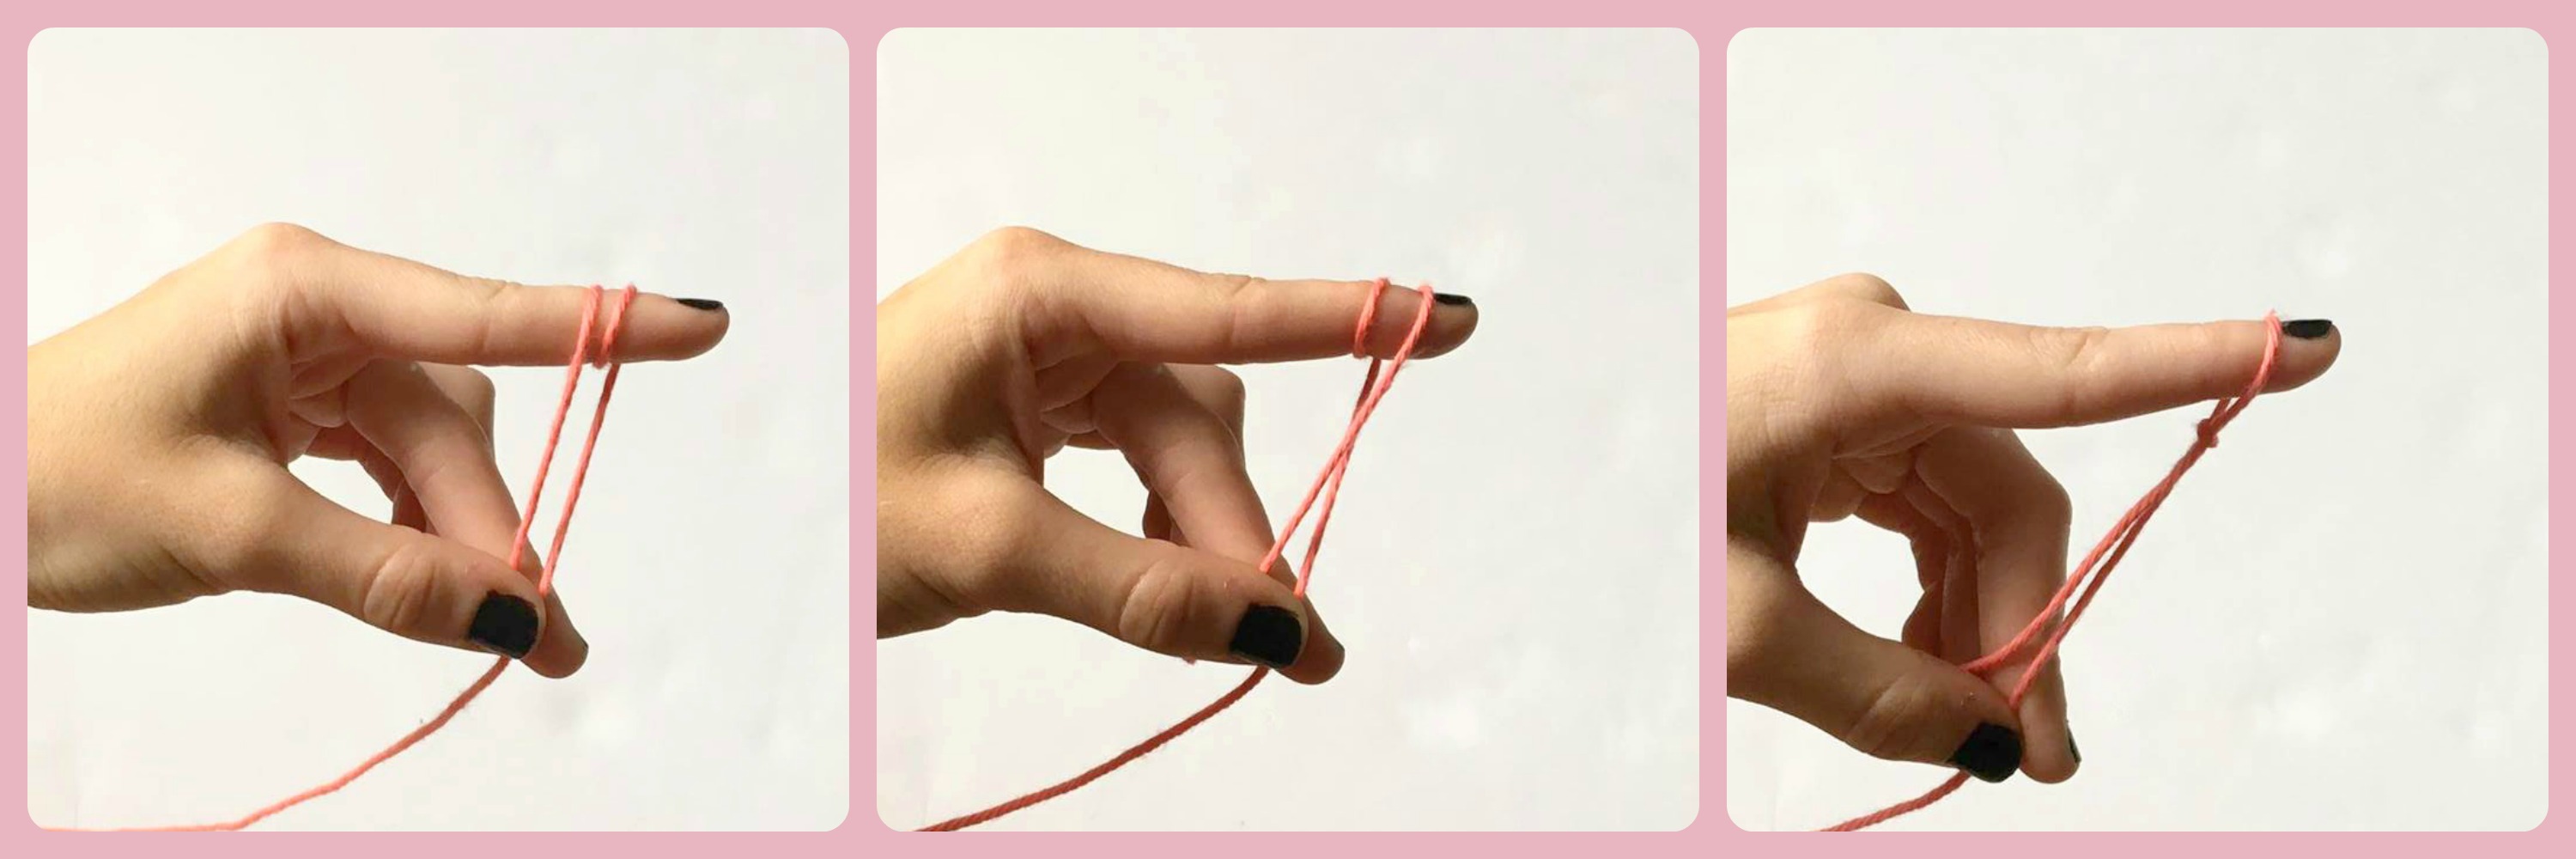
Slip Knot Method #2:
- Use your thumb and middle finger of your left hand to hold onto the tail end of your yarn.
- Wrap the working yarn around your left pointer finger twice and hold it between your thumb and middle finger to hold in place.
- Pull the back loop over the front loop without letting it fall off your finger.
- Then pull the now back loop over the front loop and over your finger.
- Hold on to both the working yarn and tail with your other fingers and push up on the loop with your pointer finger, tightening the knot.
- Insert your hook into the loop and pull down on the working end to tighten.
After you tie your slip knot, make sure the loop is loose enough to place around your hook. Then pull the long tail (working end) to tighten the loop around your hook. Loose enough to slide up and down your hook, but tight enough so that it doesn’t fall off your hook.
As with all things, learning how to tie a slip knot takes practice. But we learned two methods today to get you to tie a slip knot the easy way and I hope the pictures helped! Video coming soon.
Today we learned that to tie a slip knot, we start off by pulling a long strand of yarn out of the center or outside of your yarn ball. Try both slip knot methods and decide which one works best for you. When you’re finished, tighten that loop on your hook and you’re ready to start your next project! Before you know it, you’ll be creating slip knots without even thinking about it!
Not sure what to learn next? Sign up for my 7-Day Learn To Crochet Challenge for further step by step guidance on where to start, what to learn next, & how to get started on your first project!
Click Here To Join The FREE 7-day Challenge!Next in the Learn to Crochet the Easy Way Series:
To help further, I’ve put together a quick-read, free beginners guide that you should really check out! The free eBook provides 13 essential, detailed tips that a lot of beginners don’t know and would truly benefit from! Get your free guide along with access to my freebie library by signing up for my email list below!
The Crochet’dy Bunch Facebook Group
I created a Facebook Group just for you! We’re calling ourselves the Crochet’dy Bunch and I would love for you to join. We have daily threads that include:
- Motivational Mondays
- Tip Tuesday
- WIP Wednesday
- Tutorial Thursday
- Chit Chat Friday!
In this group, we talk about all things crochet, dive deeper into tutorials and share tons of laughs! Plus, there’s a video tutorial for every picture tutorial. If you join the group and have any questions about this post or would like me to go over something I didn’t cover, feel free to leave a question on the wall or send me a message!
Click here to join The Crochet’dy Bunch!