Read our most Frequently Asked Questions!
Read our most Frequently Asked Questions!
Limitless Crochet everyday
With crochet, the possibilities are endless. Throughout 2021, Limitless Crochet Everyday will teach you how to become a better crocheter with new techniques, stitches, and free patterns to go along with them. Crochet is an anxiety reducer for many of us and after a long and stressful 2020 year, I think this is exactly what we need.
Some of the links below are affiliate links. Please see my disclaimer for details.
- WEEK 7 -
“I make beautiful things with yarn.“
Today we’re going to be talking about crocheting in the round! There are many many things we could get into here so I’m going to cover as many as I can without making this email feel overwhelming. Whatever I can’t cover, I’ll save for another topic down the road.
If you missed last weeks topic, it was all about starting crochet projects, working in rows, reading written patterns, and counting. Then we ended with our last free pattern roundup!
READ LAST WEEK’S EMAIL HERE
February Theme:
PROJECT MAKING
Week 7: Crocheting In The Round
February 14th - 20th
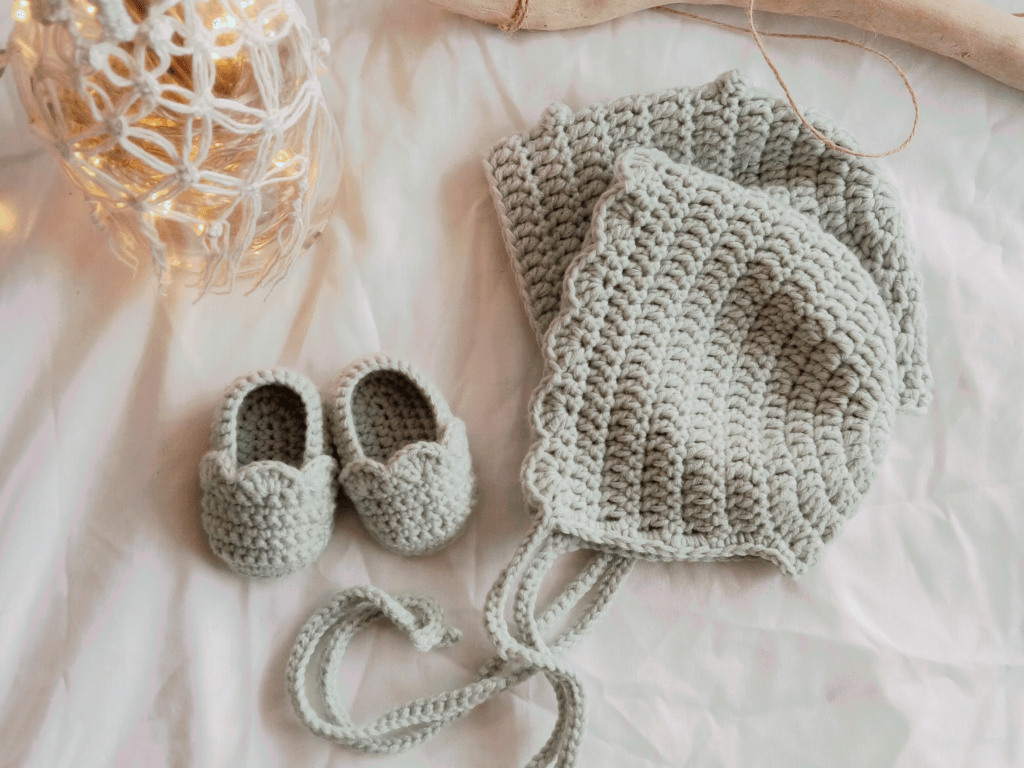
Crocheting in the round brings many possibilities. You will be able to tackle even more projects using different techniques from making hats to amigurumi and a whole lot more!
Getting Started In The Round
Crocheting in the round is an important skill to learn because there are so many more things to be made! This is a great way to make hats, amigurumi, blankets, baskets, and so much more.
There are two ways to start a project in the round:
- – Chain method
- – Magic circle
The chain method is when you start with a chain and then place all of your stitches in the very first chain until it forms a circle.
The magic circle is where you wrap yarn around your fingers, create a circle, and place all of your stitches inside that circle.
Click the button below to see a video tutorial for the magic circle that includes a short tutorial for the chain method to compare – it’s an older video so bare with me!
There are also two ways to crochet in the round:
- – Continuous rounds
- – Joined rounds
This will depend on the pattern that you’re working and it will usually tell you in the notes section of the pattern.
If it doesn’t, you’ll know that you’re working in joined rounds if it tells you to slip stitch at the end of each round.
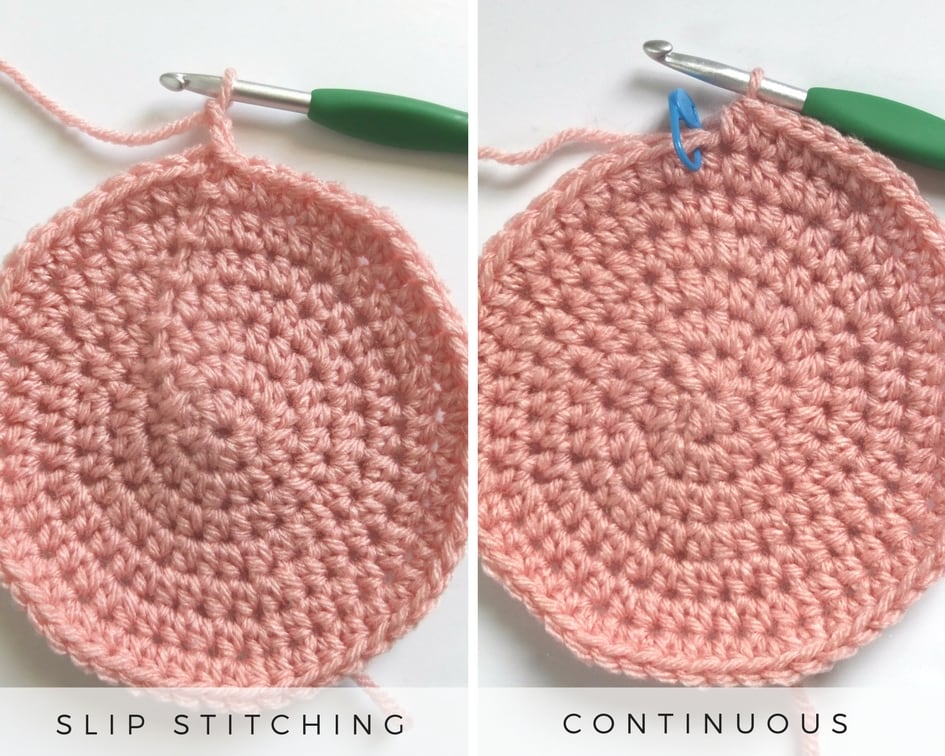
In continuous rounds you will work continuously in a circle without slip stitching to join. You will need a stitch marker for this method in order to keep track of the beginning of each round.
One big difference between these two methods is when you work in continuous rounds, you won’t have an unattractive seam trailing down the side of your work. With slip stitching you will. You can see in the photo below the difference between the two.
If you’re interested in learning more about each of these methods, I have both a picture and video tutorial for working in the round.
Increasing & Decreasing
When crocheting in the round, you have to increase in each round in order to keep your circle flat.
An increase is when you place two stitches into the same stitch.
If you’re not following a pattern, here’s a general “rule” for working in the round with even increases:
- – Single crochet – begin with 6 stitches
- – Half double crochet – begin with 8 stitches
- – Double crochet – begin with 10 stitches
If you start with 6 stitches, your total stitch count will increase by 6 after each round. If you start with 8 stitches, your total stitch count will increase by 8 after each round.
Usually when you’re making a hat, all you will need to do is increase. If you’re working with amigurumi, you will be doing both increasing and decreasing.
I don’t have any tutorials on decreasing YET, but that’s something we’ll cover next month. If you watch my “How To Crochet In The Round” video, I talk more about increasing there.
Counting In The Round
Counting Stitches
Counting stitches in the round is different than counting in rows. When you’re counting in rows, it helps to identify the front and back of the stitches like we talked about last week.
When you’re crocheting in the round you’re usually only going to be looking at the front side, unless the pattern says differently.
Let’s take the photo below for example.
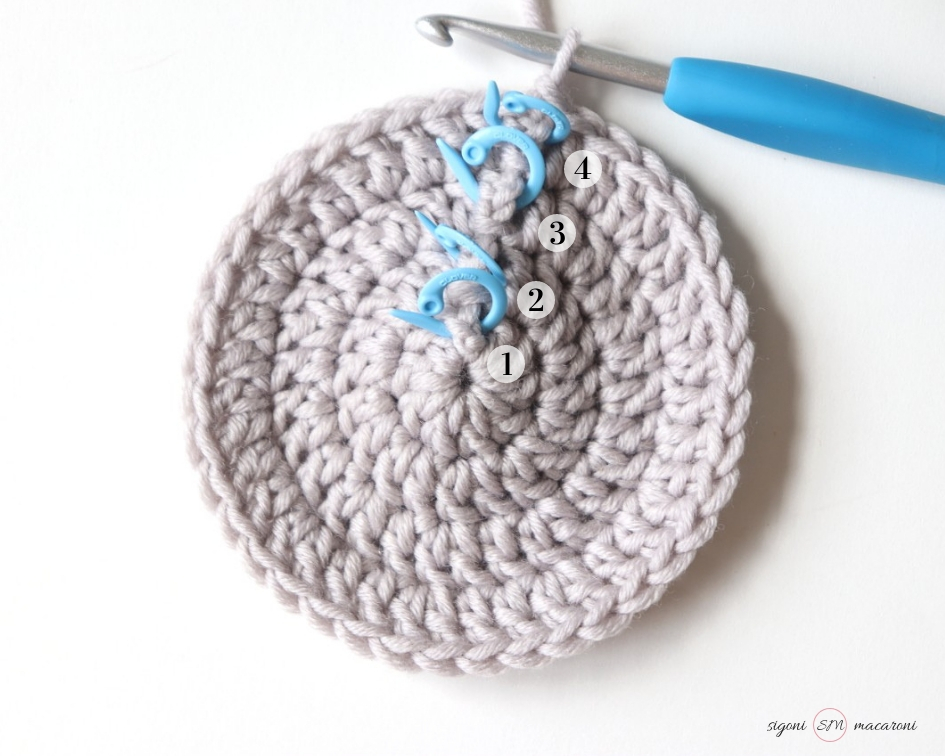
You can see that turning chains are again important in this situation. You will need to know if the turning chain counts as a stitch so that you’re counting correctly. In the photo above, it does. And that’s why it’s counted as the first stitch.
Working around the circle, you can count by the tops of the stitches or by the posts when using a taller stitch like the double crochet.
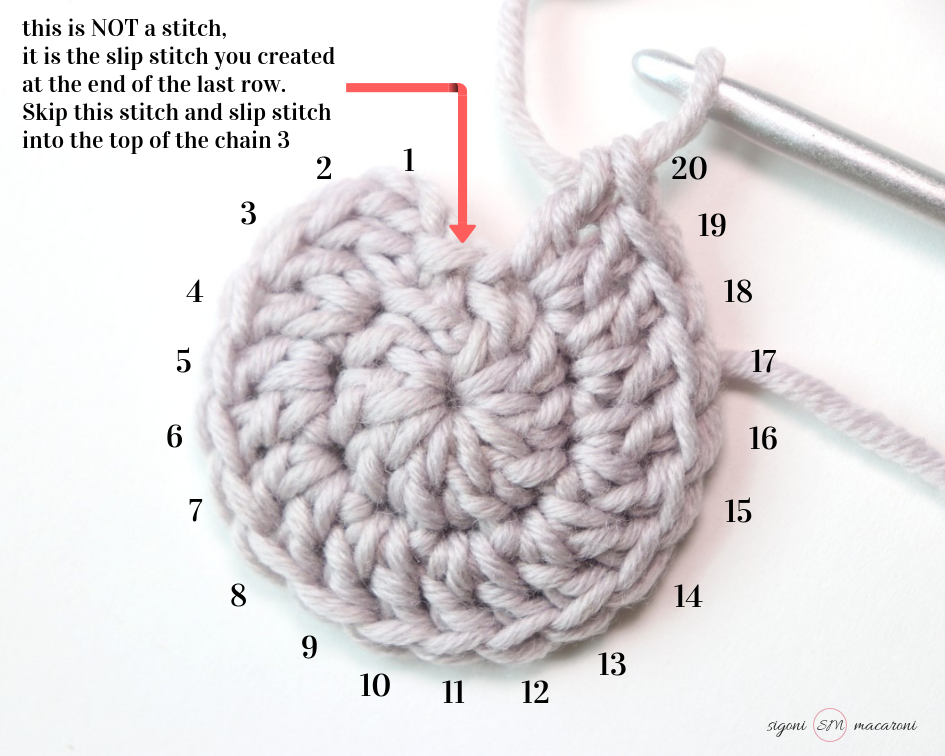
When you reach the end of a round, there’s another important step to remember.
If you’re working in continuous rounds your last stitch will be right before the first stitch of the round.
If you’re working in joined rounds, you will have a slip stitch mimicking a real stitch. Do not count this as a stitch in any round. You will skip over it and slip stitch to the first stitch of the round to join.
Counting Rounds
When counting rounds, it helps to know the typical increases to crochet a flat circle. So let’s break this down.
- – First Round: Crochet a certain amount of stitches into a magic circle or starting chain
- – Second Round: Increase in every stitch.
- Two stitches in each stitch around
- – Third Round: Increase in every other stitch.
- 2 stitches in the first stitch, 1 stitch in the next stitch. 2 stitches in the next stitch, 1 stitch in the next stitch, and so on.
- – Fourth Round: Increase every 2 stitches.
- 2 stitches in the first stitch, 1 stitch in each of the next 2 stitches. 2 stitches in the next stitch, 1 stitch in each of the next 2 stitches, and so on.
- – Fifth Round: Increase every 3 stitches.
- 2 stitches in the first stitch, 1 stitch in each of the next 3 stitches. 2 stitches in the next stitch, 1 stitch in each of the next 3 stitches, and so on.
For example, this is how it would work with double crochet:
- – First Round: 10 total DC
- – Second Round: 20 total DC
- – Third Round: 30 total DC
- – Fourth Round: 40 total DC
- – Fifth Round: 50 total DC
Each round continues growing in this way (adding one more stitch in between each increase) until you’ve reached the size you’re going for.
If you need more of an in depth explanation, I’m going to tell you again to check out the article I wrote about counting stitches and rows. If you scroll to the bottom you’ll find everything about counting in the round and I cover counting for all three basic stitches.
Crocheting in the Round FAQs
Q1: How do I make the sides of a basket stay up straight?
There are a few different things you can do to solve this problem. Here are some tips you can try:
- 1. My favorite way to make baskets is holding double strands. This will make the fabric more stiff and helps the edges of the basket stay up. I do this with my Easy Modern Storage Basket pattern. If you haven’t seen it, you can find it here.
- 2. Another way is by using a smaller hook than the yarn suggests. This again makes the fabric more stiff so that it stands up straight. I suggest going down just one hook size to see if that helps.
- 3. Also it’s good to note that sometimes the sides of baskets can look floppy, but when you put something in the basket, like yarn, it will help them stay straight.
- 4. T-shirt yarn is also a great alternative to a sturdy basket. My favorites are Paintbox Yarns Recycled T-Shirt Yarn and Hoooked Ribbon XL. Skio to Q5 to hear some more of my favorite yarns for baskets
- 5. After you’re done making the base, crochet into the BLO for one round and then start the sides of your basket
- 6. Line your basket with plastic canvas – here’s a tutorial for that.
Q2: How do you make a magic circle? Is there a good alternative if I can’t figure it out?
I covered this earlier, but I wanted to talk a little bit about it here too.
If you’ve tried the magic circle and you just couldn’t get it, I’ve been there. It’s tricky to learn at first but it’s so worth it in the end. Do me a favor and give it one more try before you give it up forever.
Here’s the tutorial – there is a picture and video tutorial. If one doesn’t work for you, try the other.
The alternative to a magic circle is the chain method that I’ve outlined above.
Q3: Do you have any tips on attaching body parts to amigurmi?
I don’t have any videos on this at the moment but I do plan on coming out with some in the future.
My best tip is to use pins to keep the body parts in place as you’re sewing them together. Also, when you are sewing on the head of an animal or doll, don’t use the first row of stitches. Sew them on a couple rows outside of the center.
Here’s a video tutorial by Repeat Crafter Me on sewing together amigurumi parts.
I also have her book Crochet Cute Critters (linked under Crochet Books) and it’s my absolute favorite when it comes to amigurumi. I’ve made at least 6 of the animals in her book. They’re simple to make and soo cute!
Q4: What’s the best way to embroider faces on amigurumi?
My friend over at LePetite Saint Crochet makes some of the most beautiful amigurumi! She has an entire playlist on her YouTube channel with lots of tips for working with amigurumi. You can find it here.
If you don’t want to go through the whole playlist, at least check out her video on Amigurumi Mistakes. There’s lots of goodies in there!
Here are a few other videos that you might find helpful:
Q5: What are the best yarns to use for baskets?
Personally, I think the best yarns to use for baskets are chunky acrylic or cotton yarns. If you don’t have a chunky yarn, you can hold double strands of a medium weight yarn with a smaller hook and this will help to keep the sides of your basket straight.
Here are some of my favorite yarns to use for baskets:
FREE PATTERN FRIDAY
This Friday I will have a new video tutorial for an older pattern and we’ll be working in the round to make it!
Do you like ice cream? Because we’re going to be making an ice cream cozy. These are fun to have if you looove ice cream (like me!), but they’re also great as gifts or even to sell at craft fairs!
You can find the ice cream cozy pattern now on my website, but the video tutorial won’t be available until Friday 2/19.
I’ll send out an email on Friday when it’s out OR you can subscribe to my YouTube channel and hit the notification bell to be notified as soon as it comes out!
Days
Hours
Minutes
Seconds
JOIN THE LCE FACEBOOK GROUP
The Crochet’dy Bunch // Limitless Crochet Everyday
I created the Facebook Group, The Crochet’dy Bunch as a space for those who love crochet and I’ve decided to group it together with the Limitless Crochet Everyday project. This is a place where we connect, share work, get your questions answered, and support each other. I hope you’ll join us!
Please don’t forget to agree to the group rules! It’s so important to me that this is a supportive, loving community, and I won’t tolerate any negativity.


JOIN THE WEEKLY NEWSLETTER!
Sign up to learn how to crochet through your emotions and gain access to our private Facebook group where you can get answers to all of your questions!
