Spring Clean Your Yarn Stash 5 Easy Steps | How To Organize Your Yarn Stash
If we can set a time for spring cleaning, we can set a time to find ways to organize our yarn stash. In today’s post we’re going to switch gears and learn how to spring clean and organize your yarn stash in 5 easy steps! Getting your yarn organized is much like spring cleaning because it takes longer than just a day. We have to take a good look around our crafting space, sort our yarn stash and supplies into different categories, then find a place to put it all!
That’s right. You and I both know that yarn is extremely addicting. Here are some signs you might need to spring clean your yarn stash:
- When the yarn hoarding begins and your craft space becomes a giant, unorganized mess.
- There are skeins upon skeins overflowing your shelves
- There are unfinished wips glaring at you from the corner screaming, “Finish me!”
- You have to buy new crochet hooks because they mysteriously become MIA.
- Your floor has become a yarn jungle.
You don’t realize the yarn addiction is real until it’s too late!
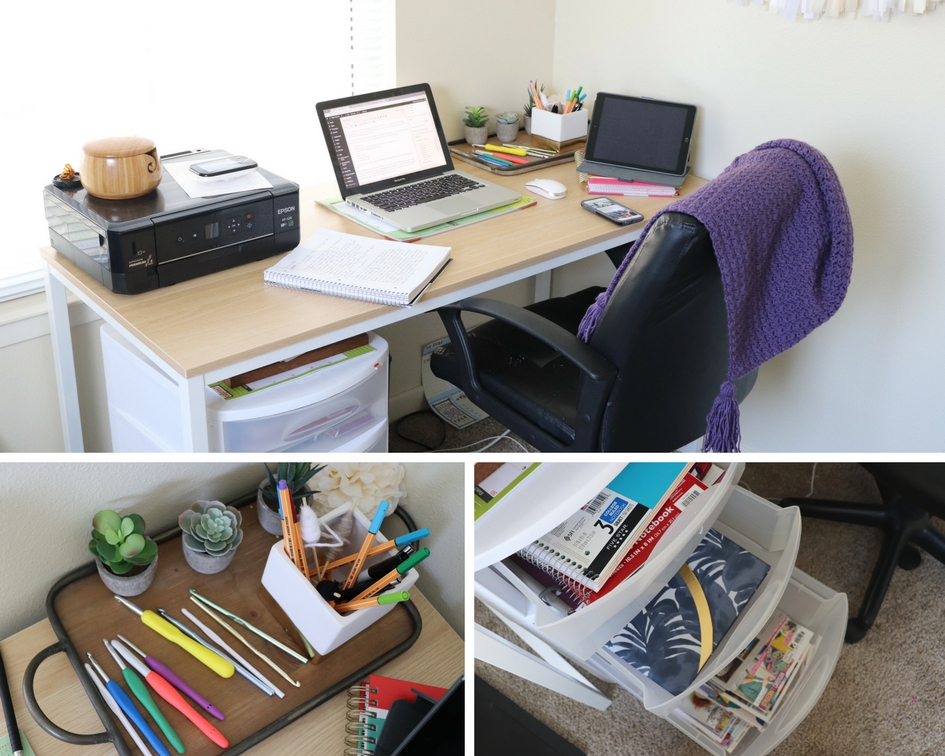
A couple of weeks ago I looked at my craft room and thought, “Enough is enough. I need to get this under control.” I wasn’t using my craft room to work, although I wanted to be. I would use it as a place to store my yarn and take my photos. Then I was out of there, leaving my mess behind. I am probably the worst organizer in the world, but I was determined to turn this craft room into an office and not just a storage space so I needed to find out how to organize my yarn stash.
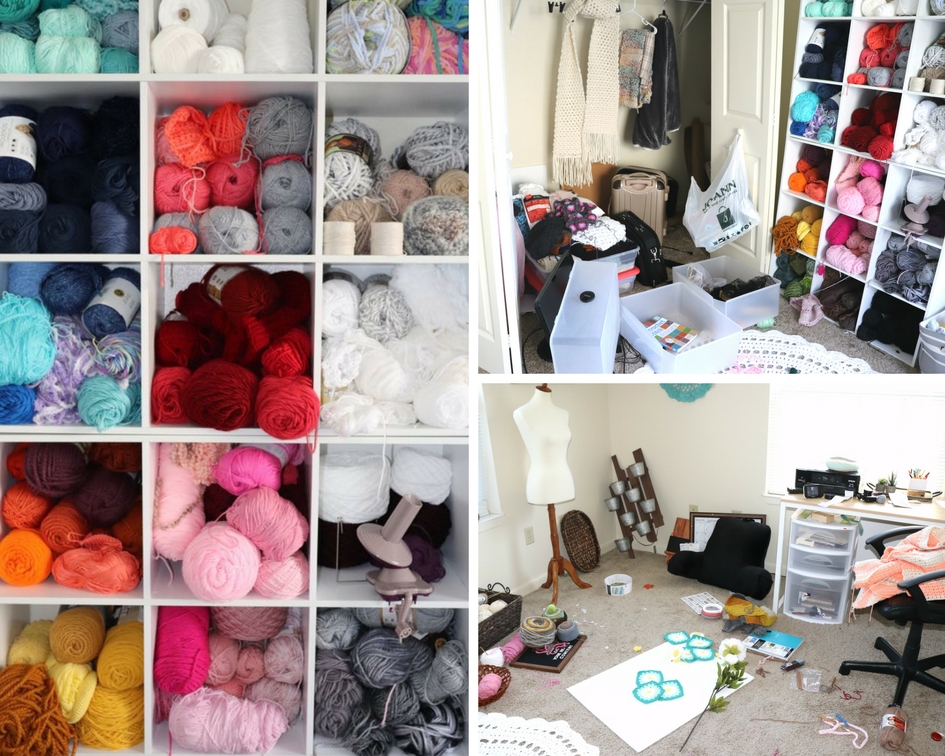
*Warning* The before is heinous. Don’t judge me.
You don’t need to have an entire craft room for these spring cleaning tips to apply. Your craft space can be any area where you store your yarn or craft supplies, big or small, in any corner of the house. For example; a corner in your living room behind your couch (me at our last apartment), the bookshelves surrounding your TV, or even any plastic bins or suitcases you can find and stuff them into.
No matter the size of your craft space, follow these steps and you will spring clean your yarn stash in no time. These are the exact steps I took.
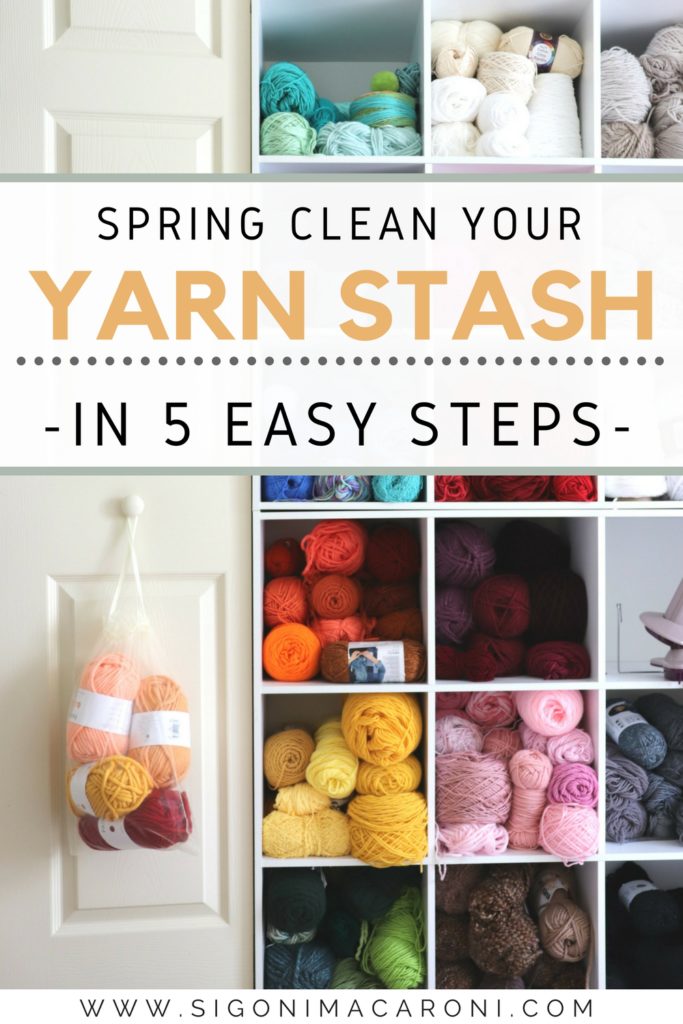
The Spring Clean Your Yarn Stash Series
Because Spring Cleaning is a process, I’m going to create a three-part series over the next three weeks, one post per week. That way you will have a week to focus on each task. For today, Part 1, you will learn the exact steps you need to take in order to get your craft space decluttered and organized. Part 2 will help you decide what to do with all of your usused yarn, scraps, or finished projects. Finally, Part 3 will be a roundup of some great organization, craft supplies, and DIY projects that I, myself, use or wish I had.
I’ve decided to split it up one week at a time so that you can focus on the task at hand.
Spring Clean your Yarn Stash & Get Organized in 5 Easy Steps
1. Take a Good Look Around Your Space
Take a picture. You’re going to want to see the amazing transformation your craft room is about to go through after you go through these ways to organize your yarn stash. Remember, I just took these same steps a few weeks ago and you will want to have that comparison. (Plus, it’s exciting!) Above I showed you my horrible ‘before photos’. You can see my ‘after’ photos at the bottom of this post!
Grab a pen and a piece of paper. Write down what you don’t like about your craft space. Anything you don’t like, go ahead and set it aside in a pile or a big box. This might make things easier for you to sort through later.
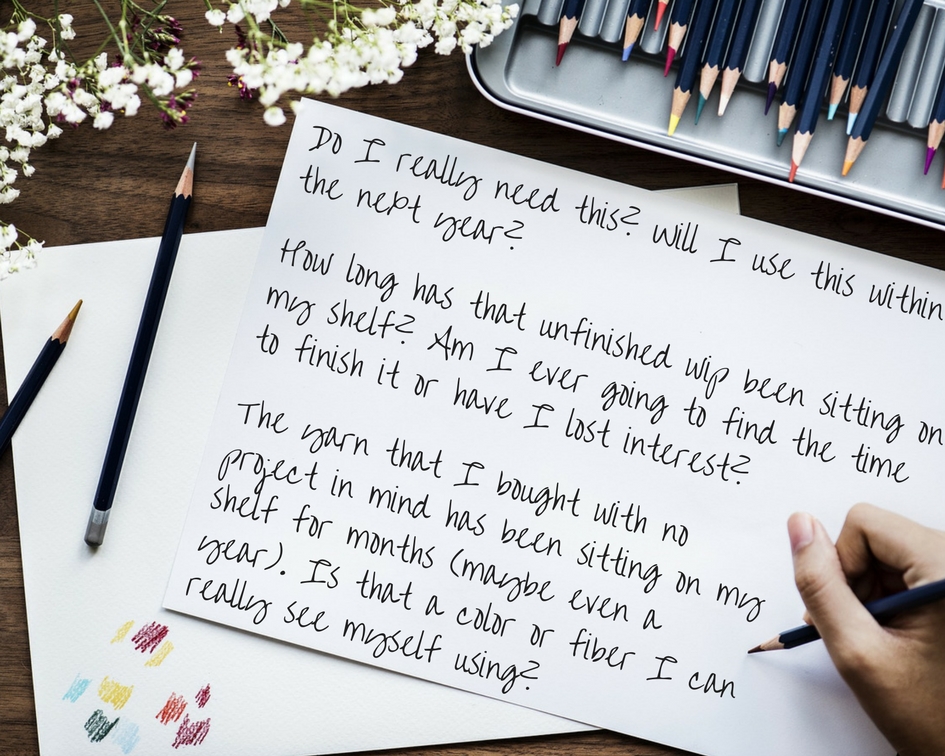
After you take a good look around, ask yourself the following questions about everything in your space. For example; skeins of yarn, unfinished wips, finished projects, craft supplies, shipping boxes, notebooks, etc.
- Do I really need this? Will I use this within the next year?
- How long has that unfinished wip been sitting on my shelf? Am I ever going to find the time to finish it or have I lost interest?
- The yarn that I bought with no project in mind has been sitting on my shelf for months (maybe even a year). Is that a color or fiber I can really see myself using?
If your answer is no to any of these questions, throw it in the pile. Go through every shelf, every drawer, every notebook.
I know it’s hard to let things go. Trust me. It made me cringe to throw away certain things. But in the end it’s worth it. This is something you have to do in order to Spring Clean your yarn stash, get everything organized, and stir up some more creativity.
I’m not telling you to throw anything away yet. Just set it aside for now.
2. Divide and Conquer
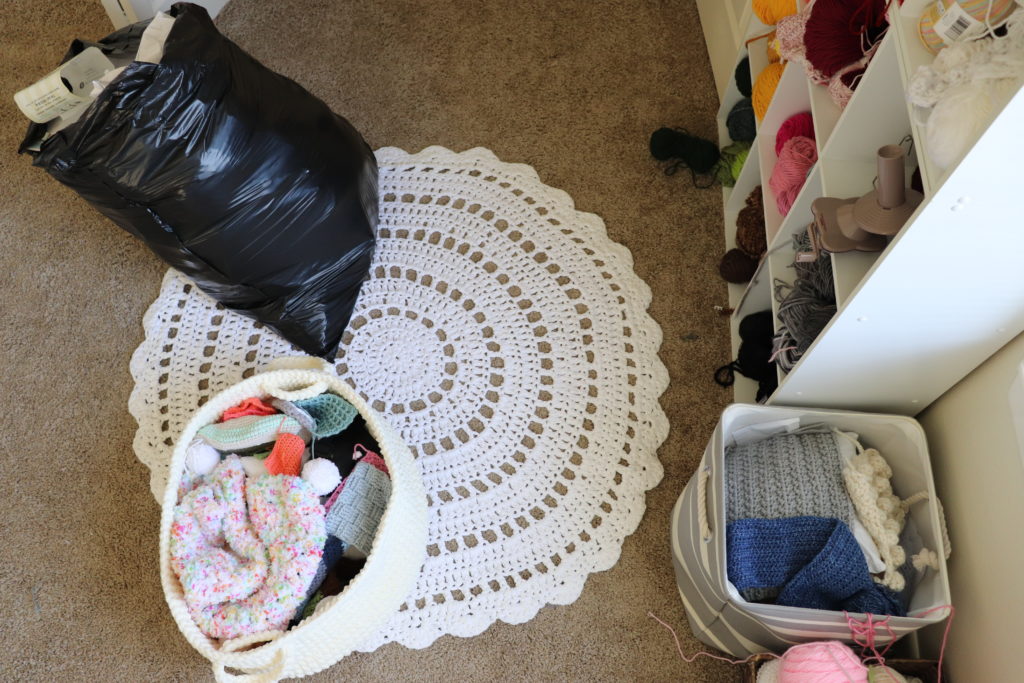
Now it’s time for the hard part. Actually throwing things away. *Gulp*
For all of the items you just set aside, we’re now going to divide them into smaller, categorized groups. You can separate these piles into plastic containers or just a couple of trash bags (that’s what I did!). One pile will be for trash, another to sell/trade, and the third will be for donation.
Did you know that there are organizations other than thrift stores that would gladly accept yarn donations? These can be finished projects or even skeins of yarn that you never got around to using. I know you have tons of those 😉 In Part Two of the Spring Clean Your Yarn Stash series, you will find a list organizations that would gladly take that yarn off your hands!
When it comes to the trash pile, I know you don’t like throwing away something you paid for. I know throwing away yarn is like ripping a page out of a novel. Both instances make me cringe. However, if you’re determined to spring clean your yarn stash, you gotta do what you gotta do. Once that tangled mess is out of your craft space, you will feel a weight being lifted off your shoulders.
If you have an unfinished wip that you know you won’t finish, you can also frog the project and save the yarn to use at a later date.
Let’s Be Real
If you just can’t bring yourself to throw away old projects, set them aside in a plastic storage bin to either donate at a later date or do something with in the future. I know that this is pretty much counteracting the whole spring cleaning process, but as amazing as crochet is, it is time consuming.
Throwing away something you worked so hard on can be hard especially if it’s something you feel sentimental about. I understand. Set it aside in a plastic container so that it’s at least put away and sometime soon you will find the perfect person to gift it to or maybe you can put together a shadowbox of some sort.
Don’t let my understanding fool you though! We’re still decluttering, so please don’t think this way about every project. You gotta let some things go!
3. Pick an Organization & Mark your Calendar
After you’re finished putting together your donation and sell/trade piles, you’ll need to figure out what exactly you’ll be doing with them. Head over to Part Two to learn more about donation centers you don’t really hear about or to learn about other places where you can sell or swap your yarn.
Once you figure out where you’ll be donating your stash, pick a day you will head over to the donation center or post your items for sale and mark it on your calendar. Don’t let it sit in your house for days or even weeks. I know the feeling of, “Eh, I’ll just do it tomorrow or maybe later this week” and then never getting around to actually going. Pick a day and stick to it.
Like I said before, the moment it’s out of your space you will feel an instant sense of relief. The same goes for your trash pile!
4. Everything Needs a Place
Take a look around. Do you see anything left that doesn’t belong in your crafting space? If so, go back through the previous steps and get rid of any other junk or place it somewhere else in your house if it doesn’t belong in your craft space.
If not, awesome. Let’s move on.
It’s time to get organized. Every single thing in your craft space needs a place. If you need to, dump all of your craft supplies into one pile and start sorting. Your piles could look something like this:
- Crochet hooks
- Craft supplies (scissors, tape measure, yarn needles, stitch markers, etc.)
- Crochet Books/Magazines/Printed Patterns
- Wips
- Skeins of yarn
- Notebooks/Planners
- Inventory lists/Order receipts (if you’re an Etsy seller)
- And whatever else
If you can think of any other supplies, make a pile for that. Then sort them all back into your storage shelves, containers, desk, and/or rolling cart. So nice and neat, huh?! If you don’t have enough space for something, Part 3 of the Spring Clean Your Yarn Stash series has a roundup of storage supplies that I use myself to make things neat and easy to find.
5. The Fun Part – Decorating!
To be completely honest, I haven’t done much decorating in my creative space as of yet. Though I am beyond excited to finally be at the point to where I can start hanging up some wall decor. I will tell you one thing though, my favorite place to buy decorations is Hobby Lobby and Target.
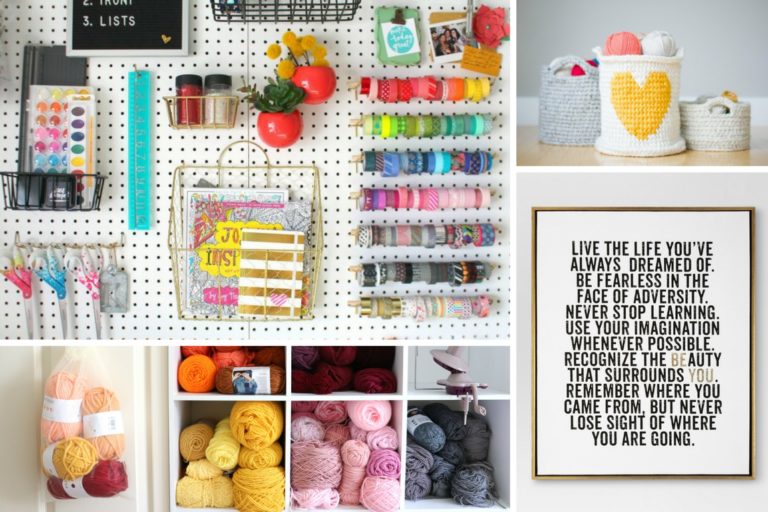
In Part 3 of the Spring Clean your Yarn Stash series, you will find a ton of decorative ideas from DIY projects to some of the things I currently have in my office space.
Your Assignment
As I’ve explained, this is Part 1 of the three-part Spring Clean Your Yarn Stash series. Part 2 will be out next Thursday, April 5th. **Update: It’s out! Check it out here.
Work on these five steps throughout the next week. While you’re working on your craft space, set aside your pile of unwanted yarn, wips, scraps, and supplies. Then on April 5th you will know exactly what to do with them.
Now take a step back and admire your new craft space. I can see that grin! Don’t you feel relieved? Now that everything is organized and looking magnificent, doesn’t it just make you want to create?!
It’s time for you to see my very beautiful ‘after’ photos! What do you think? If I can do it, so can you!
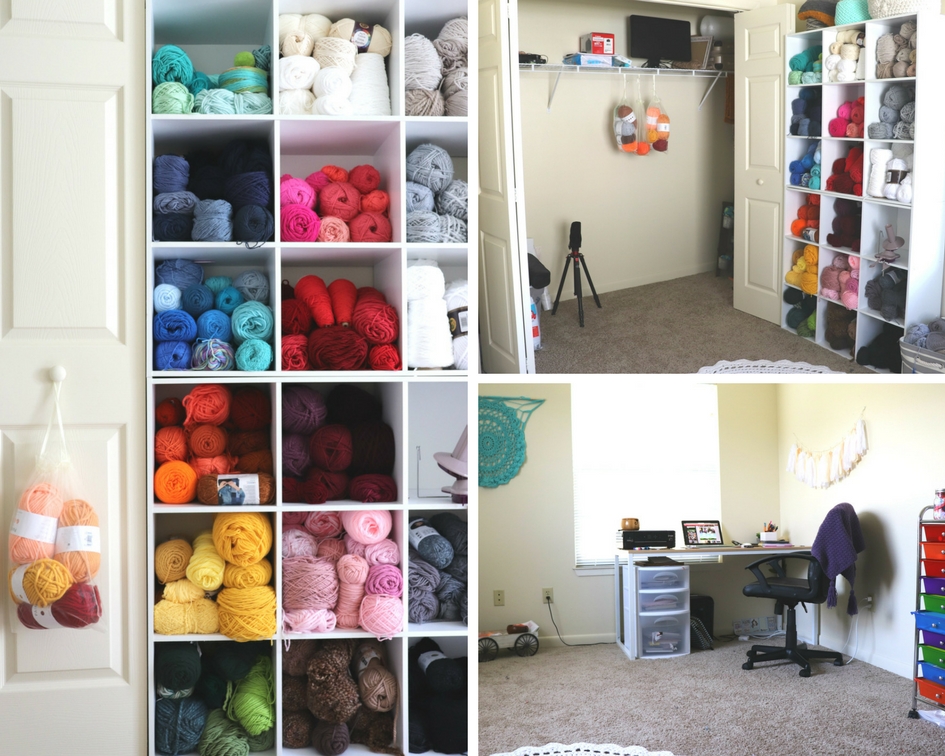
If you’re in a creative rut, or you’ve lost your crochet ‘mojo’ as they say, decluttering your craft space will really bring those creative juices back. As soon as I finished, I felt like the colors of my yarn really popped out and screamed project ideas. I’ve been designing nonstop since! I hope the same happens for you!
After all that hard work, grab some hooks, turn on a movie, and relax with the craft that de-stresses you best. 😉
If you’re in need of a mindless project, I suggest the Suzette Baby Blanket. If you’re not expecting a baby, turn it into a chunky afghan! I would LOVE to see that and I actually might make one myself.
Do you have any additional tips for organizing your craft space? How do you store your yarn? Where do you work your magic??
Next in the Spring Clean Your Yarn Stash series is what to do with your unwanted yarn and scraps! You can donate your unwanted yarn to organizations you wouldn’t normally think of, use them for crafts, or even exchange them with fellow crocheters.
The Spring Clean Your Yarn Stash Series:
- Spring Clean Your Yarn Stash in 5 Easy Steps – this post
- 17+ Ideas to Destash Your Yarn Stash
- Organize Your Craft Room Roundup


Where did you get the tall white cube shelf?! Maybe if I get one I’ll actually want to start my yarn organizing. 😝
Hahah that’s EXACTLY how I was! You should have seen my stash before. I was stuffing them into random suitcases! Lol. But I actually bought two 9-cube shelves from Amazon and stacked one on top of the other. You can find them here: https://amzn.to/2uHjySv (that’s an affiliate link, but you don’t have to use it)
They are a little on the pricey side on Amazon so you might be able to find a cheaper set at Walmart! I believe they have them there. Also, on April 12th I’ll be posting a roundup of organization and storage supplies and a lot of the DIY projects are amazing if you want to wait for that! 😊❤️