The PERFECT Solid Granny Square Pattern + Your FAQs Answered | Crochet Tutorial For Complete Beginners
Have you ever made a solid granny square and when you were finished, realized it was lopsided? Not today! Today I’m going to teach you how to make the PERFECT solid granny square pattern and you’re finally going to love making them. Plus, I will also answer some of the most frequently asked questions about granny squares. This crochet tutorial for complete beginners will walk you through how to make the perfect solid granny square with both a picture and video tutorial. So what are we waiting for? Let’s get started!
Some of the links below are affiliate links. Please see my disclaimer for details.
First of all, Happy Granny Square Day!
If you’ve been hearing a lot about granny squares this month and didn’t know why, it’s probably because the love for granny squares is so strong that some people make it last a month rather than just a day.
Did you know that there are thousands of different kinds of granny squares out there? No matter what kind of design is on the inside, if it ends in a square, it’s basically called a granny square.
Some of the most common types of granny squares are the:
- Traditional Granny Square
- Solid Granny Square
I believe these are the most common because they are the original granny squares and they’re more beginner friendly than some of the more complicated ones out there.
And before we move on to the pattern, I wanted to first answer some of the most frequently asked questions about granny squares.
Solid Granny Square Pattern FAQs
Why are my granny squares not square?
When it comes to your granny square not looking like a perfect square, this is usually due to your stitch count. Counting your stitches with solid granny squares is very important and could make or break your project.
If your stitch count is right, tension could be another culprit. If your stitches are too loose, it might look a little lopsided. If this happens, try going down a hook size to see if that helps.
If both your stitch count and your tension look right but your square is still off, blocking would be your best option to straighten those edges out.
Why is my crochet granny square curling?
When your crochet granny square starts to curl, it has to do with tension, your hook size, or your corner stitches. When crochet curls, it’s usually because your stitches are too tight. Try going up a hook size and see if that helps.
Another thing to look at is your corner stitches. With this tutorial in particular, each corner has four double crochet and a chain of 2 to separate them, creating the corner space. If you forget to add the chain 2 in any corner or all corners, your granny square will start curling.
Which is the right side of a granny square?
When crocheting a solid granny square, we are continuously working each round on the same side. This would be considered the right side.
One tip to combat keeping your squares straight (especially for traditional granny squares) is to turn your work after each row. If you do this then your granny square would really be reversible and you can choose whichever side is prettier that you want to be the “right” side.
How do you close a granny square?
To close a granny square you will slip stitch to the beginning chain and tie off your work. I will be covering this within the photo and video tutorial below and I will also share how to make your finished granny square look neat and seamless.
How do you join granny squares together?
There are many many different ways to join granny squares together. Some techniques require a tapestry needle, but if you’d rather use your crochet hook, there are ways to do that too.
There are tons of videos that you can find over on YouTube. And there’s also a really great class on Creativebug called Granny Squares Baby Blanket that teaches you how to make a blanket from start to finish. Plus they have a free trial if you’ve never tested them out before!
How do you start a granny square for beginners?
There are actually three different ways to start a granny square, just as with any crochet project in the round.
- the magic circle
- turning your chain into a ring
- working into the beginning chain
The tutorial below will cover how to start your crochet granny square by first turning your chain into a ring and working your stitches into that ring.
How many granny squares do I need for a blanket?
This all depends on the granny square pattern and the size of your desired blanket. What I like to do is grab some graph paper and draw out my design.
If your finished granny square is 6 in. x 6 in., and you want your finished blanket to be 42 in. x 54 in., you would need a total of 63 squares, 7 squares wide and 9 squares long. I hope that makes sense!
How do you crochet a small granny square?
Unless you’re making a granny square with a fancy design in the center, you can really make your squares as big or as small as you’d like. With the perfect solid granny square pattern below, I stop mine at Round 5, making it around 5 inches.
If you wanted to make your solid granny square smaller, you could stop at round 3. If you wanted to make your solid granny square larger, keep going past round 5 until you reach the length you like.
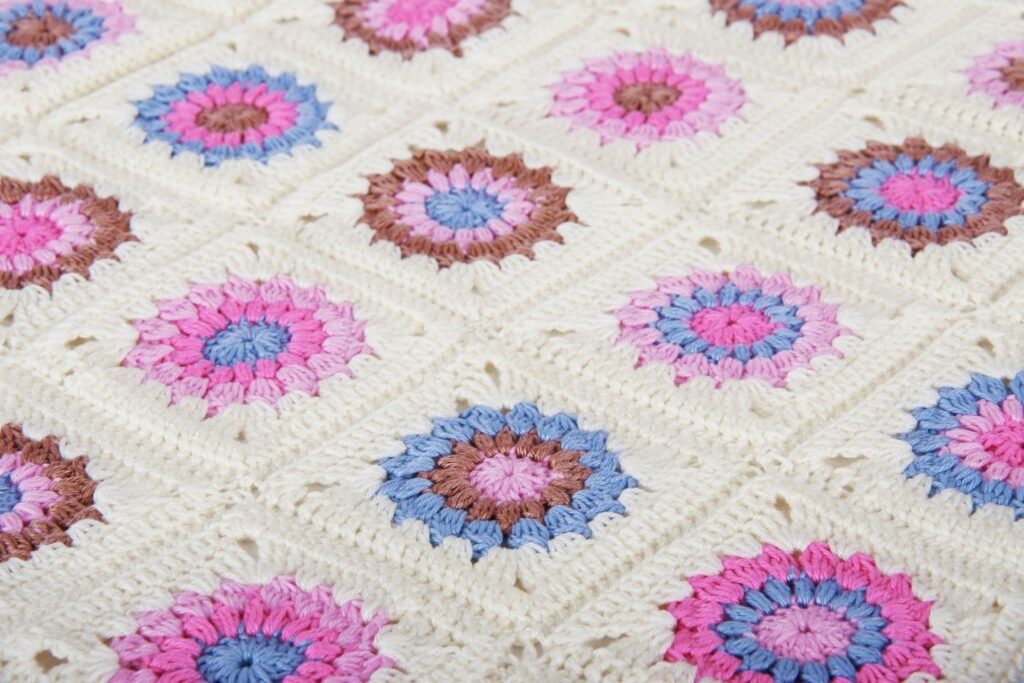
What can I do with a granny square?
You know what’s funny? I’ve actually never created a finished project using granny squares. I often ask myself what I can do with a granny square besides make a blanket, and then I get caught up in all of the things I can make and end up moving on to something else. But there are tons of things you can make with granny squares!
You can, of course, make a blanket any size. You can also take the tutorial below and use them as coasters!
I have a few granny square crochet books that I’ve purchased over the years and one of them has this really neat section with hand drawn ideas of the different things you can make. It reminds me of a brainstorming page. So based on this page, you can make:
- belt
- bathing suit
- pot holders
- purse/bag
- towels
- earrings
- a pocket for your shirt
- rug
- wall hanging
- & as you can tell by the photo below, a whole lot more.
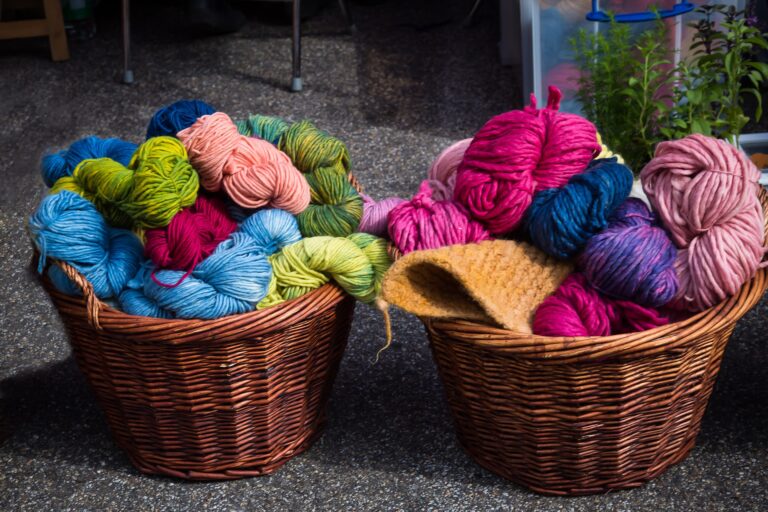
What type of yarn is best for granny squares?
The best type of yarn to use for granny squares depends on what you’re making. If you’re making a coaster or washcloth, I would use a cotton blend yarn like Lion Brand 24/7 Cotton. If you’re making a blanket, I would use a soft acrylic blend yarn like Paintbox Yarns Simply Aran or I Love This Yarn! by Hobby Lobby.
What is the best size crochet hook for granny squares?
The best size crochet hook for granny squares always depends on the yarn you’re using. If your chosen yarn recommends a 5mm crochet hook, I would use a 5mm crochet hook. If your stitches seem too tight or your work starts to curl, I would go up to a 5.5mm crochet hook. These are the only crochet hooks I use.
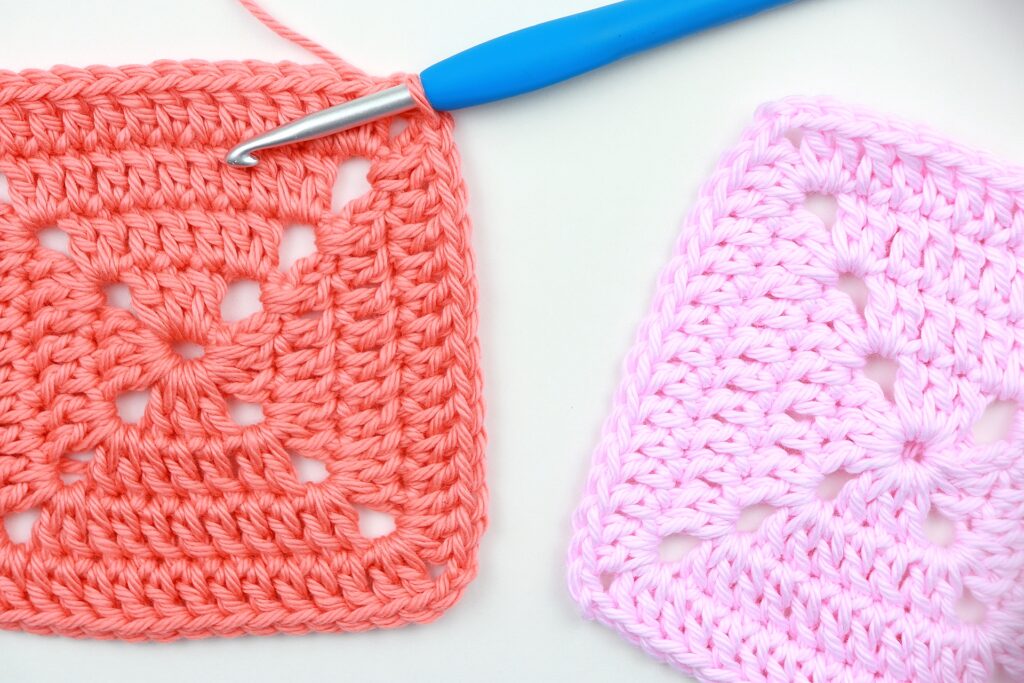
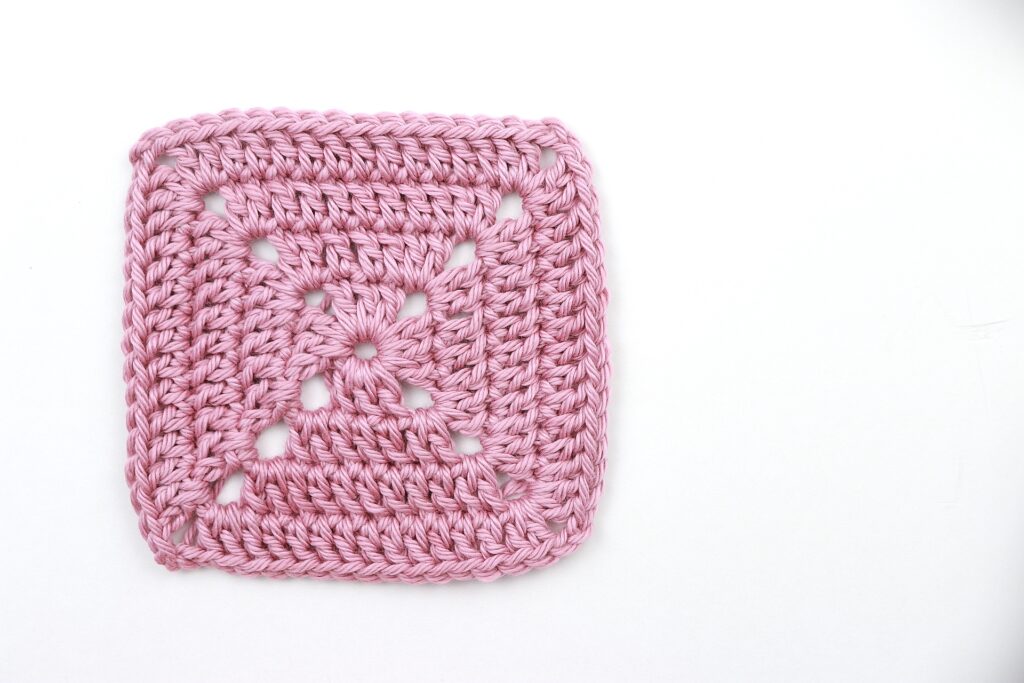
What Makes This The PERFECT Solid Granny Square?
By now you’re probably wondering, “Why is this called the perfect solid granny square pattern?”
Normally, I wouldn’t use that word because I don’t want you to come here and learn something that’s anything less than perfect. But when I was finished with these squares, they looked perfect! Here are some reasons why I love this square and why I call it the perfect solid granny square pattern.
- The seam is barely visible and that is my favorite part of this square. Yes you can still see it if you really look for it, but when you’re looking at a finished granny square project as a whole, the seam isn’t distracting. Let’s test this out. If I laid it out in front of you, could you tell me which direction the seam is?
- The gaps are there, but not too big. Some people don’t like gaps in a granny square, but I think the gaps in each corner give the square character. At the same time though, I didn’t want them to be too big.
- The end result of the perfect solid granny square pattern is a perfect square. There’s no leaning like with the traditional granny square. The edges are straight and it finishes nice and neat.
One thing that you have to remember when making these solid granny square patterns is that counting is important.
Your solid granny square will not look like a granny square if your stitch count is off.
While we’re going through this tutorial though, I will give you some tips on counting along the way.
The PERFECT Solid Granny Square Pattern Notes & Materials
Materials Used:
- Medium weight yarn (#4) – I used I Love This Cotton! by Hobby Lobby
- 5mm Crochet Hook
- Scissors
- Tapestry needle for weaving in ends
Pro Tip: You can use any weight yarn for this project with the crochet hook size that is recommended on the label. Just remember that the size of your solid granny square pattern will be different.
Abbreviations Used:
- Ch – Chain
- Sl st – Slip Stitch
- Dc – Double Crochet
- Ch2 Sp – Chain 2 Space
- Beg – Beginning
- Rep – Repeat
| US TERMS | UK TERMS |
| Double Crochet | Treble Crochet |
Notes:
- The ch 3 at the beginning of each round always counts as a double crochet
- If you don’t love working into a chain ring, you can also start this square with a magic circle
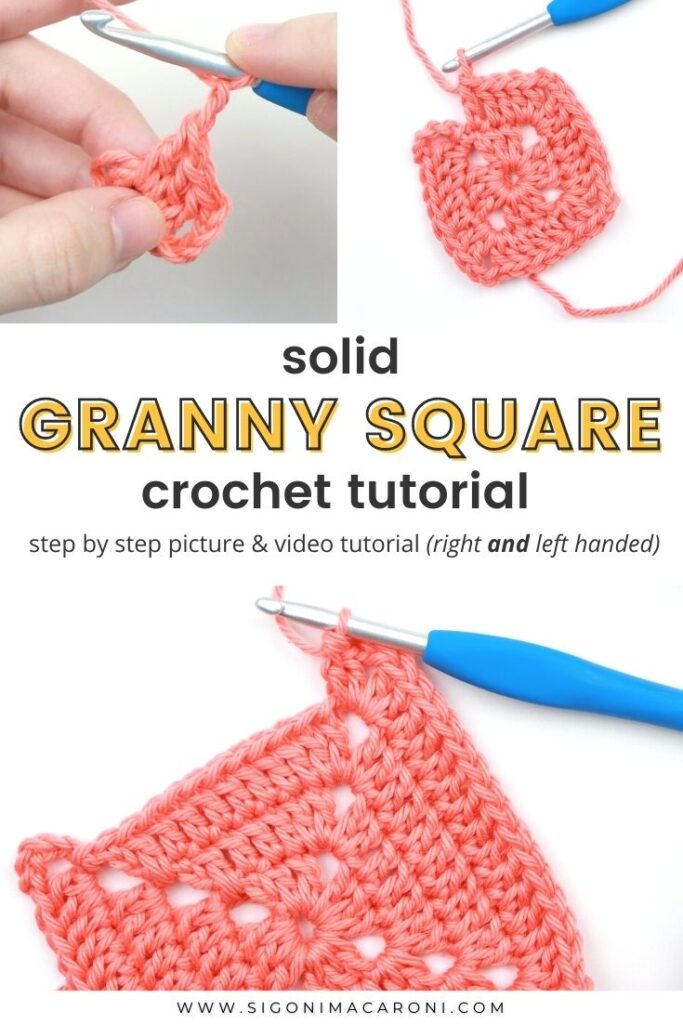
- After going through the following picture tutorial, check out the video tutorial for further guidance.
The PERFECT Solid Granny Square Pattern Instructions
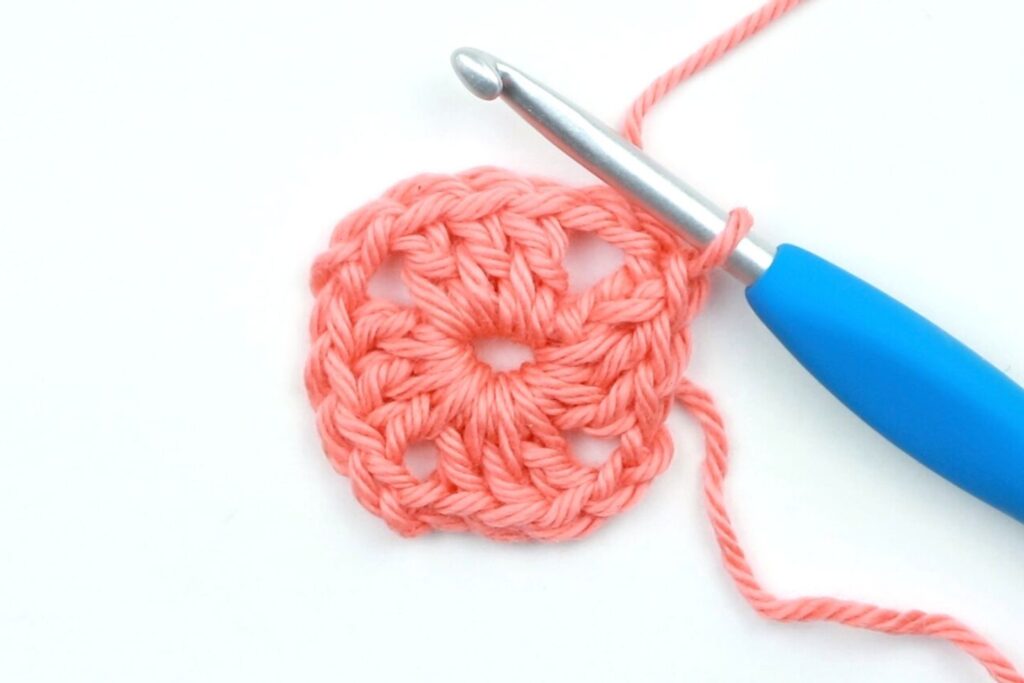
Ch 4, sl st to first ch to form ring (alternatively, you can create a magic circle)

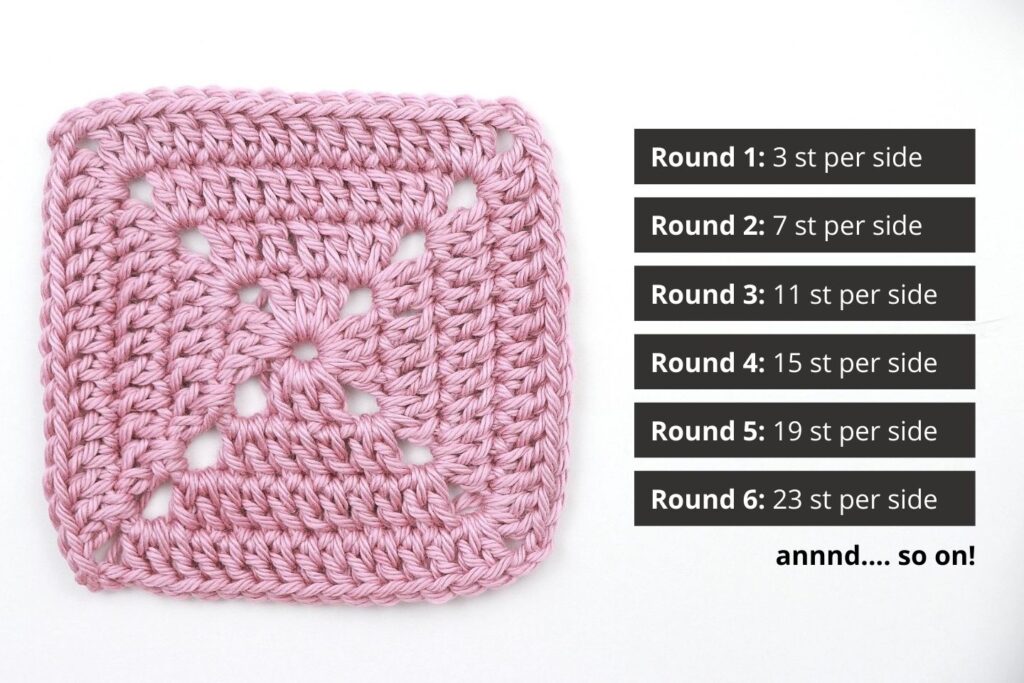
Round 1: Ch 5 (counts as dc and ch 2), [3dc into ring, ch 2] 3 times. Ch 2, 2dc into ring, sl st to 3rd ch from beg chain. (12dc total; 3dc each side)
Round 2: Sl st to ch2 sp, Ch 5, 2dc into same sp. *Dc in each of the next 3 st, [2dc, ch 2, 2dc] in corner ch2 sp. Rep * until you reach the last side. Dc in each of the next 3 st, dc in first space where you created your ch 5. Sl st to 3rd ch. (28dc total; 7dc each side)

Round 3: Sl st to ch2 sp, Ch 5, 2dc into same sp. *Dc in each of the next 7 st, [2dc, ch 2, 2dc] in corner ch2 sp. Rep * until you reach the last side. Dc in each of the next 7 st, dc in first space where you created your ch 5. Sl st to 3rd ch. (44dc total; 11dc each side)
Round 4: Sl st to ch2 sp, Ch 5, 2dc into same sp. *Dc in each of the next 11 st, [2dc, ch 2, 2dc] in corner ch2 sp. Rep * until you reach the last side. Dc in each of the next 11 st, dc in first space where you created your ch 5. Sl st to 3rd ch. (60dc total; 15dc each side)
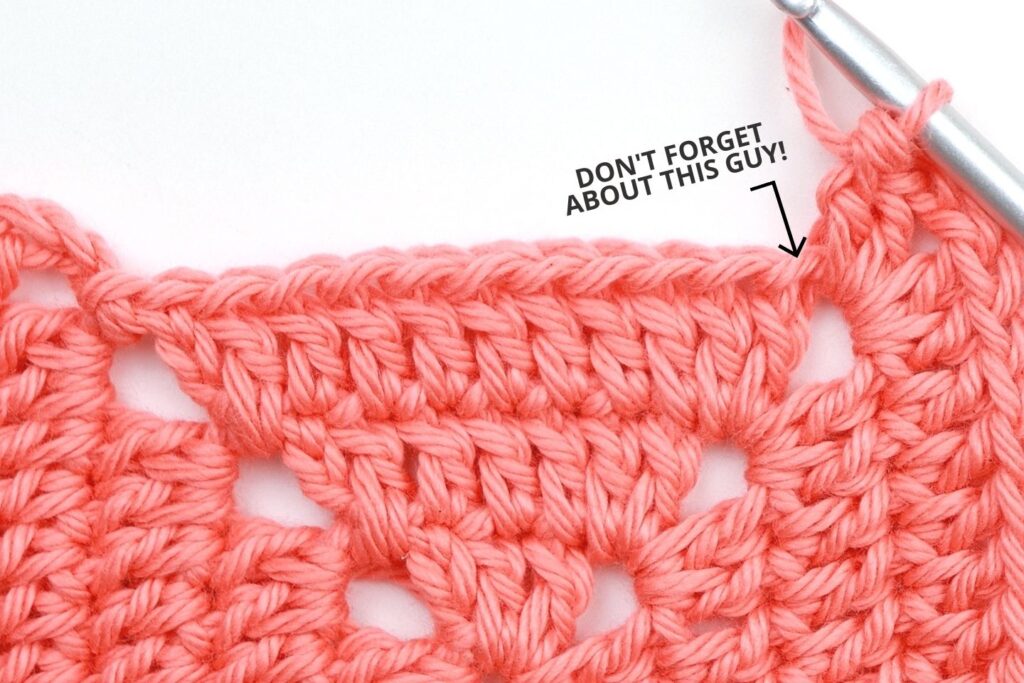
If you’re stopping here like I did, sl st into next space and tie off your work.
If you’d like to make your square bigger, just continue working in this same pattern for each round!
Thank you so much for joining me in today’s tutorial for the PERFECT solid granny square pattern!
If you have any questions that weren’t answered in the Solid Granny Square Pattern FAQs above, let me know in the comments and I’ll get back to you as soon as possible.
What will you make with the Perfect Solid Granny Square?
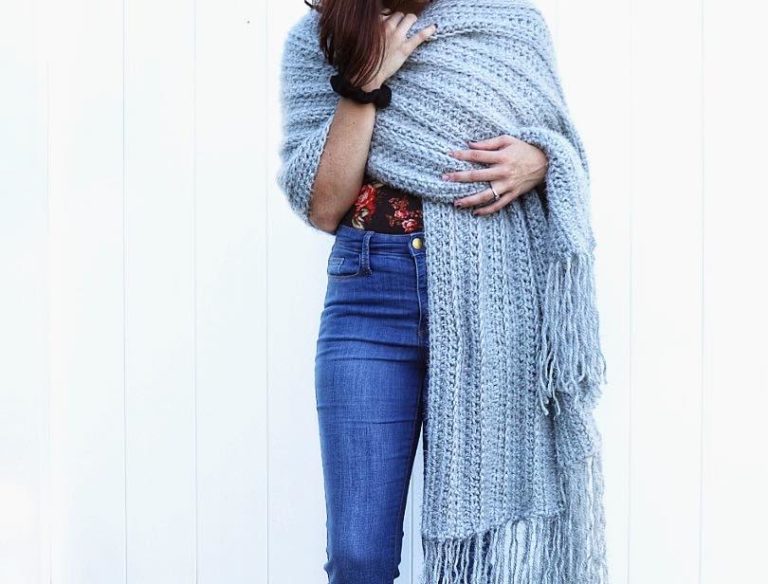
One Row Repeat Rectangular Shawl Crochet Pattern
Easy Single Crochet Basket Pattern for Beginners
How To Crochet Easy Square Blanket: Free Pattern
Easy Crochet Mrs Claus Amigurumi: Free Pattern

Black Crochet Santa Claus Amigurumi: Free Pattern