How To Photograph your Crochet and Make Yourself Stand Out on Instagram
As I announced last week, I’m going to be hosting the Happy Hooker Instagram Challenge which started TODAY, March 1st! If you haven’t heard about it yet, you can find out more information here or head on over to the Facebook Event and let me know if you’ll be joining in! I thought this would be a great time to give you some tips on how to photograph your crochet and really stand out on Instagram!
These tips are great if you’re trying to grow your following for your business, your blog, or even if you’re just trying to take some better pictures! These tips will be geared more towards Instagram, however, if you have an Etsy shop of your own, some of these tips will help you out for that as well!
How to Photograph your Crochet
General Photo Tips & Editing
Natural Light
“Lighting is key — like any form of photography, no amount of filtering or app-editing will save a photo that’s poorly lit. Natural light always reads better, so if you’re outdoors, early morning, late afternoon and overcast days are prime times for shooting.” – Margaret Zhang
Finding a way to take advantage of natural light is the first thing any photographer will tell you to do. Natural light is so important to highlighting your handmade item’s true colors. It also gives your photo higher quality and better detail.
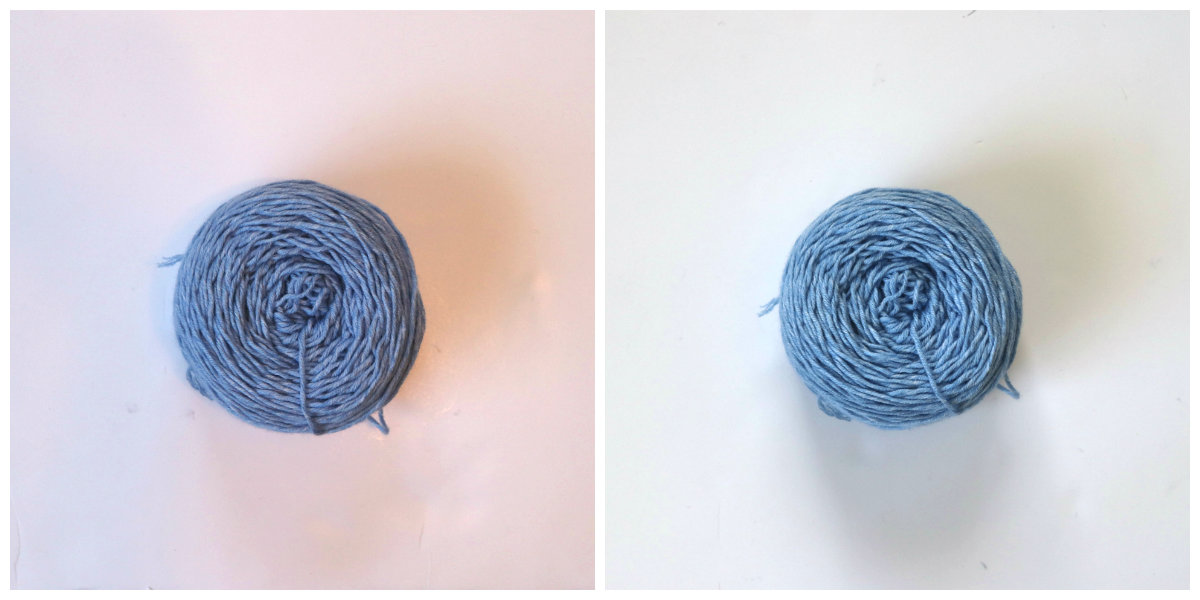
In order to get the best form of natural light, take your photos next to a window with the shades tilted. This way bright light is coming in, but not directly. If you open your shades to where the sun is beaming it, it will cause harsh shadows and will wash our your work. Tilting your shades so that the most natural light flows in, will make your photo look like the photo on the right, below (before editing).
If you take your photos outside, the lighting would be near perfect if it were a cloudy day. Set up your item in a shaded area and take your photos there, just be careful of harsh shadows. If you have light shadows in your photo, don’t fret. We can take those out while we’re editing IF we even need to. Sometimes shadows can work.
Also, you probably already know this but do not leave the ceiling fan light on while you’re taking photos. It completely washes out the colors of your project and they turn out with more of a “warm” tone which isn’t too pretty as you can see below.
When in Doubt, Use White
“White space equals chicness. Think of those Pin-worthy homes, or the latest J. Crew catalog. What they often have in common is lots of white space. Look to bring the same to your Instagram feed so that it’s not so busy and cluttered, in the same way you’d appreciate a website that doesn’t have copy and colors crammed all over.
To do this, look for white walls to shoot in front of, if you’re photographing a person. Then pick up a piece of foam board from an art shop, or use the white window sill in your home to photograph an object. Or use one of the many font apps, like WordSwag, to put a quote on a white background which gives your feed a little breathing room.” -Hilary Rushford
When I first started out I truly had now idea how others took photos on such clear, white backgrounds. If you are just as confused as I was, the answer is: white poster board sheets! You can find these pretty much anywhere for a couple bucks at the most. These poster boards can get dirty and scratched up pretty easily so I suggest buying at least 2 or 3 at a time. I use this method a lot when I’m taking photos of my crochet projects that have a lot of texture or colors going on. When you use a plain white background, the viewer’s eyes really focus on the detail of your work.
OR if you’re not into a plain white background, you can choose something with a little more texture to really make the photo come to life. For example, I have a small, faux fur rug and two separate white blankets that I use from time to time. This one is my favorite, it’s so cozy!
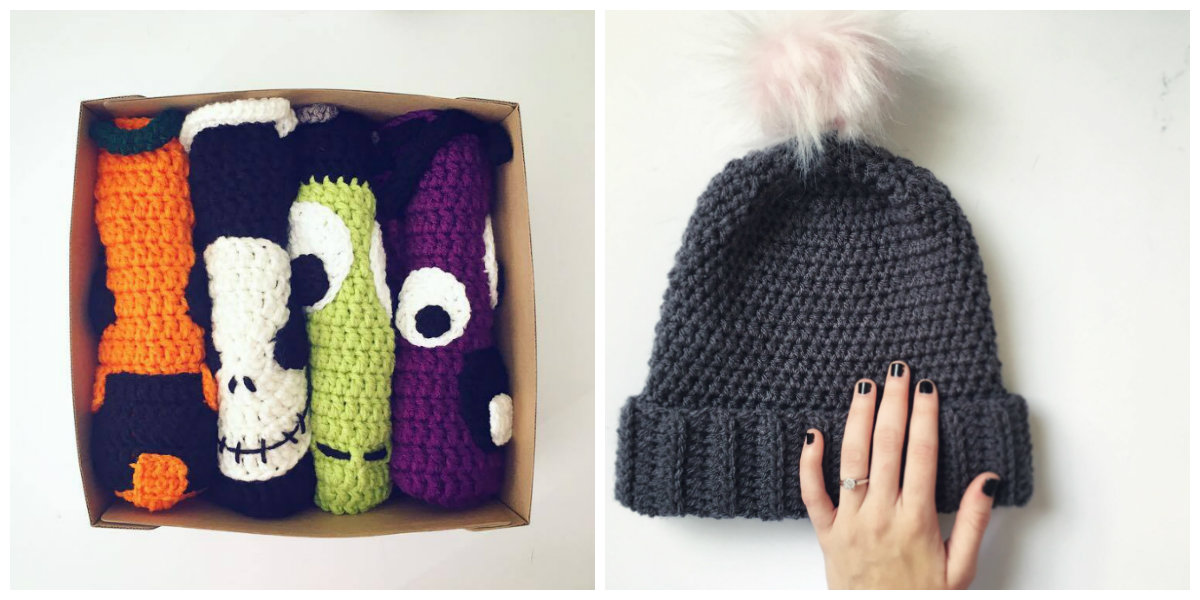
>>> Related: Drawstring Backpacks with Faces – Crochet Pattern
Backdrops Galore
If white isn’t the look you’re going for, you can buy cheap backdrops over on Amazon or Etsy in many different colors and styles. If you download the additional Photography Resources printable at the bottom of this post, you’ll see some of my favorite places to buy them from!
I recently bought a new desk for my craft room because my old one was just old. Little did I know, it makes the best backdrop for my photos! The photos below were taken on top of my desk and I absolutely love the look of them.
You can also go the super cheap (and fun!) way by making them yourself! You can use poster boards of different colors if you’re looking for a more colorful theme. You can also buy some wood panels and stain or paint them any color for less than $5! I’ve put together a list of some of the BEST photography resources I could find including the $5 DIY Backdrop. Download your copy here.

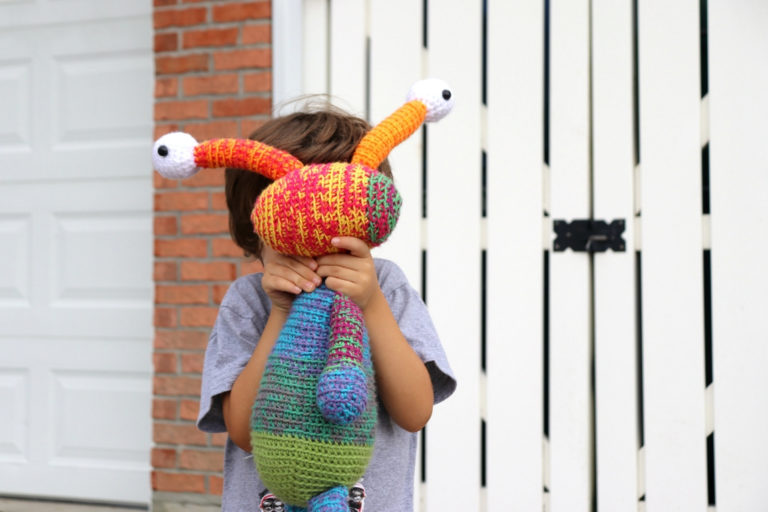
Bring Your Item to Life
Let’s say you make hats or accessories of some kind. Put it on and strut your stuff! Or find a model like a friend or your kids (my kid’s my only friend so he’s constantly my model ;)). If you make home decor, place it in a spot you would put it if you bought it from someone else. Then of course pair it with some other home decor items! (More on using props below!)
For example, my Half Circle Watermelon Rug sits in my son’s bathroom. One day, he was washing his hands and I had the great idea to snap a photo to make it look more candid. I love the way it turned out. It shows the audience what they would use it for, making it more personable.
Another trendy thing I see on Instagram is just lying your hand on top of your project like I did in the photo above. For whatever reason, I think it’s the cutest thing to see and obviously others do too because it’s been all over Instagram!
Below you see the Laundry Mat I made my mom for Mother’s Day last year. The amazing woman that she is thought it was too pretty to step on, so she hung it up on the wall in her laundry room. I honestly never would have thought to do this. I thought this was the cutest, most clever thing! Plus, it surprised me when I went down to visit her! It made me really happy to see that she loved it so much that she hung it up. So of course I instantly took a picture along with all of the laundry that happened to be folded next to it.

Editing
“Oftentimes, over-edited shots can be unappealing. When editing with filters, try to be conservative with which ones you use and how strong you make them. Pushing a photo far from its original state isn’t always as attractive as subtle tweaks and maintaining a natural look.” – Karan Bhatia
Recently, I have come to love these two editing apps: Snapseed and VSCO. I know for a fact that these apps are available for free on iPhone because that’s what I have, but I’m almost positive they’re available on Android as well.
I use Snapseed first to generally edit my photos. All I do is crop and make sure my photos are bright, contrasted when needed, and blurring the background here and there. After Snapseed, I open the photo in VSCO and choose my theme. To be honest, I’m in the middle of a theme transition. I was using A6, but now I’m liking the look of HB1 even better. Normally I use the same exact preset to every photo so that it aligns with my Instagram Theme. Themes take hard work and planning, but accounts who stick with one definitely benefit by growing a larger following. I highly suggest taking a look at this article on Preview that explains more about Instagram Themes!
Do you know what a preset is through VSCO? I just learned about this recently. If you don’t, it’s just an edited look that is already pre-set so that you don’t have to edit a ton in order to get that look. If you need some visuals, I’ve created a Pinterest Board just for you so you can see what I mean by presets and maybe even find one that suits your style!
Once you get your editing technique and filter down, continue editing each of your photos the same way with the same filter. This will make your work and your Instagram theme look visually appealing and consistent. Just like when it comes to branding! Find your style. The Preview app that I talk about below has AMAZING Instagram theme ideas and tips on their website. I’m so glad I found them.
Play Around with Angles
“Try taking pictures from unusual viewpoints. A view that seems normal can look amazing if shot from a completely different perspective than one is used to seeing. Try shooting from up high or right down on the ground to achieve more interesting pictures.” – Mike Kus
Although I have a thing for flat lay, playing around with angles is so important especially with crochet and knitting. Both of these crafts have great textures to them and it’s important to catch that detail and grab the viewers attention. I used to do this all the time, but recently I haven’t been feeling as creative and out comes the flat lay. This is something I really need to work on as well and during the Happy Hooker Challenge I’m really going to try and change my look up a bit. Will you be joining me??
Quality not Quantity
“Before doing anything, you should think about what’s in your life and what you want to share with your audience. Select your content first.” – Simone Bramante
A lot of people encourage you to post 1-3 times a day on Instagram in order to grow a quicker following. While it’s true that this would give your photos more of a chance of being seen, I stand by quality not quantity. Posting 3 photos a day is a LOT of work. If you can schedule out your photos ahead of time, that is perfect and you’re on the right track!
Don’t stress about posting 3 photos a day if it’s not something you’re able to do. Try your best to post at least one photo a day. Even if you do post one photo a day I still encourage you to schedule them ahead of time in order to make things easier for yourself. Pick a day of the week (mine is Sunday) and set up a photoshoot to take a weeks worth of photos or more if you’re an over-achiever! If you want to plan even further, let’s say you choose Sunday as your photoshoot day, on Saturday you can write down in your notebook ideas for the photos you want to take for each item so you have a plan on Sunday.
Planning ahead is so much better than throwing a photo together at the last minute that looks rushed and not well thought out. Plus, you’ll be less stressed throughout the week. You and your followers will appreciate this in the long run.
Keep it Steady
Nothing irritates me more than a blurry photo, especially when the part of the photo I was trying so hard to focus on is the one part that’s blurry. There are several ways to make sure you keep your camera or smartphone steady.
If you have shaky hands and depending on where you’re shooting, hover over your product and lean your elbow on a nearby object, even if that object is your knee. This will keep your hand(s) a little more steady.
Or you can go ahead and buy yourself a tripod. These aren’t pertinent to taking good photos, however, it will really help omit any blur and ensure that you’re shooting at a balanced level. If you’re taking photos of yourself with your handmade, a tripod would really come in handy. (or at least a selfie stick propped up against your desk and a box on the floor – she says, speaking from experience)
I currently have two tripods. The first one I bought was so cheap compared to the others I could hardly believe it came in such perfect shape. It truly is a great tripod for the price! If you’re interested, you can find it here.
Because I’m starting my YouTube Channel soon (eek!), I upgraded to a more expensive tripod in order to shoot from different angles. You can shoot perfect flat lays with this tripod and move it in literally any direction. If you’re looking to upgrade, I highly suggest this one. It’s incredible.
Upgrade your Camera
When you think of Instagram, you generally think of everyone taking their photos on their cell phones. In fact, I guarantee that’s what most people do. But did you know you don’t HAVE to take photos on your phone? I may sound dumb, but this is honestly something I never thought about because I assumed everyone used their phones. Then I started looking through some accounts with larger followings and I realized they were using actual cameras!
Remember when I said I upgraded to a new tripod in order to record my YouTube videos? Well, I also upgraded my camera! I can’t tell you how excited I am to finally own a really nice Canon camera. The photos that result from this beauty completely take my breath away. The best part is that I can send them from my DSLR camera directly to my phone using Wifi! How crazy is that?! I didn’t even know that was a thing. This makes it so much easier for me to be able to edit and upload my photos straight to Instagram without having to pull out my laptop and search through the many photos on my sim card. It’s amazing to me. If you’re looking to upgrade, you should definitely look into this one.
Craftsy
Another great resource for online photography classes is Craftsy! They have many many classes on different crafts, including crochet! As for Photography Classes, they currently have 74! One class that really relates to this post is called Product Photography at Home and is it taught by someone who has her own Etsy shop and has written her own book.
Craftsy has also just released a new subscription called Craftsy Unlimited where you can have access to EVERY SINGLE CLASS! There’s everything from photography, crocheting, knitting, sewing, embroidery, and so much more. Plus, you can sign up for a FREE 7-Day Trial.
More on Instagram – Increasing Viewers and Engagement
The Preview App
As I stated above, I’m so happy I found the Preview App! After I edit my photos, I immediately upload them to Preview which is a free app. Using Preview has been amazing. It allows you to upload your photos and move them around in order to design your Instagram feed before you actually upload them on Instagram. It’s so much easier for you to see for yourself and they have tons of other features, so I’ve included a video below for you to check out!
Not only do they let you “preview” what your feed will look like, they also have a blog AND YouTube channel that includes tons of Instagram tips. They’re the best! I hope you love it too.
Hashtags
Hashtags are important to use in order to reach a larger audience. You can include up to 30 hashtags per post. I usually use around 25 but sometimes I use the full 30. When you choose your hashtags, avoid the most common popular terms. Instead, use a hashtag that is more detailed to your particular photo. For instance, if you’ve taken a picture of a hat you crocheted, don’t use #hat use #crochethat. If you use a hashtag that millions of people have used, your photo will get lost amongst the many, many others! Use hashtags that have been used less than 50,000 times in order to increase the opportunity that your photo will be seen.
Another way you can choose your hashtags is by looking up the tag you want to use, click on it and view the top posts for that hashtag. Look for hashtags that get the same amount as likes as you do for each photo and you’re most likely to show up on the Top Posts section of that hashtag.
Using Props
“Experiment with different objects and observe the way they enrich what your photo is trying to convey. Maybe it’s a Defender off-roading through the mountains or a pair of wooden rowboats about to be taken out on a fjord. Suddenly, the scene is no longer just beautiful, it is alive with stories.” – Kym Pham
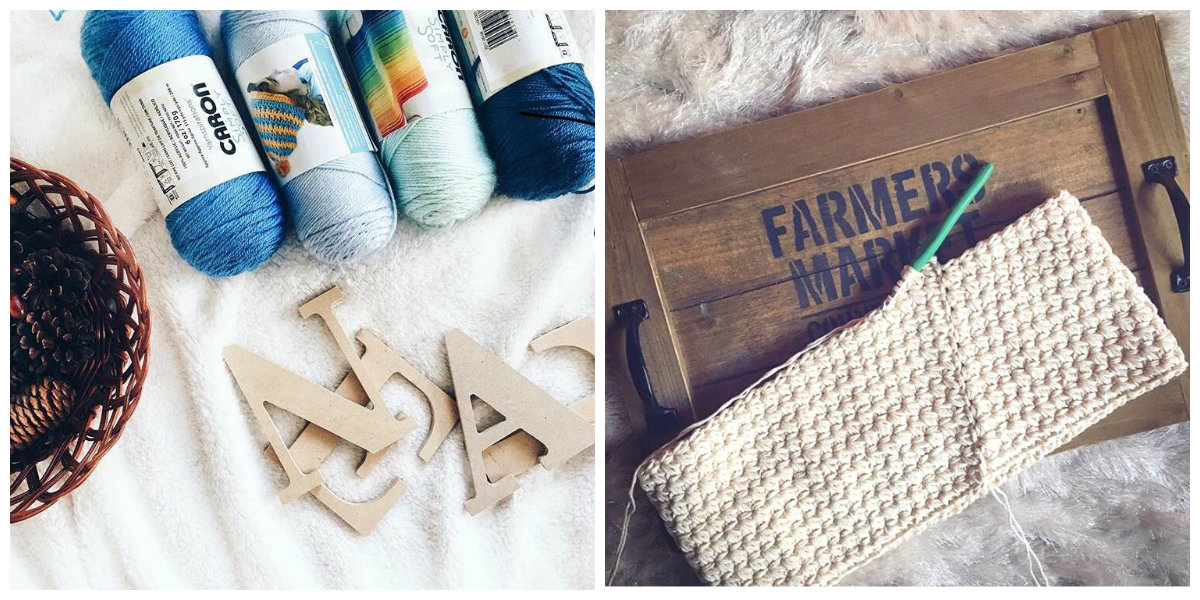
My favorite place to buy props is Goodwill because I love all things that look vintage/antique and you can find a lot here. Every single time I go to Goodwill, I find something amazing and only in the $1-4 range! I’ve bought wooden trays, vintage coffee mugs, a wooden cheese board, baskets, shelves and more that were all in really good shape. You’ll see some of them in action during the Happy Hooker Challenge! 😉
Share a Story
It’s important to really share a story about your work in the captions. Providing a long caption filled with insight and emotion, really increases engagement and relationships with your fellow makers. It helps us better understand you and see you more as a person rather than just a photo. Those one to two liners aren’t really going to help you build relationships.
Also, if you want to increase your engagement even more, ask a question related to your photo! When you ask a question, don’t make it just a yes or no question. Make it something they can relate with and maybe share their own story. Then reply back! Even if you have a large following you should reply back to as many as you possibly can. How would you feel if you walked down the street and waved and said hi to a friend and they just stared at you and walked away? That’s exactly the way I see it when others don’t continue the conversation with someone who took the time to comment.
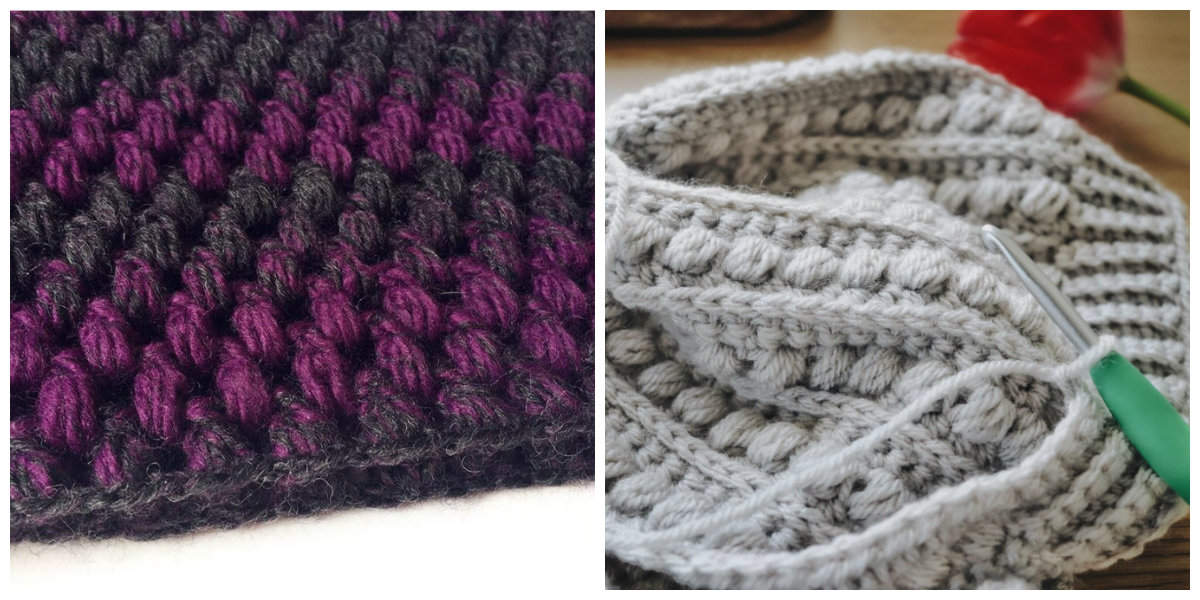
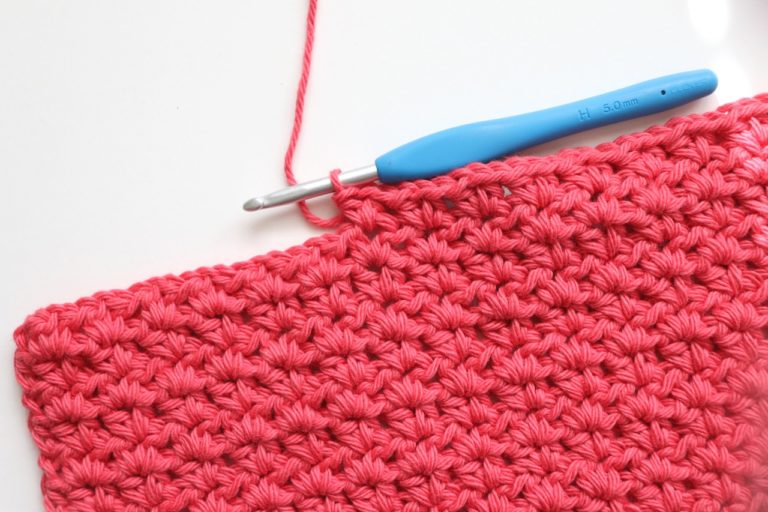
Recently I posted an EXTREMELY simple photo just of one of the basic stitches (as seen below). I honestly didn’t think it would get many likes, but I liked the way it looked so I posted it anyway. In my caption though I shared a personal story about how crochet has changed my life, how I learned, and then I asked several questions at the end. I ended up receiving a lot more likes than I normally do AND I had multiple conversations going on in the comments! And this isn’t the first time that has happened. It just shows how important it is to really engage with your audience if you want them to engage with you.
Tag other makers or companies
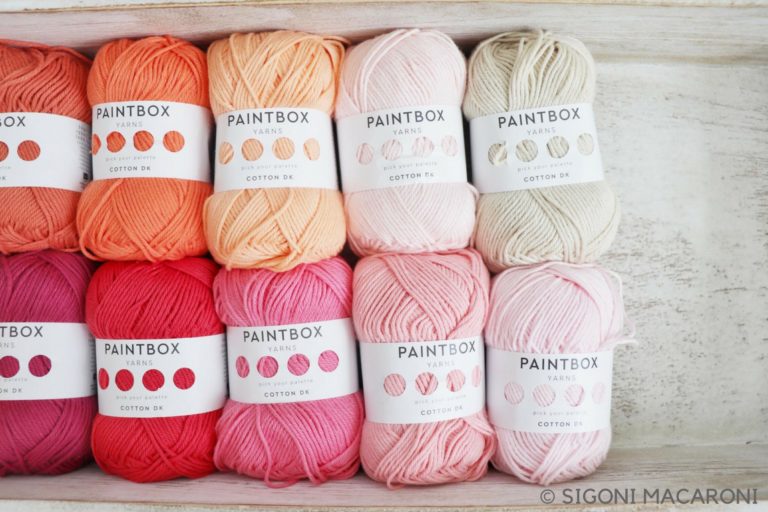
Every time I include a photo of a particular yarn or I speak about a brand, I always tag them in my photo and include their hashtags. This makes it so that they can see your photo and if they like it enough, you could possibly get featured! Being featured opens you up to a larger audience who will then come to your account and see if you’re worthy of a follow. A few brands you can tag are Lion Brand, Red Heart, and Joann Fabrics. I’ve been featured by both Joann Fabrics and Red Heart multiple times. They don’t always feature you on their Instagram Feed, but they do feature you on their website which still gives you the opportunity to be seen. I’ll list the hashtags they look through below.
- Lion Brand Yarn – #lionbrand, #lionbrandyarn
- Red Heart Yarn – #redheartyarns
- Yarnspirations – #yarnspirations
- Joann Fabrics – #handmadewithjoann
Other than tagging yarn companies, you can also tag other accounts that frequently feature other accounts. Some accounts that feature handmade makers are:
- @Bhooked
- @Craftsposure
- @Craftastherapy
- @Craftyfeatures
Have Fun, Be Creative and Practice, Practice, Practice!
“For me, taking better Instagram photos means practicing all the time. I am always ready to capture the most interesting location/scene/moment/light. Practice composing your photo well, taking many different frames of the same subject for the best possible result and paying attention to the editing process. These will help you post a sharp and clean photo with nice tones and natural colors.” – Sezgi Olgaç
That’s what Instagram is for right? Sharing the love for everything we do combined with our love of photography. If you don’t have fun with it then what’s the point? Also, being creative and turning your Instagram theme into something of your own really makes you stand out. Everyone starts somewhere. Go take a look at some of the most popular Instagrammers and (if you have some spare time) scroll allll the way down to posts from years ago. I promise you’ll feel a lot better! It takes practice and time to find your style and understand what all goes into Instagram and how best to be seen. You can do it, just keep trying! Don’t spend each day worrying about your Follower count. Focus more on creating beautiful, heart-felt photos and captions!
Whew! That was one hell of a post! I’m sure I could have split it in two, but since photography isn’t something I normally talk about I thought it would help you more to have it all in one place!


Wow! This is so helpful! Thank you. I love the neutral one. 🙂
Thank you! I’m so happy it was helpful to you!
So many fantastic photography tips. I bought a poster board a while ago and now I need more – you are right, they get scratched up. I need to pull out the DSLR and take more photos with that too. I think it will make all the difference 🙂
It really does make such a huge difference! I have only ever shot from my iPhone but when I invested in my Canon, the first day I started using it I was completely blown away! I’m thinking, wow I need to reshoot all of my previous blog post photos! Lol
Some really great tips here for all kinds of photography. Your pics always come out so beautiful!
Thank you so much! That makes me so happy to hear! ❤️
These are great tips that I can apply to my work in progress photography skills! Thank you!
You’re so welcome! I hope they help to improve your photography skills further!
GREAT tips about using natural light a white. It’s so helpful to get a bright, clean look. Something my dad always taught me is to include a little neutral gray somewhere in the picture as well (it can be in the very corner that you crop out). The reason for having this, is you can use the gray to do a white-balance test in your editing software to ensure your colors are “true.” I’ve found it super helpful.
Wow, that’s an awesome tip! I honestly think I heard this in photography class, but I must have completely brain dumped it! That is such a great idea, thanks so much for sharing!!
Great tips for photography on Instagram and Social Media. Not only for your niche but many others as well. Thanks for the tips!
Yes these tips can definitely suit many different niches! I’m glad you enjoyed them!
There are so many wonderful tips in this blog, I saved it for later and shared it on Facebook. Seriously impressed! Thank you for putting it together.
Thank you so much! I’m so glad you’re loving the tips and thank you for sharing!
I love all of these tips! Blogging has really opened my eyes to the importance of natural lighting for a good picture! And hashtags can be time consuming to make sure you’re choosing the right ones, but they are so worth it! Thanks for sharing! 🙂
Hashtags are definitely a battle. You have to do a lot of research to make sure you choose the right ones that will really help you grow your account! And yes, natural light is SO important for every single photo!
Great tips on photographing… Especially on the need to upgrade! I have been shooting with my same camera for over a decade and upgrading has seriously been on my mind lately!
Yes, same here! I was shooting with my iPhone for the longest time and because I’ve taken many classes and had jobs related to photography, I’m a pretty good editor. However, I decided I needed to finally upgrade my camera and it is mind blowing how much of a difference it makes! I hardly even edit anymore!
These are really great tips! Natural light is always best for me with my photography — I have to catch it while I can! And learn about some other techniques!
That’s the thing about photography, you’re always learning new things! And natural light can be tricky sometimes but when you get the hang of it and you know what time of day natural light shines best wherever you take your pictures, then you’ll be able to set a schedule of what days and what times you take your photos!
Wow, this is so helpful! I live in rainy, gray Washington state and in the winter, photos are a struggle! Any advice for shooting on a dark day?
Yes! There are these things called Light boxes that you can either buy or make yourself. I’ve seen a couple on Pinterest and there are a few on Amazon that you can buy. If you download my additional photography resources guide, you’ll see some of my favorites! You can also use additional lighting like light kits that you can find on Amazon!