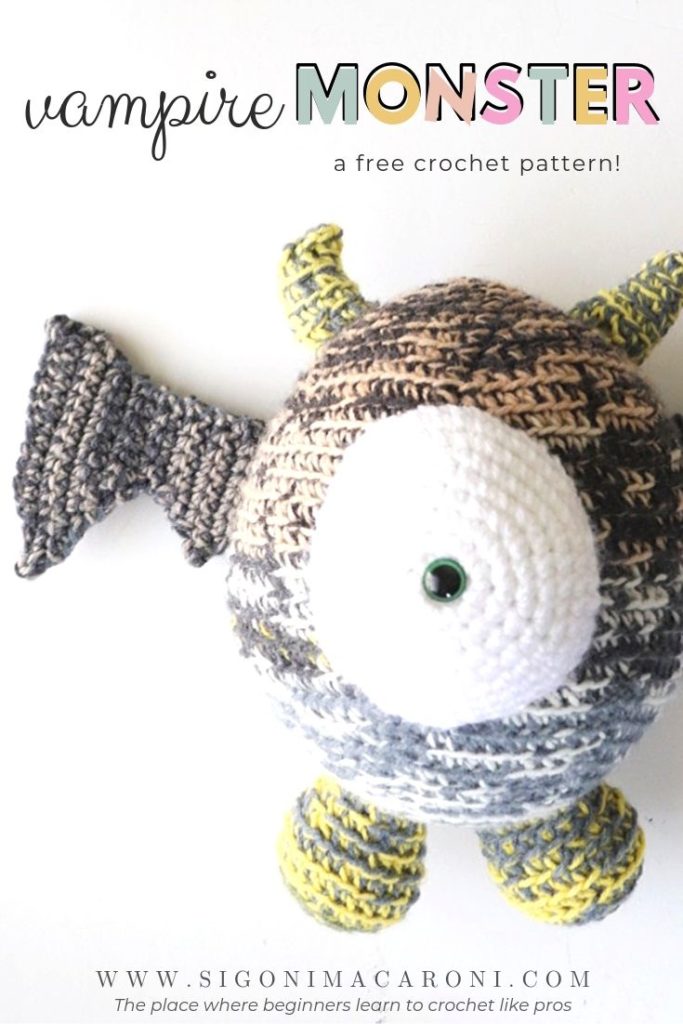
Amigurumi Vampire Monster Crochet Pattern – Mandala Monster Collection
Vamp, the Amigurumi Vampire Monster crochet pattern is being released for the first time, for free! Halloween is coming and I thought I would surprise you with not one, but all of the amigurumi monsters from the Mandala Monster Collection. You can make your own unique vampire monster with a yarn cake of Lion Brand Mandala and two strands of yarn. This amigurumi monster is easy, it works up quickly, and makes a great gift for the kids in your life.
Vamp, the Amigurumi Vampire Monster is kind of an introvert. He loves to fly around at night and sleep during the day. My son thinks he looks like a vampire and my niece thinks he looks like an owl. So you could say that he’s like a “vampire” bat or a “night owl” as they say.
He’ll sit in the trees under the moonlight and nature-watch all night, just enjoying the moments. During the day he sleeps and Vamp hates when the other monsters disrupt his sleep!
The Mandala Monster FREE Collection
Last year, I told myself I was going to start creating collections of patterns within the same category. I was going to release one pattern for free and then if you wanted the entire bundle of patterns, you could purchase them all at a discounted price. While I loved this idea, Hurricane Michael had different plans and it put a stop to all of my future collections.
Now that it’s been a year (holy cow, it’s already been a year?!), my blog’s focus has started to shift once again. Recently, I’ve been working very hard behind the scenes designing different products that I hope you will love. But because I’ve been very busy with this, it hasn’t left me much time to write up new patterns.
Since Halloween is right around the corner, I thought it would be the perfect time to re-release these Mandala Monster amigurumi crochet patterns for free! And that’s the deal behind that.

Yarn & Substitutions
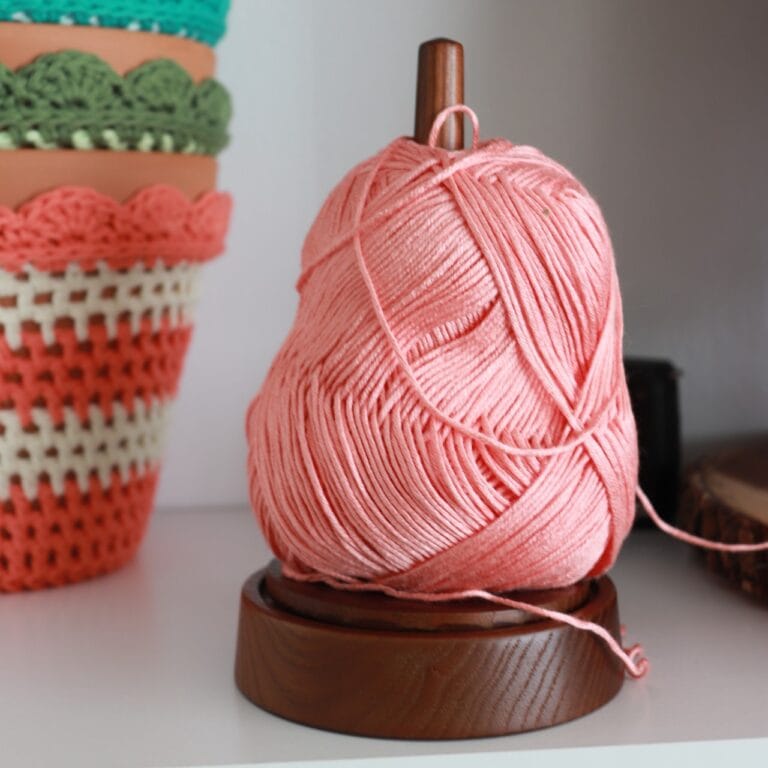
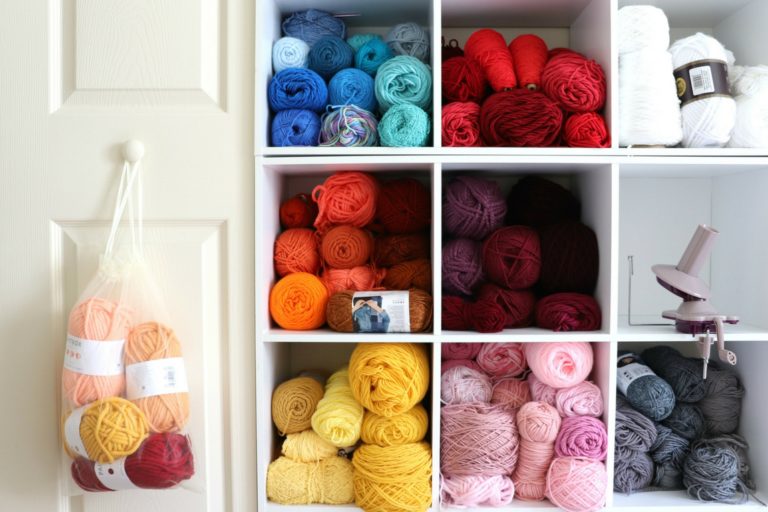
For each of these amigurumi monsters, I’ve chosen to use Lion Brand Mandala because of the drastic colorways. I used Lion Brand Mandala in Serpent for Vamp. You can use any of the weight 3 cake yarns that Lion Brand has to offer. They would all make beautifully unique monsters.
Throughout the entire pattern, you will be working with two strands of yarn (one pulling from the outside of the yarn cake and the other from the inside). I chose to do this for a few different reasons:
- Every single monster made will be your own unique monster because the colors won’t match up exactly as another.
- Monsters are supposed to be fun, interesting, and different. What’s better to achieve this than using lots of crazy colors?
- By using two strands, the colors clash together (in a good way) and it helps to work your project up faster.
This pattern was originally designed holding two strands of lightweight yarn, but if you’d rather not hold 2 strands you could substitute by holding 1 strand of medium weight yarn and the same 5mm hook.
This post may contain affiliate links, please view my disclosure policy for details.
Pattern
- Get the ad-free, large print, printable PDF pattern HERE.
- PIN this pattern to your Pinterest boards for later HERE.
Materials
- 5mm Crochet Hook
- 1 skein Lion Brand Mandala in Serpent (lightweight #3; 100% acrylic; 590yds/5.3oz)
- Red Heart Soft in White (or any white, medium weight yarn to use to create the eyes)
- 1 Sheet Mesh Plastic Canvas
- Tapestry Needle
- Scissors
- Polyfil Stuffing
- Stitch Marker
- 12mm Safety Eyes
- Black Marker
Abbreviations Used
*All Sigoni Macaroni patterns are written in standard US terms*
- Ch – Chain
- Sc – Single Crochet
- Rep – Repeat
- St(s) – Stitches
- Sl st – Slip Stitch
| US TERMS | UK TERMS |
| single crochet (sc) | double crochet (dc) |
Special Stitches
- BLsc – Back Loop Single Crochet: Single crochet into the back loop only.
- BLsc2tog – Back Loop single crochet decrease: Insert hook into the back loop of next st, yarn over, pull up loop (2 loops on hook). Insert hook into back loop of next st, yarn over, pull up look (3 loops on hook. Yarn over pull through all three loops).
Notes:
- This monster is created by holding two strands of yarn and working in the back loop only except for the eyes. For the eyes you will work each stitch as normal and you will use one strand of white, medium weight yarn.
- Tutorial: How to crochet holding multiple strands of yarn
- Tutorial: How to work in the back loop only
- This pattern calls for Lion Brand Mandala. To get the funky colors you see on each monster, I held one strand from the inside of my cake and one strand from the outside.
- You can also use any of their other weight 3 yarns like Lion Brand Cupcake.
- If you do not wish to work in the back loop, you can work your single crochet stitches as normal. However, I suggest sizing down to a 4.5mm crochet hook if you decide to do that.
- You can work the body parts of your monster in any order. When you’re done you will sew them all together.
- Stuff the body parts with polyfil stuffing as you go before your holes get too small.
- Stuff the body of your monster tight enough so that it is not lumpy and uneven, but not too tight to where the polyfil shows through.
- With each body part, you will be working in continuous rounds. Do not slip stitch at the end of each round. Place your stitch marker in the last stitch of each round and move it up after each round.
- Tutorial: How to crochet in the round
- I use plastic safety eyes for all of my monsters, but if you would rather embroider them, especially for younger children, feel free to do that!
Amigurumi Vampire Monster Crochet Pattern
Amigurumi Vampire Monster Body
Round 1: 6sc in mag cir
Round 2: 2 BLsc each st around (12)
Round 3: [2 BLsc next st, BLsc next st] Rep [ ] around. (18)
Round 4: [2 BLsc next st, BLsc next 2 st] Rep [ ] around. (24)
Round 5: [2 BLsc next st, BLsc next 3 st] Rep [ ] around. (30)
Round 6: [2 BLsc next st, BLsc next 4 st] Rep [ ] around. (36)
Round 7: [2 BLsc next st, BLsc next 5 st] Rep [ ] around. (42)
Round 8: [2 BLsc next st, BLsc next 6 st] Rep [ ] around. (48)
Round 9: [2 BLsc next st, BLsc next 7 st] Rep [ ] around. (54)
Round 10: [2 BLsc next st, BLsc next 8 st] Rep [ ] around. (60)
Round 11: [2 BLsc next st, BLsc next 9 st] Rep [ ] around (66)
Rounds 12-22: BLSc each st around (66)
Round 23: [BLsc2tog, BLsc next 9 st] Rep [] around (60)
Round 24: [BLsc2tog, BLsc next 8 st] Rep [] around (54)
Round 25: [BLsc2tog, BLsc next 7 st] Rep [] around (48)
Round 26: [BLsc2tog, BLsc next 6 st] Rep [] around (42)
Round 27: [BLsc2tog, BLsc next 5 st] Rep [] around (36)
Round 28: [BLsc2tog, BLsc next 4 st] Rep [] around (30)
Round 29: [BLsc2tog, BLsc next 3 st] Rep [] around (24)
Round 30: [BLsc2tog, BLsc next 2 st] Rep [] around (18)
Round 31: [BLsc2tog, BLsc next st] Rep [] around (12)
Round 32: BLsc2tog around (6)
Tie off and weave in ends
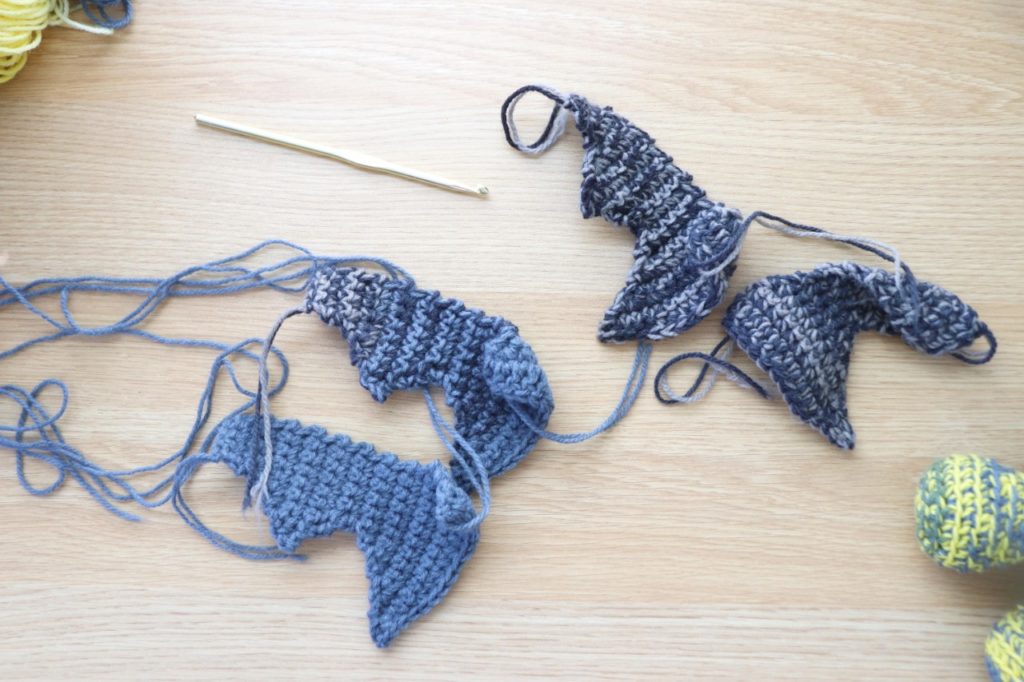
Wings (make 4)
Row 1: Ch 5, Sc in 2nd ch and next 3 ch. Turn work (4)
Rows 2-3: Ch 1, sc across. Turn work (4)
Row 4: Ch 1, 2sc first st, sc next 3 st. Turn work (5)
Row 5: Ch 1, Sc next 4 st, 2sc last st. Turn work (6)
Row 6: Ch 1, 2sc first st, sc next 5 st. Turn work (7)
Row 7: Ch 1, sc next 6 st, 2sc last st. Turn work (8)
Row 8: Ch 2, sc 2nd ch from hook, sc next 8 st. Turn work (9)
Row 9: Ch 1, sc next 6 st, sc2tog. Leave last st unworked. Turn work (7)
Row 10: Ch 1, sc2tog, sc next 5 st. Turn work (6)
Row 11: Ch 1, sc next 4 st, sc2tog. Turn work (5)
Row 12: Ch 1, sc next 5 st. Turn work (5)
Row 13: Ch 1, sc next 4 st, 2sc last st. Turn work (6)
Row 14: Ch 1, 2sc first st, sc next 5 st. Turn work (7)
Row 15: Ch 1, sc next 6 st, 2sc last st. Turn work (8)
Row 16: Ch 1, 2sc first st, sc next 6 st, 2sc last st. Turn work (10)
Row 17: Ch 1, sc next 9 st, 2sc next st. Turn work (11)
Row 18: Ch 2, sc 2nd ch from hook, 2sc next st, sc next 9 st, 2sc last st. Turn work (14)
Row 19: Ch 1, 2sc first st, sc next 12 st, 2sc last st . Turn work (16)
Row 20: Ch 1, sl st next 3 st, sc next 2 st, hdc next 4 st, dc next 7 st. Turn work (16)
Tie off weave in ends for two of them, but leave long tail for sewing on the other two.
Feet (make 2)
Round 1: 6sc in mag cir
Round 2: 2 BLsc each st around (12)
Round 3: [2 BLsc next st, BLsc next st] Rep [ ] around (18)
Round 4: [2 BLsc next st, BLsc next 2 st] Rep [ ] around (24)
Rounds 5-6: BLsc each st around (24)
Round 7: [BLsc2tog, BLsc next 2 st] Rep [ ] around (18)
Round 8: BLsc each st around (18)
Tie off leaving long tail for sewing
Horns (make 2)
Leaving a long starting chain for sewing,
Ch 10, sl st to first st to form circle.
Round 1: Sc each ch around (10)
Round 2: BLsc each st around (10)
Make sure your work is facing right side out
Round 3: [BLsc2tog] 3 times, 2 BLsc next st, BLsc next st, 2 BLsc next st, BLsc next st (9)
Round 4: BLsc each st around (9)
Round 5: [BLsc2tog] 3 times, BLsc next st, 2 BLsc next st, BLsc next st (7)
Tie off and weave top shut.
Eye
Round 1: 6sc in mag cir
Round 2: 2sc each st around (12)
Round 3: [2sc next st, sc next st] Rep [ ] around. (18)
Round 4: [2sc next st, sc next 2 st] Rep [ ] around. (24)
Round 5: [2sc next st, sc next 3 st] Rep [ ] around. (30)
Round 6: [2sc next st, sc next 4 st] Rep [ ] around. (36)
Round 7: [2sc next st, sc next 5 st] Rep [ ] around. (42)
Round 8: Sc each st around (42)
Tie off, leaving a long tail to sew onto body.
Monster Assembly
Attach a safety eye in the middle of your eye. Sew the eye in the center of your monster body, stuffing with polyfil as you go.
Stuff the feet with polyfil and sew them to the bottom of your monster, about a half an inch apart.
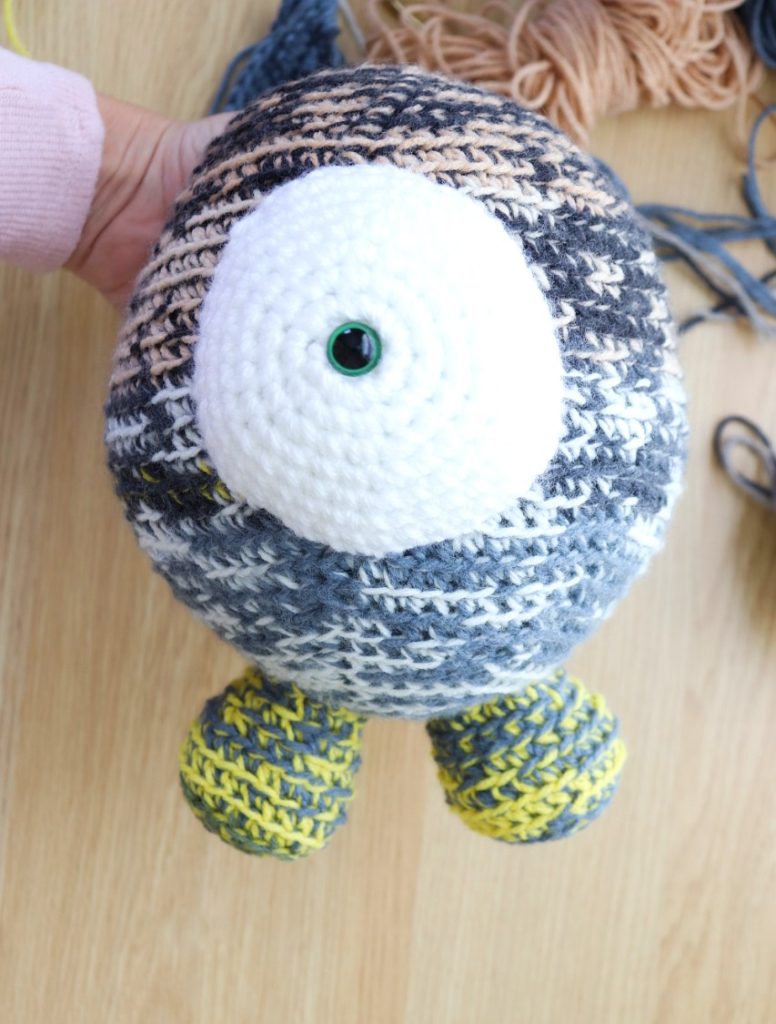
Stuff a small amount of polyfil into the horns and sew them on either side of the head about 2 1/2 inches apart.
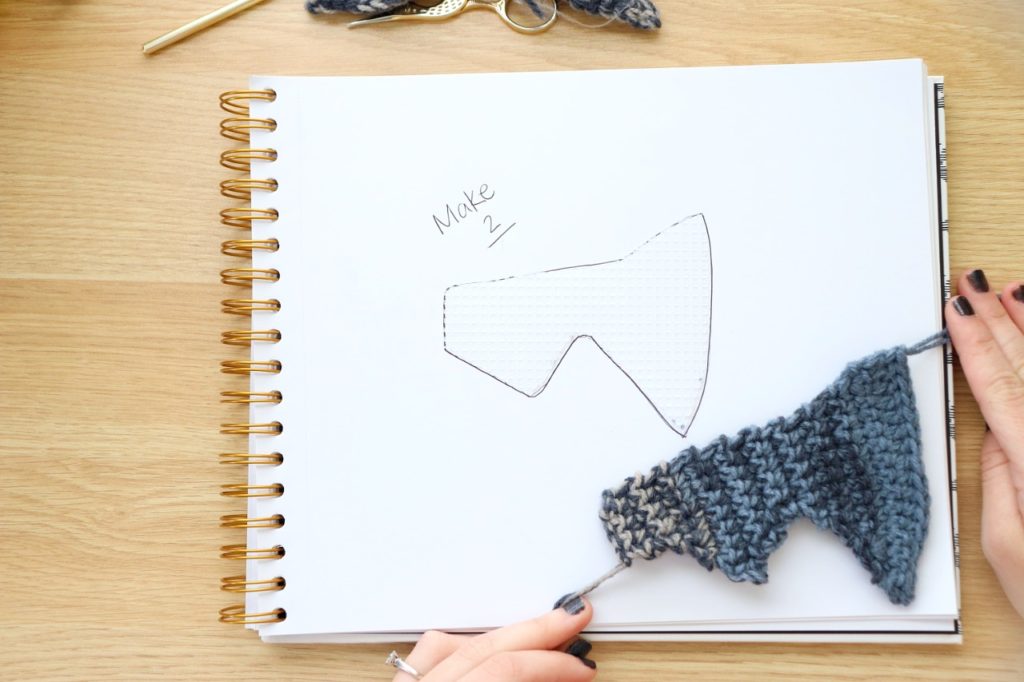
Trace one of your wings with a black marker around the sheet of plastic canvas, being careful not to get marker on your work (if you do, it’s okay! No one will see it.. shh).
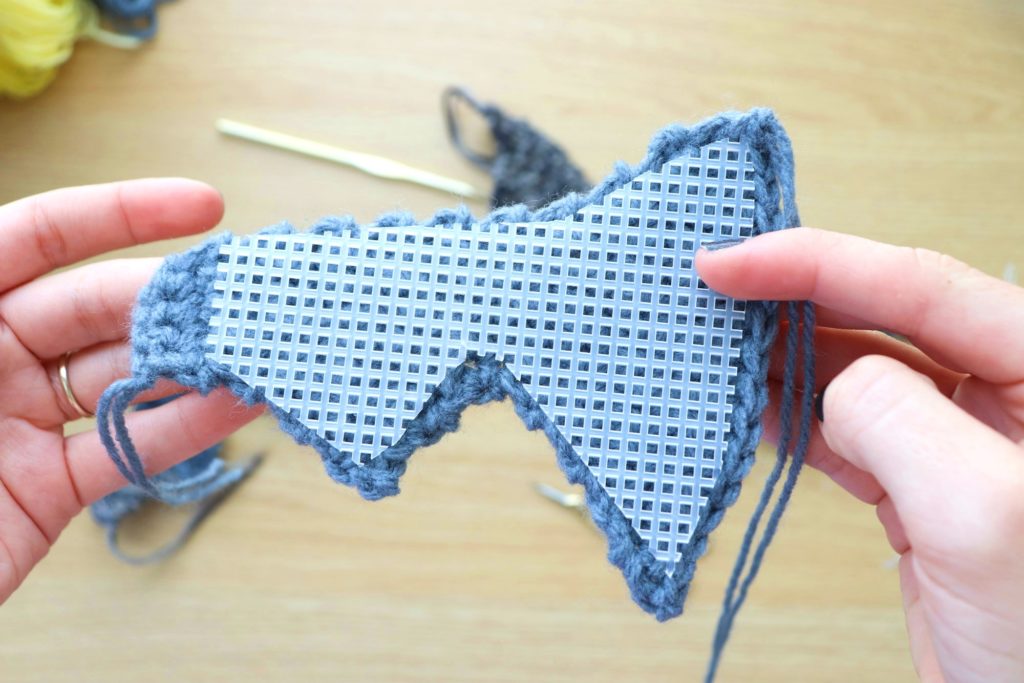
Cut the shape out of the plastic canvas and match it up with your crocheted wing. Continue cutting your plastic canvas around the edges so that it will fit snugly inside when you’re sewing the wings together.
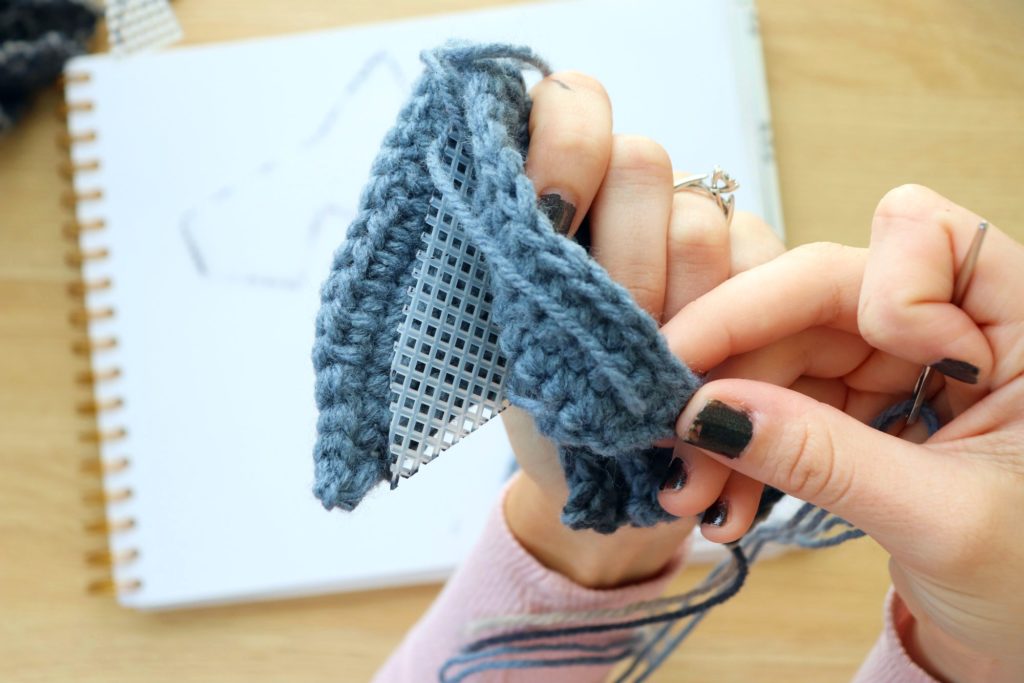
Place another wing on top so that the plastic canvas is sandwiched in between and whip stitch the wings together. Repeat this process with the second wing, leaving a long tail for sewing to the monster body.
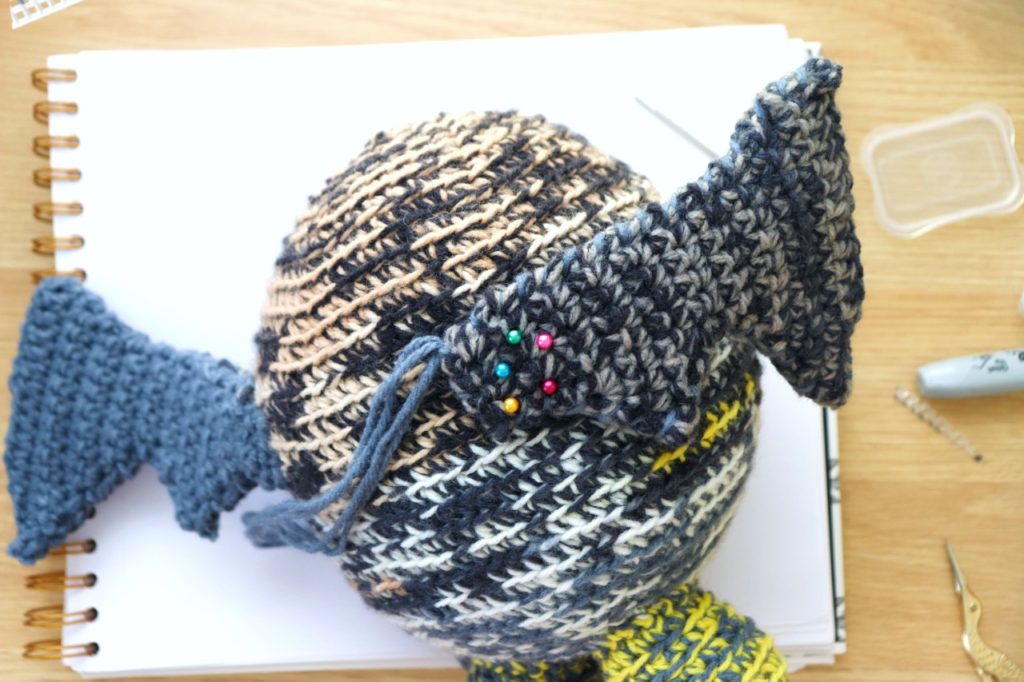
Sew your wings to the back of your monster about 4 inches apart. When sewing, you will need to sew from the edge of the wing to about an inch in. This will ensure that it is secure and stable.
I really loved designing this amigurumi vampire monster (he’s my son’s favorite!) and each of the other amigurumi monster crochet patterns. I hope you enjoy making them just as much. The hurricane ended up destroying all of my original monsters so I guess it’s time to make some more!
Which amigurumi monster crochet pattern is your favorite? What yarn did you end up using? Let me know in the comments below!