Read our most Frequently Asked Questions!
Read our most Frequently Asked Questions!
Limitless Crochet everyday
With crochet, the possibilities are endless. Throughout 2021, Limitless Crochet Everyday will teach you how to become a better crocheter with new techniques, stitches, and free patterns to go along with them. Crochet is an anxiety reducer for many of us and after a long and stressful 2020 year, I think this is exactly what we need.
Some of the links below are affiliate links. Please see my disclaimer for details.
- WEEK 8 -
“Crochet keeps me from unravelling.“
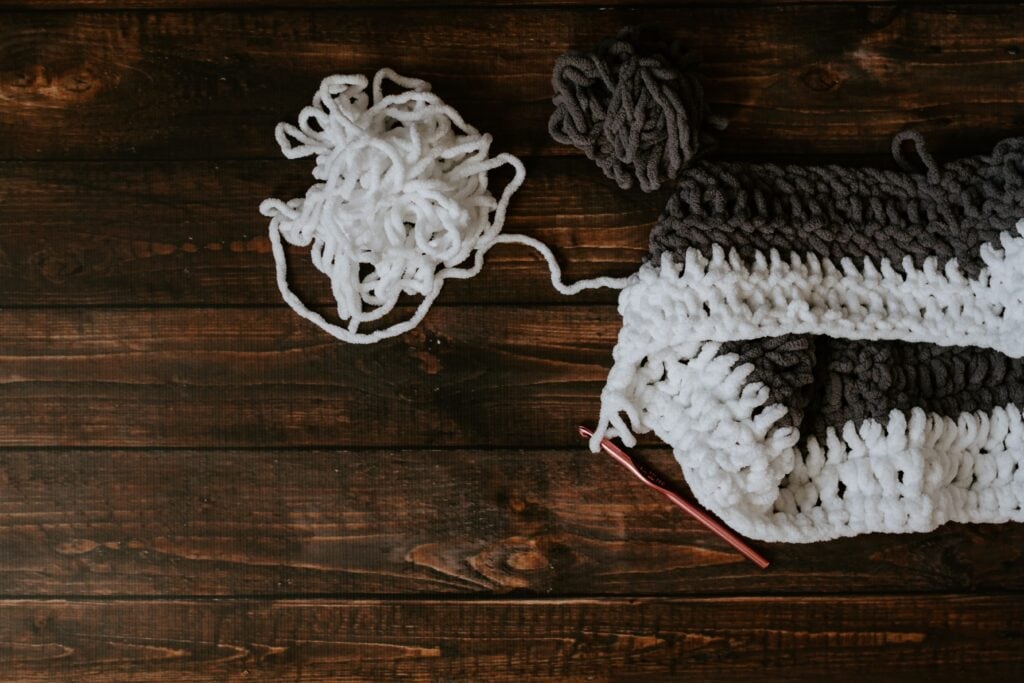
So you’ve picked out a project, you started making something beautiful, and now you’re in the middle of the project. What happens if you come across something you’re unsure how to do? That’s what we’re going to talk about today!
If you missed last weeks topic, it was all about crocheting in the round. How to start a project in the round, how to work in joined and continuous rounds, and we ended with making an ice cream cozy.
READ LAST WEEK’S EMAIL HERE
February Theme:
PROJECT MAKING
Week 8: In the Middle of a Project
January 10 - 16
What happens if you’re working on a project and you come across something you don’t know how to do? Do you call it quits? No way!This week we’re going to talk about some of the things you might encounter in the middle of working on a crochet project.
In the Middle of a Project
So you’ve started a new project that you’re extra excited about and then you come across a problem. Do you call it quits and move on? No way! Let’s talk about some issues you can run into when working on a crochet project and how we can solve them.
Changing Color / Adding a New Skein
There are some patterns that only require one color and one ball of yarn. But at some point, you’re going to need to know how to add on a new skein or change color.
There are actually quite a few ways to add on a new strand of yarn and we’re going to cover 7 of them today. I know that sounds like a lot, but I think it’s fun to know all the different ways and in the end you can choose your favorite.
1. Traditional
The first way I’m going to share with you is the only way I’ve ever changed my yarn color. This is also the same way to change color when working on a tapestry crochet project.
To change yarn color (or add a skein) the traditional way:
- Crochet into the stitch right before the stitch you want to be a new color, but don’t finish the stitch.
- Before the final step of the stitch, pull the new strand through (whether this is a new color or just a new skein of yarn)
- Continue working down the row and either crochet over your ends to secure or weave them in later.
Here’s an example:
- For the single crochet: Insert your hook into the next stitch, yarn over, pull up a loop, you’ll have two loops. Drop the strand your working on and grab the new strand. Pull the new strand of yarn through those last two loops. Then continue working with the new yarn.
I have both a picture and video tutorial demonstrating how to do this. I cover all three basic stitches and how to do it at the end of a row and in the middle of a row.
2. Magic Knot
Adding a new yarn with the magic knot really is quite magical to watch. I’ve never actually done it this way while working on a crochet project, but from what I’ve seen it looks to keep things pretty secure.
I think this would be best when you’re adding on a new yarn of the same color or if you’re making a scrap yarn blanket and you aren’t too picky about where the color ends up.
3. Standing Stitch
I know I said earlier that the traditional way is how I always change my yarn color, but I do this one quite often as well.
I usually change yarn with a standing stitch at the end of a row when I’m making a blanket.
Here’s how to change yarn with a standing stitch:
- 1.) When you reach the end of a row and you’re ready to change color, tie off your work the way you normally would when you’re finished with a project.
- 2.) Tie a slip knot on your hook with the new color
- 3.) Insert your hook into the last stitch you worked, yarn over and chain one to secure it.
- 4.) Continue with the pattern
If you’ve seen my Forever Blankets you’ll know that they’re all mindless crochet projects and while they do require color changing, there’s nothing too too fancy about them. They’re meant to be relaxing to make.
My point is, when I’m making one of those blankets, I don’t care about knots in my work. I’m not trying to impress anybody. The blankets are for my family so the knots aren’t noticeable and don’t bother us.
I don’t have a tutorial on this now, but I’m thinking about making one in the future. For now, here’s a tutorial by Lalylala Videos that I found to be pretty helpful.
4. Russian Join
This one I’m throwing in because it’s a pretty neat way to change yarn. It looks flawless but I don’t think it’s something I would ever take the time to do.
But that’s just me! It’s still fun to know about all the ways you can join yarn.
I believe you can only do this with a plied yarn because you’ll be going through the yarn strand with a tapestry needle.
Here’s (another) tutorial by Bella Coco for the Russian Join
A few more ways to join yarn
I wanted to share a few more ways to join yarn so that you can try a few and pick your favorite:
- 1.) Quick Way To Join New Yarn by Tuula Maaria
- 2.) Attach Yarn With Slip Stitch by It’s All In A Nutshell
- 3.) Crochet With Your Ends by Hooked by Robin – this one’s my favorite because it incorporates weaving in your ends at the same time!
Losing Motivation / Crojo
A few weeks ago I wrote an article that I shared with you called 11 Crochet Secrets. Within this article I talked about losing motivation under Secret #10 so if you want to read about that, you can find it here.
When you’re in the middle of a project and you lose the motivation to keep going, it can feel pretty dreadful, especially if you’re making the project as a gift for someone else. It’s a crappy feeling when you don’t want to make something anymore but you feel obligated to finish.
I’ve been there.
Do you remember that blanket I was making for my mother-in-law? It was so much more work than what I was expecting and it took me 3 years to complete because I dreaded making it!
BUT I have to say that I was feeling that way when I was going through a lot personally. So I put it aside for a while and about a year later I picked it back up and I truly loved making it.
I learned a new, fun way to make a popcorn stitch and I kept thinking about how happy she would be when she saw it. So that helped me to keep going.
It is a-okay to put something aside if you’re not feeling the project right now. Try working on something else. You’re allowed to have multiple projects going on at once! – more on that later
If you’re working on a project that’s taking forever, try taking a break and making something small so you can have that quick win. That’s the reason why I put together a long list of quick win projects that you can try.
Here are some other things you can do to get your crojo back:
- 1.) Learn a new technique – have you tried Tunisian crochet? We’ll be talking about this in August!
- 2.) Pick up a comfort project – something that doesn’t need to be rushed so you can just enjoy the process
- 3.) Take a break from crochet and try another craft – Through the end of February, Creativebug is offering a 5 month subscription for only $5 which is pretty great! That’s where I learned how to incorporate art into my daily life.
Problems in the Middle of a Project: FAQs
Q1: What do I do when I encounter a flaw in my yarn?
A few weeks ago we talked about yarn flaws and why they tend to happen. For a more detailed answer to why they happen, you can go back and read that post. But I’ll reiterate what I said then:
“Yarn is essentially a piece of string that, during the milling process, sometimes breaks. The mill isn’t going to throw away good yarn because of a single breakage. So, what they do is tie the yarn together with a knot and the process carries on. Now, unless a yarn company or dyer inspects every millimetre of each skein looking for knots (and let’s face it, who has time for that!) nobody is going to know a knot is there until someone discovers it while knitting.”
Basically, it’s normal to come across a knot or any other flaw while you’re working. But what should we do when we encounter one?
You can either crochet through it or cut it out and reattach your yarn. Really, it could go both ways.
I personally always crochet through it and I’ve never had a problem with it coming undone or affecting my project too much.
But others might suggest cutting the knot out and reattaching your yarn in one of the ways I mentioned previously.
Q2: How do you carry yarn in tapestry crochet?
To carry yarn in tapestry crochet, you’ll want to complete your yarn changes the “traditional” way I described earlier. But there’s more to it than that and it’s better explained through video. Yay For Yarn has a beginners tapestry crochet video and I think she does a really great job demonstrating how to carry yarn. You can watch the video here.
The very first tapestry crochet project I ever made was this laundry mat by B.Hooked Crochet. I made it for my mom and years later she still has it hung up in her laundry room 😊 I was a complete beginner at the time and I remember this video tutorial being very easy to follow. So even if you’re not making this mat, you might find some great tips through this video.
Q3: How do I keep my yarn from tangling?
Yarn tangling drives me nuts!
Some people find the act of untangling yarn relaxing. I am not one of those people 😂
That’s why I make sure I’m good to go from the start. Here are a few things that I do:
- Pull the strand from the center of the skein. This is the best way to go because it flows so much easier and I’ve never encountered any tangling.
- The only thing about this is the “yarn barf”. If you pull too much out it will be a tangled mess. Try to pull the skein apart in the middle and really dig for the center strand.
- Use a yarn dispenser (my favorite tool!). All you do is push the pole through the middle of the skein and use the outside strand to crochet and it’ll spin around as you go.
- Find my favorite yarn dispenser here (the first tool under Crochet Beginner Essentials)
- You can also use a toilet paper holder or a paper towel holder to fulfill the same purpose.
- Do not pull from the center when you’re using velvet yarn(this might apply to any novelty yarn). When you pull from the center of velvet yarn it inevitably gets BEYOND tangled even if you think you’re doing a good job of keeping things together. I learned this the hard way 🙄
Q4: Why is my project curling?
It depends on what you’re making, how big you’re making it, and the stitch you’re using. But it’s usually one of two things. Tension or a tight stitch.
First, tension.
When you start to see your work curling, the first thing you might think of is tension. If your work is curling, it could be because you’re crocheting too tight. If you think this is the case, try loosening up.
Many things affect tension. It changes with your mood, the hook you’re using, the position you’re in, and other ways.
Make sure you’re comfortable, sitting up straight, elbows relaxed, good hook in hand, and you’re good to go.
If you’re naturally a tighter crocheter, here’s a tutorial on how to adjust the way you hold your yarn.
Another thing you can do is try going up a hook size (or two if you need to) just for the foundation chain and then for the rest of the project, go back down to the original size. This will ensure that your foundation chains aren’t too tight and it won’t scrunch your work together.
Second, tight stitches.
The single crochet stitch is another culprit of curling edges because it is the tightest of the basic stitches. When you’re making a small project with just single crochet, it will almost always curl no matter who you are or how long you’ve been crocheting. So don’t stress about it!
Let’s say you’re making a larger project with the single crochet stitch. It should naturally flatten out the bigger the project becomes.That goes for projects using any of the basic stitches.
Sometimes it’s tension, but other times it’s just the stitch.
If you’re working on a smaller project with just single crochet, your edges will most likely stay curled. Blocking your project when you’re finished will help to keep them straight.
Q5: How do I store my project when I’m not working on it?
To be completely transparent, when I’m crocheting I’m usually on the couch. When I’m done, I set it on top of the couch where all of my crochet clutter starts to form (yarn, hooks, scissors, books). It drives my husband nuts 🤪 So I need to heed my own advice here.
Right now I have an entire room for my office/craft supplies so that is where I store everything except my project that’s on the couch 😉
For the WIPs that I have that I’m not actively working on, I store them in plastic bins or in my WIP basket (although sometimes they get lost in there).
Here are some things you can do:
- – To keep your work from unravelling, place a locking stitch marker on the loop of your last stitch. When you do this, it locks your stitches in place.
- – Store your WIPs in plastic bins or shelves. I have both!
- – Use large baskets/bins to store separate projects and make your house pretty at the same time! Just be careful using wicker-type baskets because you don’t want to snag your yarn.
- – Get a tote organizer. My sister-in-law gave one to me for my birthday a few years ago and I always use it when we’re traveling.
Q6: Is it okay to work on several different projects?
Yes, of course! Sometimes when you’re working on a large project you can start to feel tired of it and need to switch things up. If this is the case, I suggest making a small project that you’ll have finished in a day or two. That way you have a quick win under your belt and you’ll feel satisfied working on the one that’s taking a little longer.
I always have at least 2 projects going on at once. Depending on my mood or a deadline, I might want to work on one project over the other. And I also like to have a larger mindless project going on in the background. Usually a blanket. That way if I don’t feel like working on something that requires a lot of thought, I can pull it out on those days.
Be careful not to overwhelm yourself with too many projects. I would say 3 is probably a good number.
Also, sometimes you’ll start a project and you’ll lose interest. Even if you’ve spent a lot of time on it, if you know it’s not something you want to finish, then don’t finish it. It’s okay to change your mind. Rip it out and save that yarn for something else.
I can’t tell you how many times I’ve done that.
SURPRISE FRIDAY?
I had something planned for this week, but it ended up not working out so now I have nothing to share! 😬
I’m going to do some thinking and see if I can come up with something and then you’ll have a little surprise on Friday.
In the meantime, check out some of my free patterns on the blog or watch some crochet tutorials on my YouTube channel!
JOIN THE LCE FACEBOOK GROUP
The Crochet’dy Bunch // Limitless Crochet Everyday
I created the Facebook Group, The Crochet’dy Bunch as a space for those who love crochet. And I’ve decided to group it together with the Limitless Crochet Everyday project. This is a place where we connect, share work, get your questions answered, and support each other. I hope you’ll join us!

Please don’t forget to agree to the group rules! It’s so important to me that this is a supportive, loving community, and I won’t tolerate any negativity.

JOIN THE WEEKLY NEWSLETTER!
Sign up to learn how to crochet through your emotions and gain access to our private Facebook group where you can get answers to all of your questions!
