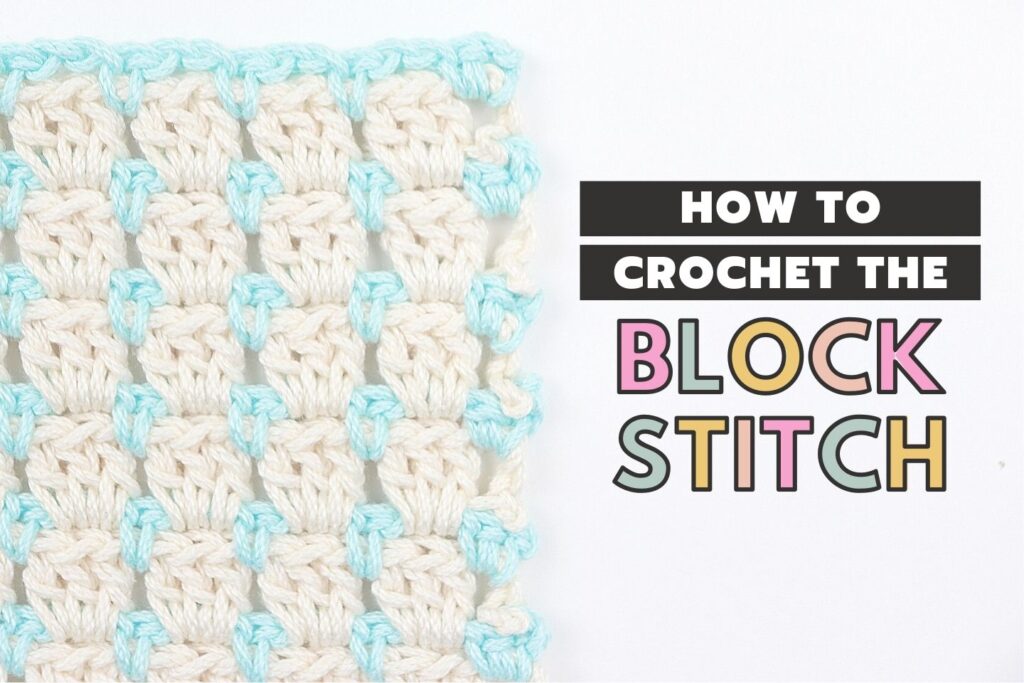
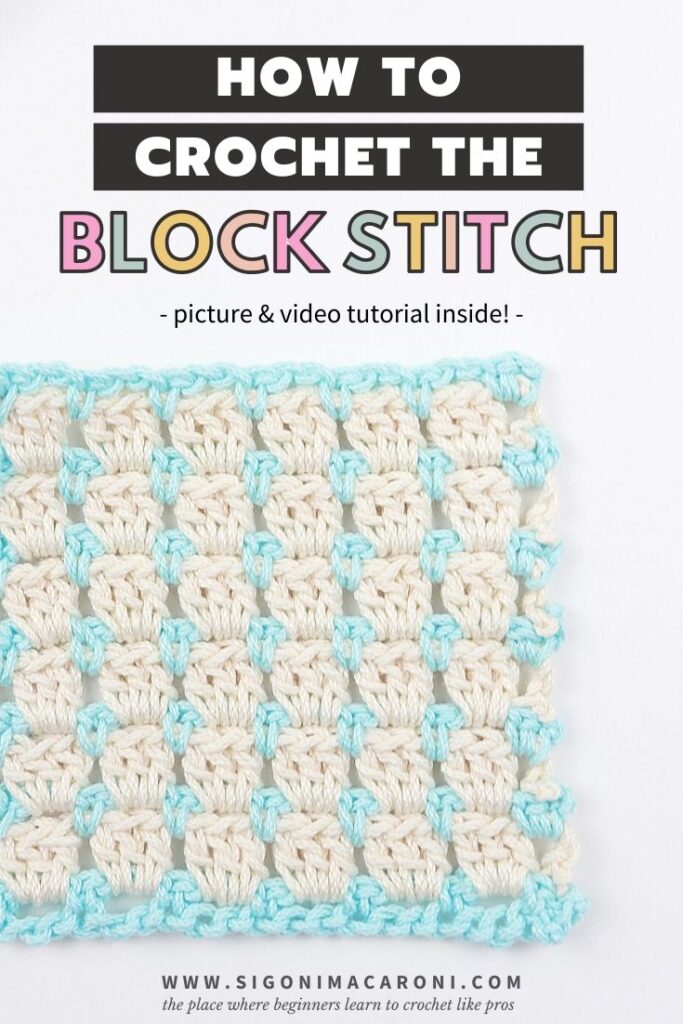
How To Crochet The Block Stitch | Cool Crochet Stitches (Picture & Video Tutorial)
The Block Stitch is such a cool, not to mention beautiful, crochet stitch and it’s so easy to make. This stitch is a great crochet stitch for blankets, coasters, and pretty much anything! You can use the Block Stitch with one color, but I suggest using multiple colors to really bring out its beauty. For today’s episode of Cool Crochet Stitches, we’re going to cover how to crochet the Block Stitch with a picture and video tutorial!
For the Block Stitch Crochet Tutorial, you will need:
- Any weight yarn – 2 colors (you could use one color, but using two or more will really show off the beautiful contrast of this stitch)
- The recommended crochet hook for the yarn you choose
- Tapestry needle
- Scissors
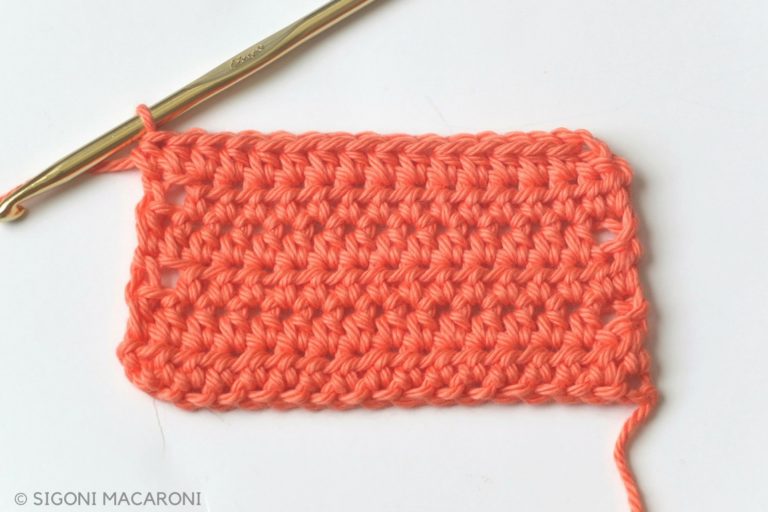
You can, of course, use any weight yarn for this stitch but in today’s tutorial I will be using a medium weight yarn (Lion Brand 24/7 Cotton) and a 4.5mm crochet hook.
Abbreviations used:
- Ch – chain
- Sc – single crochet
- Dc – double crochet
- Ch-2 sp – chain 2 space
- Sk – skip
| US TERMS | UK TERMS |
| Single Crochet (sc) | Double Crochet (dc) |
| Double Crochet (dc) | Treble Crochet (tr) |
How To Crochet The Block Stitch: Cool Crochet Stitches Episode 1
I’ve put together a picture and a video tutorial to show you how to crochet the block stitch so that you have every opportunity to understand how to create this stitch. Also, if you take a look at the video tutorial, I’ll show you how to create a beautiful coaster just using your practice swatch!
You can find the video tutorial below the picture tutorial.
Oh and one more thing.
If you’re using this block stitch tutorial to create anything larger than my practice swatch, make sure you create your foundation chain in multiples of 3 + 1.
Crochet Block Stitch Picture Tutorial
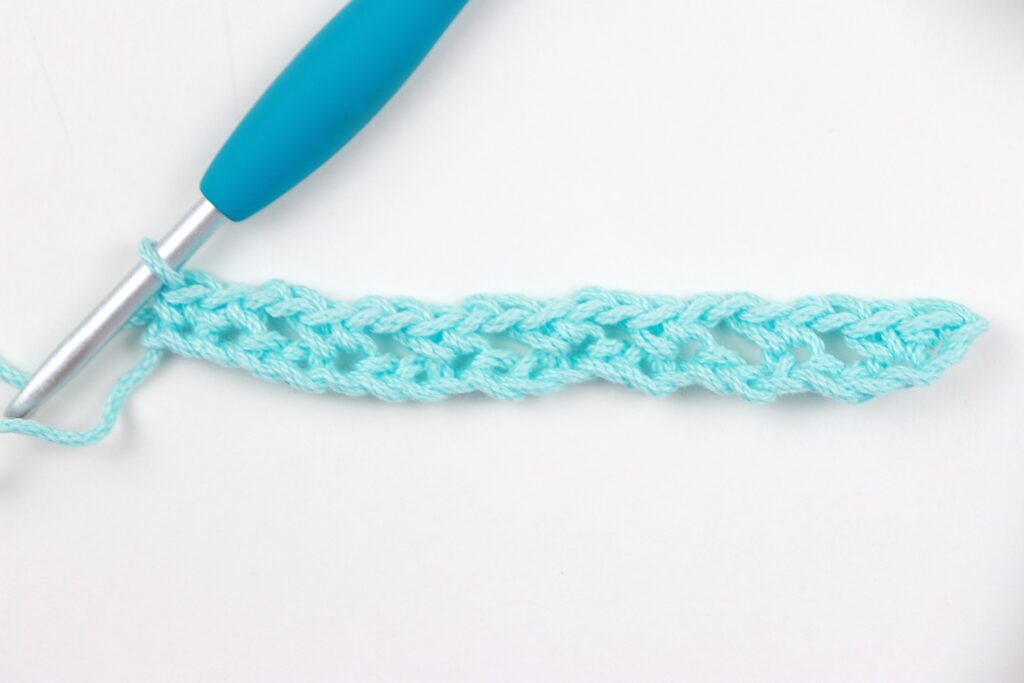
First, chain 22.
Row 1: Sc into the second ch from hook and sc into the next ch. *Ch 2, sk next two ch, sc into next ch. Rep * to end of row. Sc last ch.
Here you can choose to create a seamless color change on your last stitch, or you can tie off your yarn here and add on your new color.
Row 2: With your new color, ch 3 and turn your work (ch 3 counts as dc). Place 3 dc into the next ch-2 sp and each ch-2 sp down the row. We will only be working into the ch-2 space, not into the actual stitches. You should end up with two sc at the end of the row. Sk next sc, dc into last sc.
Again, you can create a color change on your last stitch, or you can tie off your yarn here and add on another color.
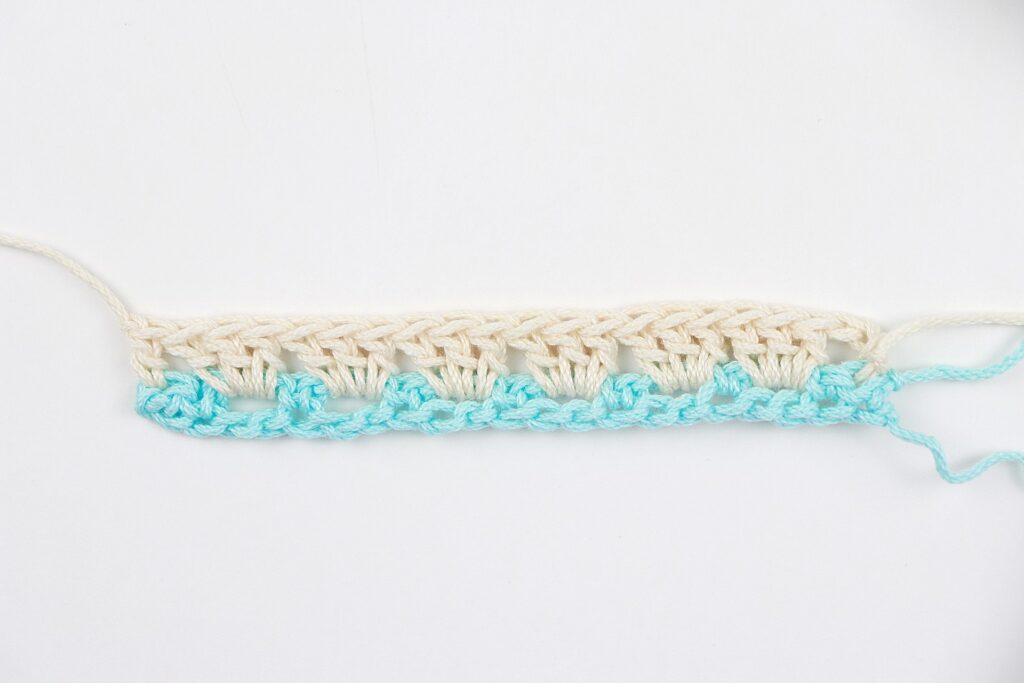
Row 3: With your new color, ch 1 and turn your work. Sc into the first st and sc in the space between the dc and the first dc of the cluster. *Ch 2, sk 3 dc, sc into space between the next two dc clusters. Rep * to end of row. Sc two times into the space between the next cluster and the ch-3 from the previous round.
Color change on your last stitch, or tie off your yarn here and add on another color.

Simply repeat rows 2 and 3 until you reach your desired length!
Interested in making a quick coaster with your practice swatch? Watch the video tutorial below.
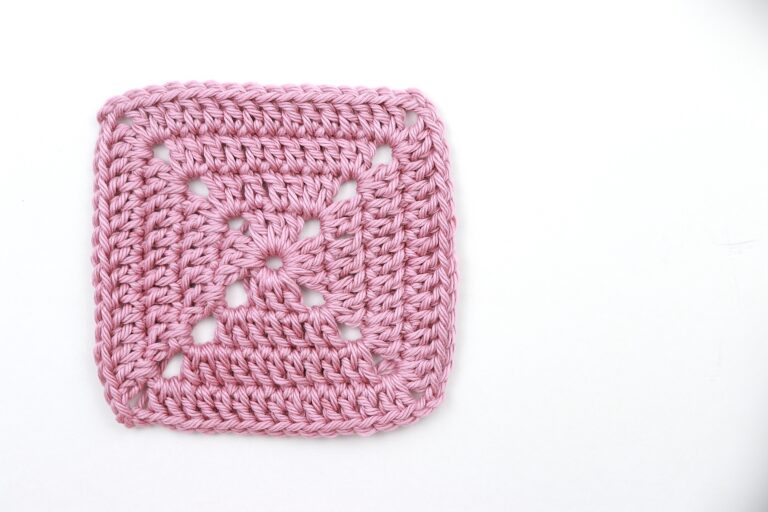
Want to make a gorgeous Rainbow Baby Blanket using this Block Stitch tutorial? Check out my brand new baby blanket design!
Additional Tips When Working The Crochet Block Stitch
- If you’re going to be changing your yarn color after every row, you’re going to end up with a lot of ends to weave in. It’s inevitable so just prepare yourself.
- Within the tutorial I told you I tie off my color after every row. You don’t have to do this. Add on your new yarn the way you like it best. The reason why I do this is to ensure my ends are secure especially when making a baby blanket.
- Depending on the yarn you’re using, the sides might look more tight scrunched up when you finish a Row 3 row (this happened with the 24/7 Cotton yarn), but if you stretch it out a little bit it will stay straight.
Crochet Block Stitch Video Tutorial
Click here to watch the RIGHT HANDED video on YouTube.
Click here to watch the LEFT HANDED video on YouTube.