30 Minute Crochet Beanie | Quick & Easy Crochet Pattern
Need a quick gift idea? Today we’re going to make a 30 minute crochet beanie! This free pattern is super simple and 100% beginner friendly. If you think it’s too basic, I’ve included some ways that you can dress it up and make it extra special for whoever you’re gifting it to. Inside the video tutorial, I showed you how to make this basic, 30 minute crochet beanie (it actually took me 20 minutes!) in the average women’s size.
For this tutorial you will need to know the double crochet stitch, but the video tutorial will walk you through this basic crochet beanie step by step if you want to start there. Not only will we learn how to crochet a basic beanie in any size, but we will also learn how to adapt this pattern to different yarn weights.
First I’m going to share the general pattern for the 30 minute crochet beanie using a super bulky weight yarn and an 8mm crochet hook. To resize the beanie, scroll past the past and read those instructions.
30 Minute Crochet Beanie Pattern
Materials Needed:
- Super bulky (#6) yarn – I used Lion Brand Thick & Quick
- 8mm crochet hook
- Scissors
- Tapestry needle
Abbreviations:
- Ch – chain
- Dc – double crochet
- Sl st – slip stitch
- St – stitch
Notes:
- Ch 3 counts as dc
- 30 Minute Crochet Beanie Video Tutorial
Pattern Instructions
Round 1: Ch 4, 9dc in 4th ch from hook. Sl st to join (10)
Round 2: Ch 3, dc in base of ch, 2dc each st around (20)
Round 3: Ch 3, dc in base of ch, dc next st, *2dc next st, dc next st. Rep * around. Sl st to join (30)
Round 4: Ch 3, dc in base of ch, dc next 2 st, *2dc next st, dc next 2 st. Rep * around. Sl st to join (40)
Rounds 5-9: Ch 3, dc each st around (40)
How to Resize your Basic Crochet Beanie to ANY Size using ANY Weight Yarn
Understanding the anatomy of a crochet beanie is essential when it comes to making sure your hat fits like a glove. There are only 3 basic parts to know:
- the crown
- the hat height
- & the circumference
If you know these three elements, you will know how to crochet the perfect hat.
Follow the pattern above or the video tutorial to make your crochet beanie and to resize, you’ll need to adjust the crown and the hat height based on the head circumference of whoever you’re making it for.
Here are some average head circumferences listed on the Craft Yarn Council website.
- Baby: 14-16 inches (35.5-40.5cm)
- Toddler: 16-18 inches (40.5-46cm)
- Child: 18-20 inches (45.5–51cm)
- Teen: 20-22 inches (51–56cm)
- Adult: 21-23 inches (53–58.5cm)
Now let’s talk about the steps you can take to resize your 20 minute crochet beanie. You can follow these steps no matter what yarn weight you’re using.
Step 1:
Begin the pattern the same way as written above (or follow the video tutorial here)
Step 2:
Increase each round until you reach the crown width based on the head circumference (listed above) for who you’re making it for – measurements for each size are listed below.
- Baby: 4-5 inches (10-13cm)
- Toddler: 5-5.5 inches (13-14cm)
- Child: 5.5-6 inches (14-15cm)
- Teen: 6-6.25 inches (15-16cm)
- Adult: 6.25-7 inches (16-18cm)
If you’re using a lighter weight yarn, you’ll have to continue increasing further than what I showed in the video tutorial. Here’s another tutorial for crocheting in the round if you need additional help.
Step 3:
Continue double crocheting with no more increases. The number of rows will determine your hat height. I’ll give the general hat height measurements below, but just know that you don’t have to make it that exact length. The more rows you add, the more slouch your hat will have. It’s all personal preference.
- Baby: 5-6 inches (13-15cm)
- Toddler: 6.5-6.75 inches (17cm)
- Child: 6.75-7.5 inches (17-19cm)
- Teen: 7.5-8 inches (19-20cm)
- Adult: 8-9 inches (20-23cm)
And that’s it!
How to Dress Up Your Basic 30 Minute Crochet Beanie
Within the video tutorial I explained how you can dress up this basic beanie and turn it into something even more beautiful! Here are the different ways you can customize your 30 minute crochet beanie.
- Add a slip stitch border (demonstrated in the video tutorial)
- Use a darker colored yarn – if you use a black yarn they won’t be able to see how simple your stitches are!
- I love using this neck light when I use darker yarn.
- Add a faux fur pom to the top – You can get these from your local craft store or here on Amazon
- Alternate colors – try using their favorite colors or their favorite sports team
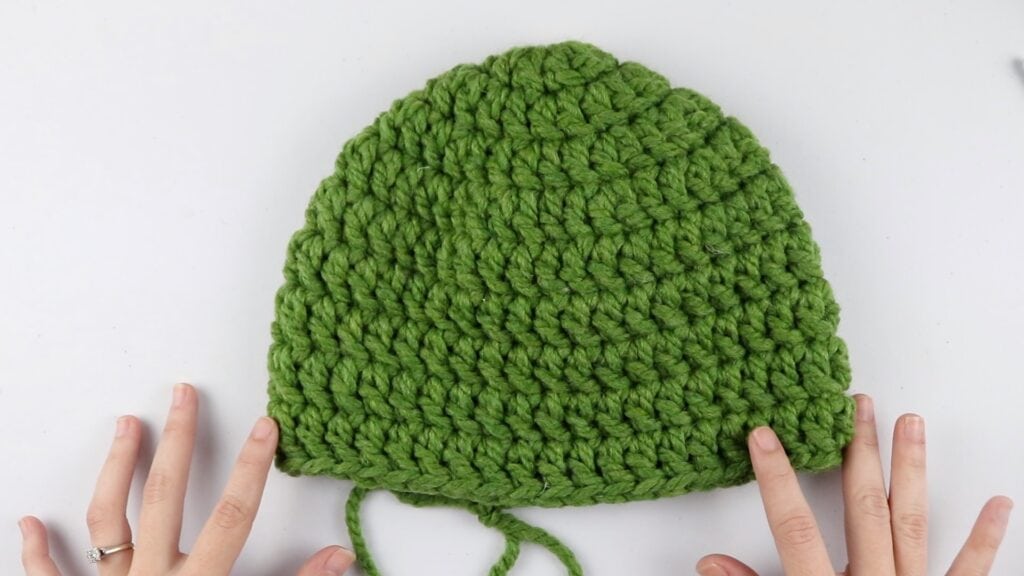
- In the photo below (on the right) I used Lion Brand Thick & Quick in Grass & Fisherman
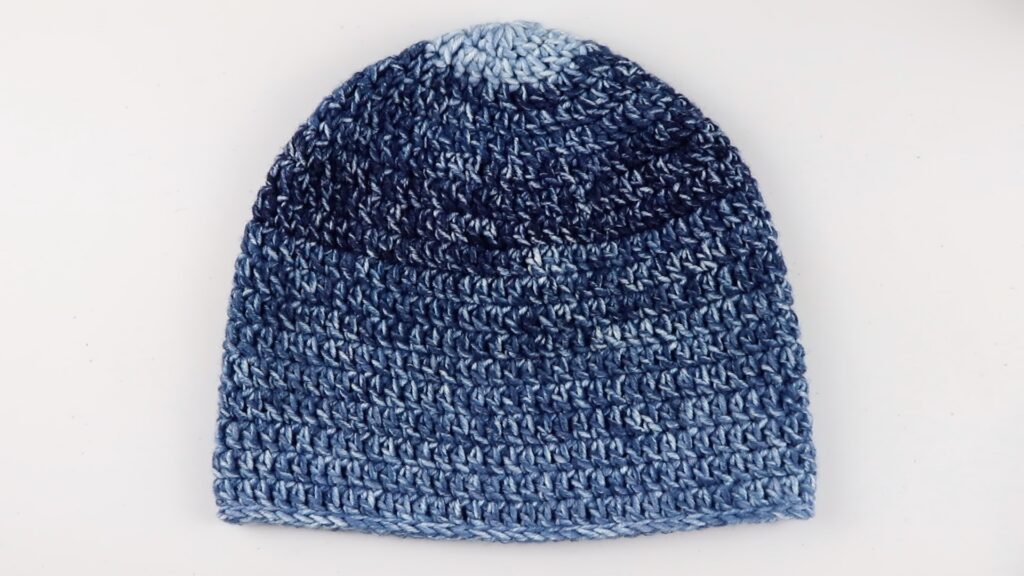
- Use a variegated yarn – this makes it look more fancy and there are so many pretty variegated yarns out there.
- In the photo below (on the left) I used Lion Brand Mandala Ombre in Harmony.
- Use a lighter weight yarn – Doing this will add some time to your 20 minute beanie, but the smaller the stitches the less basic it looks!
- Add on an applique – I forgot to add this to the list in the video but this would be great too! There are lots of flower appliques on Pinterest!

Let me know in the comments what you think about today’s 30 minute crochet beanie! I hope you enjoyed this tutorial and I can’t wait to see the beautiful hats that you make.
Let me know in the comments who you made yours for and how you customized it! ❤️


Hi Sigoni! Did a few lessons and tonight I did my first 30 min beanie. So proud of me! Thank you! Easy to learn with your videos!!
Hey Sigini, I just made the beanie twice with Lion Brand Wool Ease, Thick and Quick yarn. It is a super bulky yarn, uses a size N crochet hook. I love your pattern!