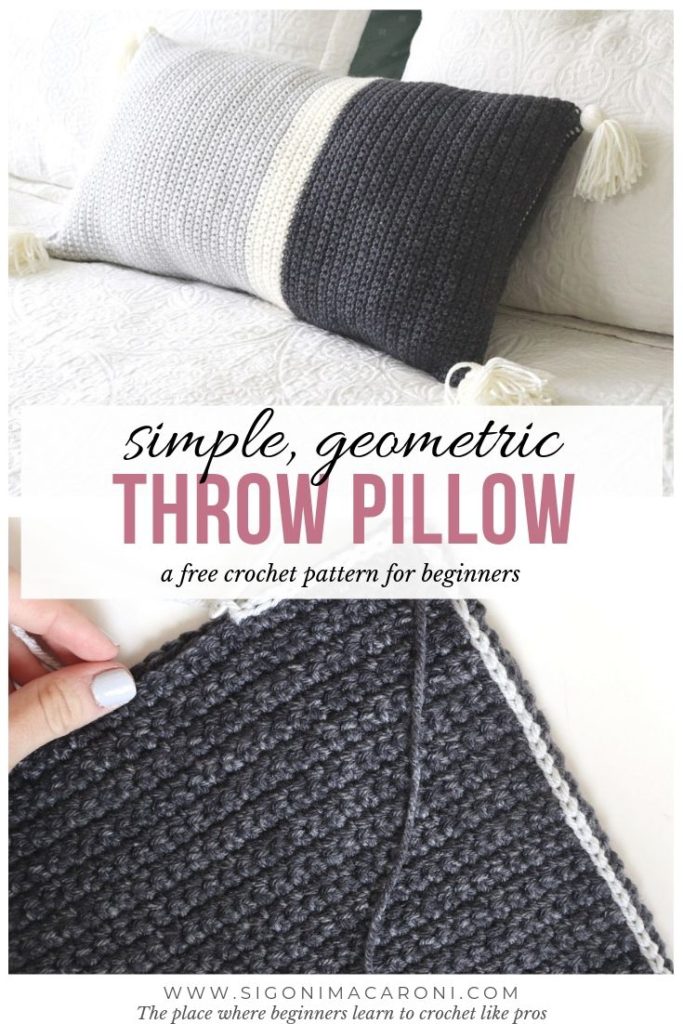
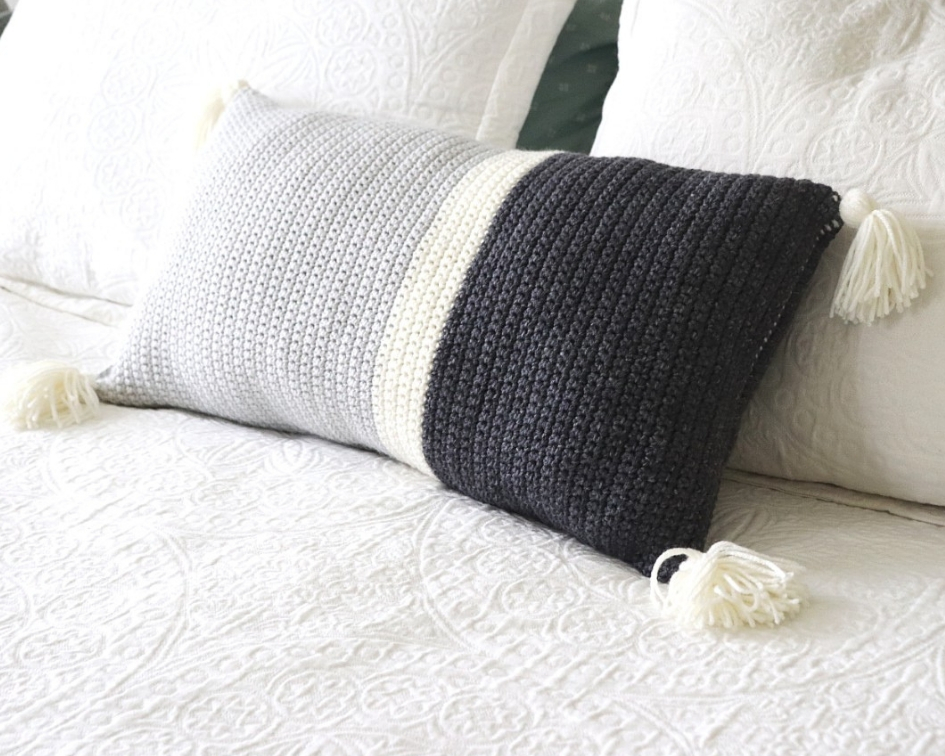
Simple Geometric Crochet Throw Pillow – Free Crochet Pattern
This Simple Geometric Crochet Throw Pillow is an easy, fun project for beginners bringing a touch of modern handmade to your home. This free crochet pattern only uses single crochet, but the colorblock effect makes it look modern and unique.
At the beginning of this year I started to realize that teaching others how to crochet is my passion. I also realized that I’ve been posting so many crochet tutorials that I wasn’t leaving myself time to design patterns specifically for beginners. Now I’m trying to change that!
My goal is to create free crochet patterns using simple stitches, but in a way that it makes projects look unique and not simple. I want beginners to show off their projects and feel as though they’re creating masterpieces! I also don’t want you to think you have to be a beginner to create these projects so I love creating something different that everyone will love, no matter the skill level.
This Simple Geometric Crochet Throw Pillow is all of those things in one. It is easy to make and is great if you’re looking for a pattern that is only single crochet. Maybe you just like the relaxation that single crochet or maybe you want to create something beautiful while also practicing a new stitch! It’s a great first pillow to try out because it’s simple and you’ll learn how to change colors and create tassels!
The Yarn:
The yarn I used for this pattern is I Love This Yarn! by Hobby Lobby. I love how soft and gentle it is when you’re working with it and the finished result. This yarn is only found at Hobby Lobby so you can find it in store or you can order it on their website.
If you don’t have a Hobby Lobby near you, don’t fret! There are plenty of great medium weight yarns out there that will do the trick. A few are:
Hobby Lobby’s I Love This Yarn! is 100% acrylic and has about 252 yards in each skein. I used 2 skeins of Light Gray, 1 skein of Ivory, and 1 skein of Dark Gray Stonewash Print.
The Techniques:
The only stitch used in this pattern is the single crochet! If you’re a beginner and you’d like a refresh on the single crochet stitch, you can find that beginner tutorial here.
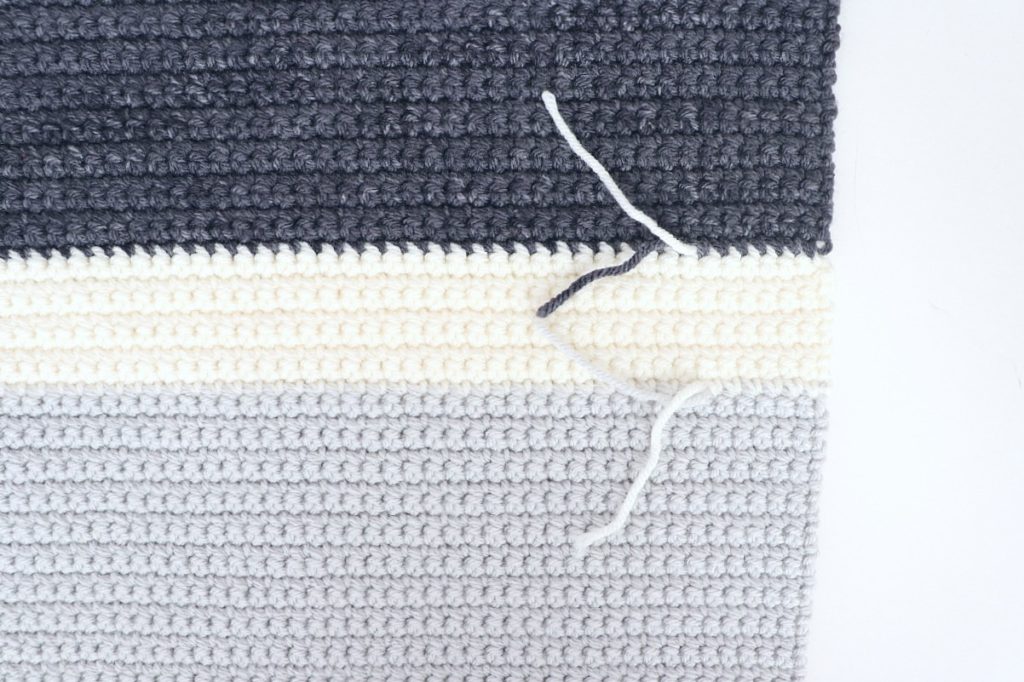
To make this throw pillow a little more modern and unique, I threw in a colorblock effect. To brush up on how to change colors with crochet, head over to this tutorial.
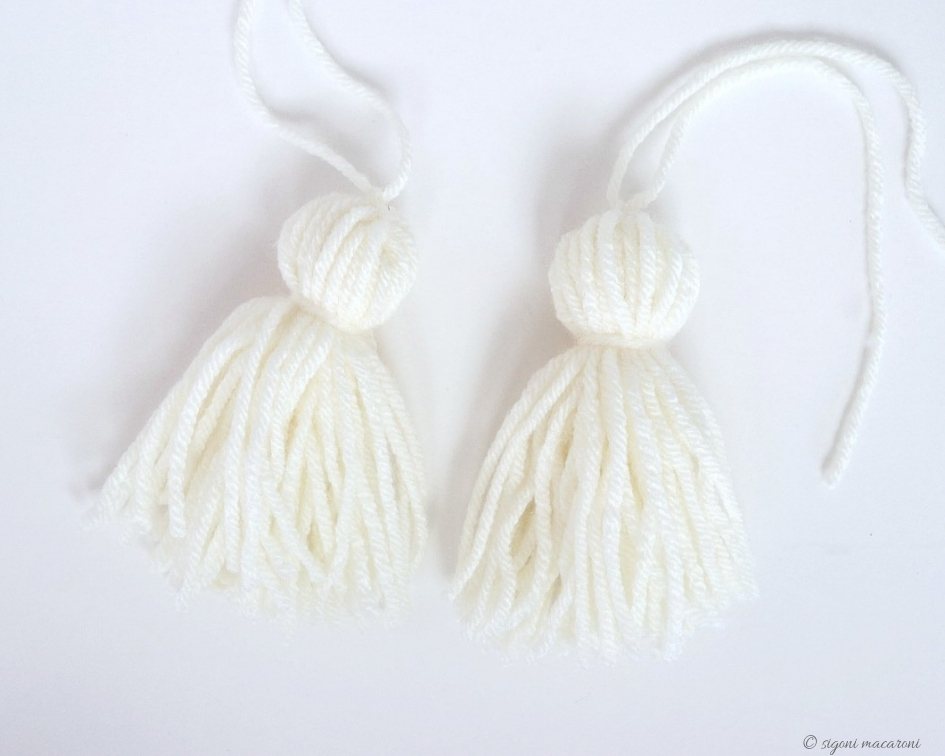
You will also need to know how to create tassels! I’m in the process of putting together my own tassel tutorial, but because I haven’t finished I didn’t want to leave you hanging. You can find a great tutorial for making yarn tassels in this video with Brittany of Bhooked Crochet.
Last but not least, we will be learning how to seam together and stuff our pillow! I will walk through this with you through the picture tutorial (and the video tutorial coming soon!) below. I use the slip stitch method to seam together my pillow and then I flipped my pillow inside out to stuff.
You will see some of the color showing through on the sides depending on the color you chose. This doesn’t bother me, but you can always change your color once you reach that point and slip stitch with the same color.
You can also whip stitch your pillow cover shut if you prefer to seam by sewing.
This post may contain affiliate links, please view my disclosure policy for details.
Simple Geometric Crochet Throw Pillow – Free Crochet Pattern
Materials Used:
- Hobby Lobby’s I Love This Yarn! (weight #4, 100% acrylic, 252 yds)
- 2 skeins Light Gray
- 1 skein Ivory
- 1 skein Dark Gray Stonewash Print
- 5mm Clover Amour Crochet Hook
- Polyfil Stuffing
- Tapestry Needle
- Scissors
Abbreviations Used:
- Ch – chain stitch
- Sc – single crochet
- St – stitch
- Rep – repeat
| US TERMS | UK TERMS |
| single crochet (sc) | double crochet (dc) |
Helpful Tutorials:
- Single Crochet Tutorial
- Chain Stitch Tutorial
- How to Change Colors in Crochet
- How to Make a Yarn Tassel – Brittany of BHooked Crochet
Notes:
Each color is referred to as a different letter in the pattern. Depending on the colors you choose, this will be up to you. If you chose to use the same colors I did, here is the color key:
- Color A: Light Gray
- Color B: Ivory
- Color C: Dark Gray
- Get the easy-to-read, ad-free printable PDF pattern HERE.
- PDF includes: Picture tutorial, materials used, & helpful tutorials
- PIN this pattern to your Pinterest boards for later HERE.
Simple Geometric Crochet Throw Pillow Pattern
Front and Back Panels of the Throw Pillow (make 2)
With Color A, ch 50
Row 1: Sc in 2nd ch from hook and in each ch down row (49)
Row 2: Ch 1, turn work. Sc in each st across (49)
Rows 3-57: Rep Row 2
Switch to Color B
Rows 58-65: Ch 1, turn work. Sc in each st across (49)
Switch to Color C
Rows 66-104: Ch 1, turn work. Sc in each st across (49)
Tie off your work. If you would like to weave in your ends, you can do so now. However, the side with the loose ends will be the inside of your pillow so they won’t be seen anyway. It’s completely up to you!
Assembly
Place both of your panels on a table in front of you with the right sides facing each other (you choose which side you think looks better and that will be your right side).
Starting in the bottom right-hand corner of Color A, attach your yarn color of choice and begin slip stitching your project shut. There should be about one slip stitch for each row.
Pro Tip: Use a stitch marker or some sort of clamp to hold your pillow cover together so that everything lines up when you’re seaming.
You will slip stitch around the entire pillow until you reach the opposite side of where you started. There should be an opening left on the side with Color A.
Do not cut your yarn yet.
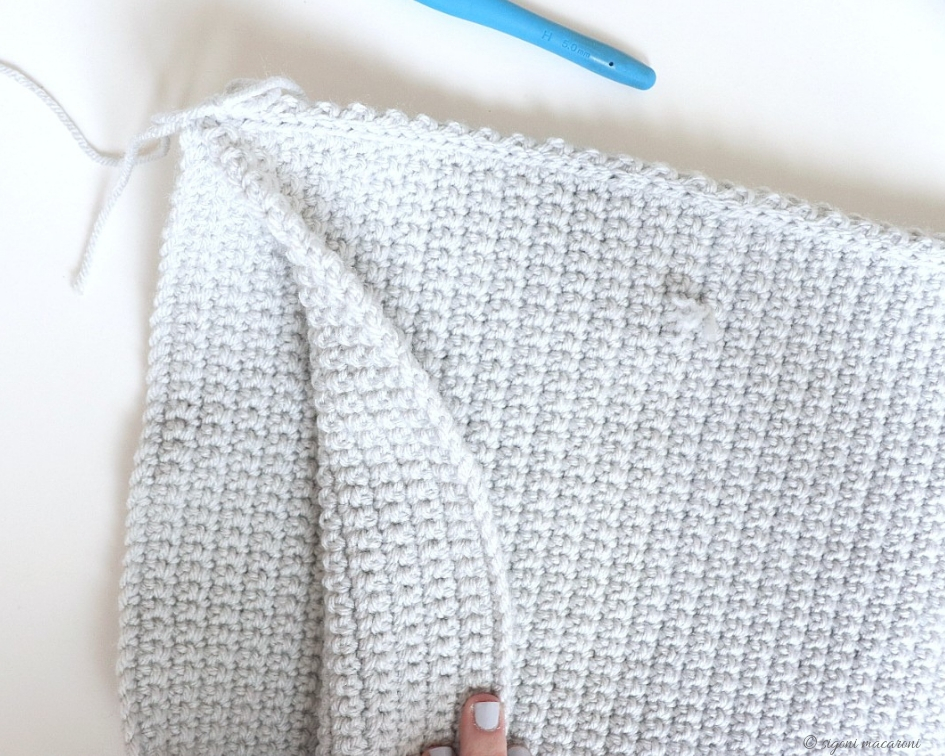
Flip your pillow inside out and begin stuffing with polyfil (or your pillow insert if you decided to go that route). Once your pillow is fully stuffed, continue slip stitching your pillow cover shut.
Tie off your work and weave in your ends.
Create 4 tassels by following this tutorial and attach one to each side of your throw pillow using your tapestry needle.
And that’s that! You’ve created a very simple, geometric crochet throw pillow and all it took were some single crochets and slip stitches!
I would love to see your finished projects. Share them in the Facebook Group or with me on social media. You can find me everywhere @sigonimacaroni.